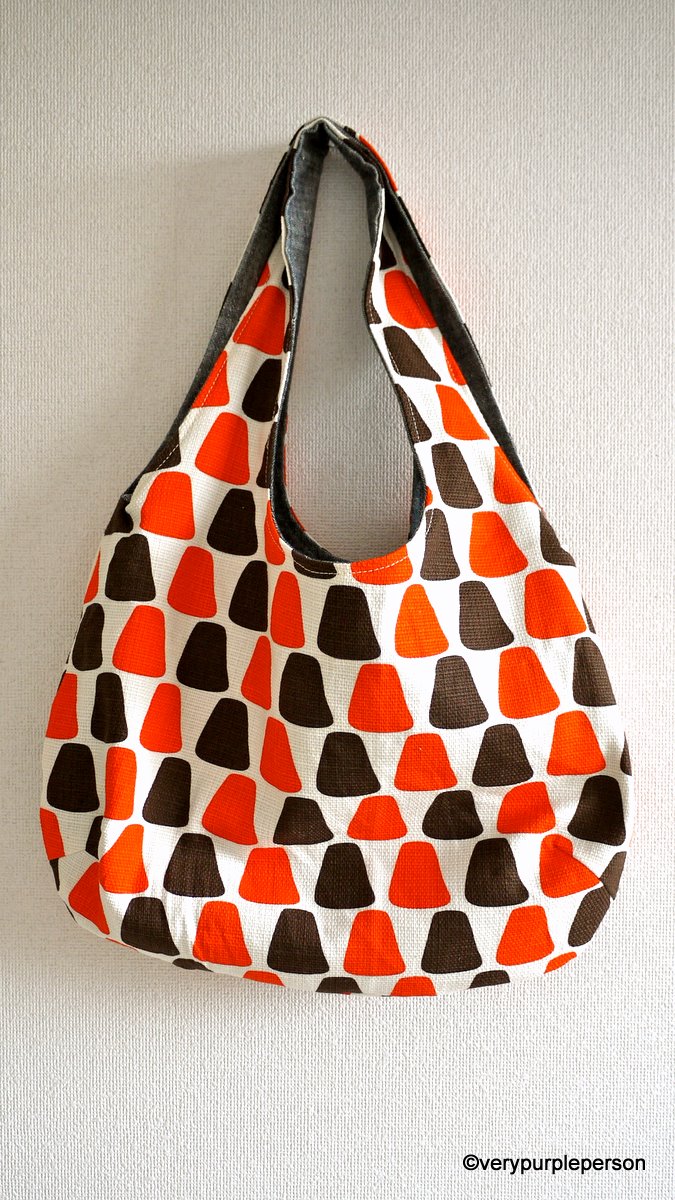
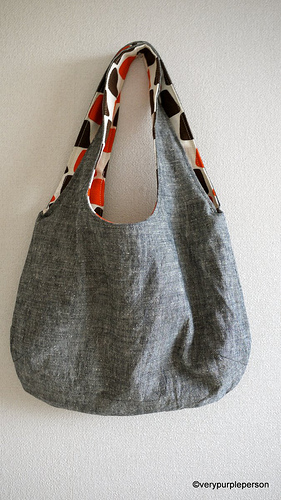
drupal hit counter

Making reversible bag

Reversible bag

I was cutting fabrics to make a reversible bag when I read the newest comment in last post where Juliet asked me about sewing reversible Charlie bag. Yes, I cut fabrics in front of my computer, and everytime it blinks, I’ll stop what I’m doing to look at my inbox, twitter, facebook, etc. Bad habit.

Anyway, there’s actually a post in BurdaStyle about lining the Charlie bag. But when I checked it out, it turned out a bit different than what I usually do. Unfortunately, I can’t remember how or when I learned my technique. Maybe I read it somewhere, or someone told me how (my mother?), or maybe I figured it out by myself. So I took pictures while I sew my bag to show how I make it.

The fabric on one side of the bag is leftover from my bib dress. I found this interesting fabric with orange and brown pattern in the nearest thrift store for less than $5 and use it for the other side of the bag. I love thrifting! My bag is actually not a Charlie bag, it is slightly smaller and has rounded bottom. But it is similar to Charlie bag in terms of shape and sewing technique.

Edit: Pattern for my reversible bag is now available for download. Just click the download link at the bottom of this post to get it. The tutorial is also available in PDF file.

Disclaimer: You may use the finished products for both personal and commercial use (craft shops or markets only – no mass production). Please do not pass off the pattern and tutorial as your own. Thank you!

.E

The Tutorial

1. Here is 4 pieces of fabrics after being cut. We’re gonna refer them as set A and set B. If you want pockets, sew them before going to the next step.
Making reversible bag

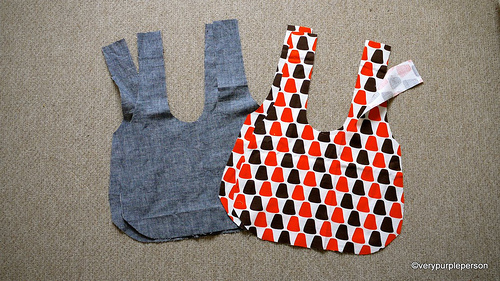
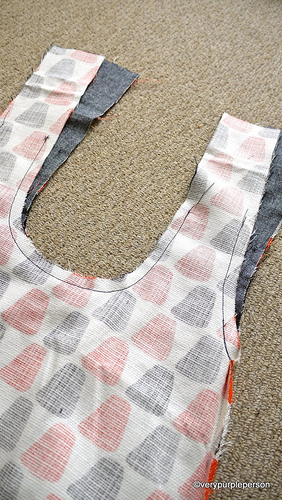
2. Sew the bottom and sides of each set. My bag has a rounded bottom and a dart, Charlie bag has straight edges.

If you use my pattern, sew the darts before sewing the bottom and sides of bag.
Making reversible bag

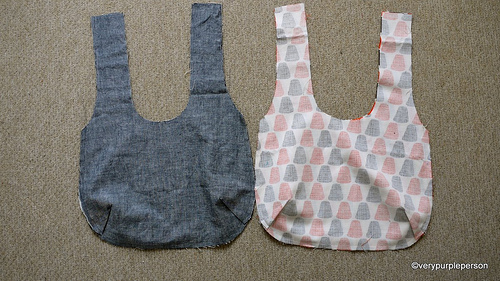
3. Put set B in set A, right sides together, and sew around the straps. Stop stitching about 20 cm before the tops of the straps. If your machine has reverse stitch, use it on each end of stitchings to secure it.
Making reversible bag

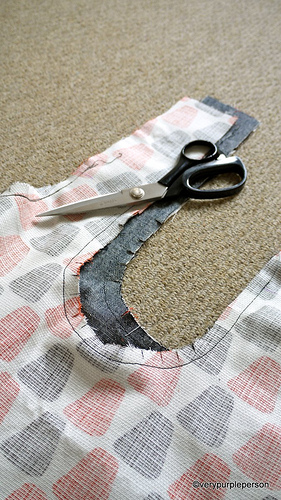
4. Clip rounded corners.
Making reversible bag

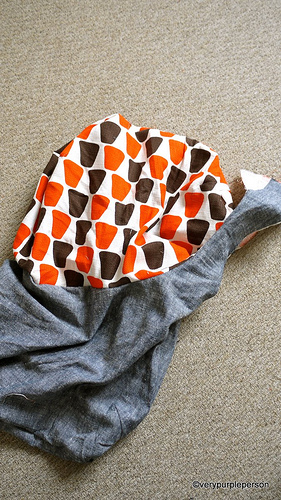
5. Turn the right sides out through one of the straps. It will be a bit difficult at first and you’re gonna wonder if you’re doing it right, but just keep doing it. You will feel a thug and after that the bag will turn right sides out smoothly.
Making reversible bag Making reversible bag

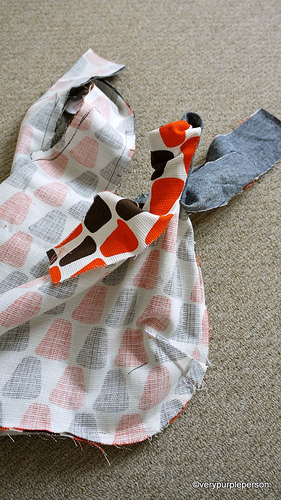
Pull out each of the remaining straps.
Making reversible bag

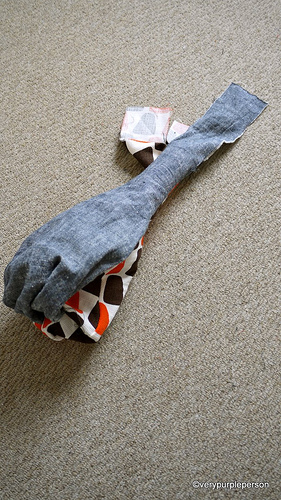
6. Look! You almost have a bag!
Making reversible bag

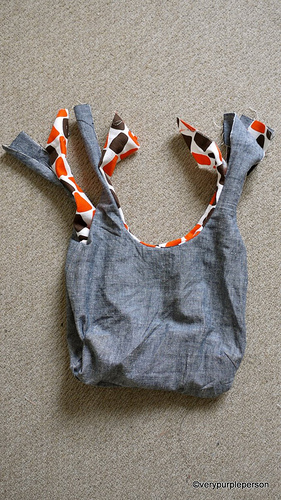
7. Sew the straps of each set together. I often sew the straps absent-mindedly and then found out that I’ve attached them wrong! So please make sure that you sew each strap to the strap beside it, NOT the strap that is in front of it.
Making reversible bag Making reversible bag

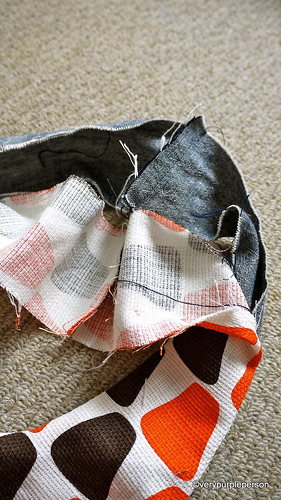
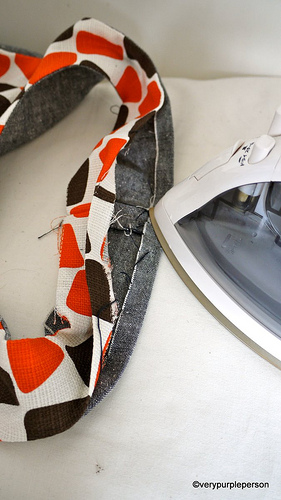
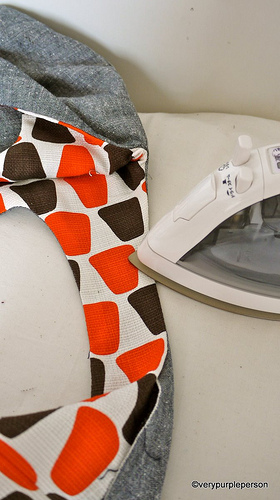
8. Press the seams open. Fold seam allowances on straps and press. Also press edges of bag to make it easier for topstitching.
Making reversible bag Making reversible bag

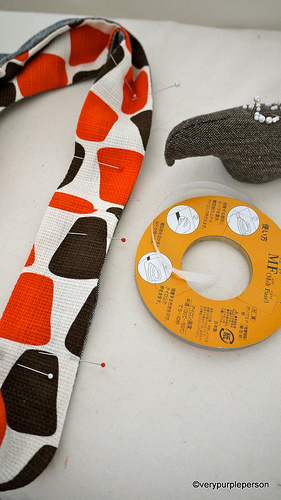
9. Match the tops seams together and pin all open edges of straps. You can also use fusible tapes to make sure it is neat. But I will use pins here.
Making reversible bag

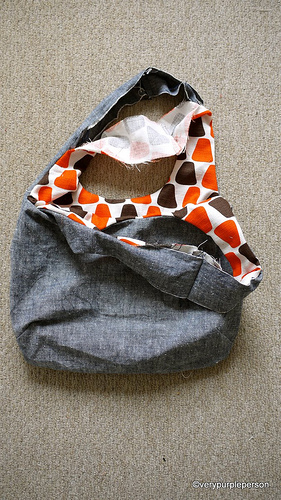
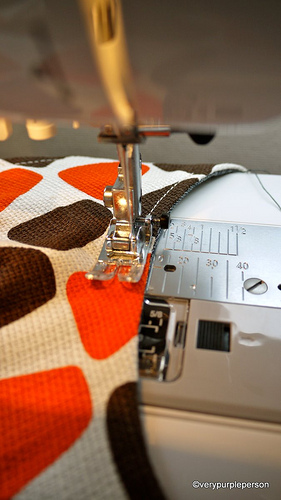
10. Topstitch all edges of bag. I use different colour thread for the bobbin.
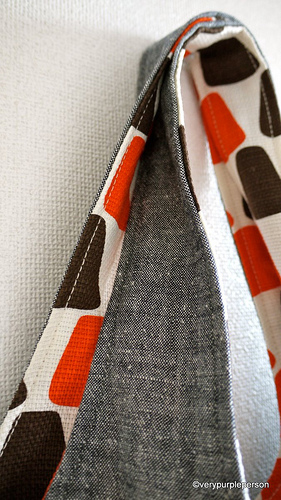
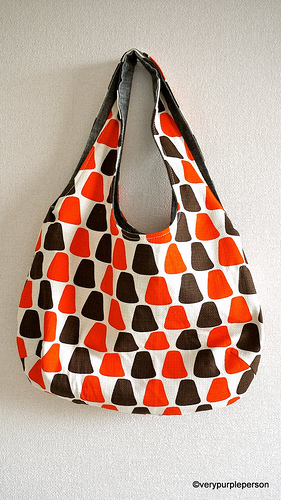
Making reversible bag A reversible bag!

A reversible bag!
A reversible bag! A reversible bag!

Thank you for reading and I hope this post is useful for you!

Click to download:
Reversible bag pattern (118896) ¦ Reversible bag - instructions (85343)

Have you made something from my tutorials? Join my flickr group to share!

353 Responses to Making reversible bag

  1. [...] Reversible Handbag - PDF for pattern and another PDF for the instructions. Very easy and you could probably add some pockets as well. [...]

  2. [...] I drove my sewing machine over to #21. I know. That’s pretty lazy of me, but I had heaps of fabric, a few groceries and the sewing machine, so that’s my story. Today’s project was a reversible tote bag – I think this was the pattern we used. [...]

  3. teresa says:

    thankyou…..I will try it!

  4. teresa says:

    thankyou forse the Pattern! I will try it very soon!

  5. Thank you so much for a great tutorial. I made one for a fundraising project. Have a look here http://www.silklaceandsteel.com/reversible-bag/

  6. [...] Reversible Fabric Bag – Very Purple Person [...]

  7. [...] a reversible shoulder bag using the pattern over on the Purple Girl blog [...]

  8. [...] tutorial – it’s easy, just so long as you follow all the steps. I used the tutorial by very purple person, but I have a few comments, so be sure to keep [...]

  9. This bag is in my opinion THE gift idea for friends! They love the bags and I have a fun time making them. I enlarged the pattern so the bags could be used as beach bags. So perfect! The instructions are very easy to follow and at the beginning I needed about 3 hours to make one and now I am down to about 2 hours! Here is an example of one of the bags I have completed: http://www.craftideas.info/html/reversible_bag_p.html

  10. Debora Cadene says:

    Hey there. I love the bag and have started making it, but appear to be “stuck”.I have the 4 pieces cut and the darts are sewn. The directions are a little vague after that. I’m wondering if you might be interested in taking a few more pictures of what happens after you have the darts done. I know the same type fabric goes wrong side together, but it doesn’t say how far to sew the bag…do you go all the way up the outside of the bag to the top of the strap….
    I’d really love to “get” this, but I think I’m gonna need more pictures. Do you think its possible to mabey “whip” up another bag and give us more details???

    You would be doing a whole bunch of us a huge favour!
    thanks bunches,
    Debora Cadene.

    • Debora Cadene says:

      Actually…I’d sure appreciate help from any of you gals n guys that have made this

      • veerle says:

        Hi Debora,
        I making one right now. First time, so I’m trying it myself. I stitched the big outside “U” good sides togehter. Then turn one set good side out. Put the two sets in each other, now you cant see te good sides of fabric any more.
        Stitch small “U” and outside of straps, exept for the top 15 a 20 cm and the top of the straps. Then pull the right sides out. Continue as showed above.

        Hope this works for you.
        Greetings,

        Veerle.

      • Audrey says:

        Hi Debora! I agree the instructions are a little vague for a beginner (like me). I think I have it figured out though! Once you have the 4 pieces cut and the darts sewn, pin together set A and B separately with wrong sides together. Make sure the darts are lined up before you sew. Then sew set A around the bottom and set B around the bottom. Take set A and turn it so the right side is out. B should still have wrong side out. Place A inside B. Pin around the opening. You should be pinning A-1 to B-1 and A-2 to B-2 this time. Then sew around the straps, tucking away whichever half you are not working on. I think the instructions are pretty clear after that. Hope that helps!

  11. [...] from the after-school Teen Fiberworks program finishes up sewing a reversible bag. Following this great tutorial, our four members completed their first machine-sewing [...]

  12. K says:

    thank you for sharing this free pattern for purse! It was super easy, your download for pattern and directions was so easy to follow. First time making a purse, definitely won’t be my last! These would make great gifts for friends and family! Thanks so much!

  13. sharon says:

    Thank you finally manage to sew reversible bag

  14. Emily says:

    Thank you! Can’t wait to make my bag!

  15. Katie Powell says:

    I am a beginner. No problems with darts but can’t get the step 4 and 5 right. Do you sew all the straps together or leave open space between the two sets? I have sewn it both ways, and both times the bag is sewn shut at the top when I turn it through the strap. About to give up and remove this pin. HELP!!!

  16. katerina says:

    thank you for this tutorial…to me (trying to learn how to sew) it worked magically!!! I now have my “very purple hand bag”…thanks so much… i send you a bit of the greek sunshine… spring is coming to Athens…kisses Katerina

  17. Mincher says:

    This is confusing! I don’t understand where to sew it! I don’t understand step 4 or 5!!! I don’t understand how to do this! :( ( all this inside out, how many layers to sew, all 4, or just 2? This is confusing!

  18. Camilla Foster says:

    As I usually like to use something functional for Easter baskets, I’m making Easter “bags” for my 5 granddaughters. One side is a sparkly Easter fabric with a solid for the reverse side. Really cute & something they can use all year! Thank you!,

  19. LAIS M FERNANDES says:

    EU QUERIA MUITO BOLSASA COISAS QUE EU POSSA FASER PARA VENDER,OBRIGADA.

  20. [...] jóról.   Az egyik ilyen emailben kaptam egy linket egy kiforditható táskáról.  Ahogy ezt a blogot olvasgattam, rájöttem, hogy ezt a táskát én is megtudom [...]

  21. Jen says:

    Love this bag! Thank you for a great tutorial!

  22. [...] This reversible bag is sweet and simple…I love it!  Pick your favorite fabrics and get started today.  Can a girl ever have too many bags??  I think not!!  {tutorial on Very Purple Person} [...]

  23. Steph says:

    Thank you so much for this pattern and explications.

  24. genny says:

    nice :)
    I will try this!

  25. vrbeauty says:

    muuuuuuuuuuuuuuuuuuuchas gracias por compartir lo intentare y te enviare fotos!gracias!

  26. [...] Meine Mamma ist seit vielen Jahren Eulen-Fan. Als ich mit Elke in Ludwigsburg auf dem Stoffmarkt den coolen Eulenstoff entdeckte musste ich einfach zuschlagen. Daraus wurde zu Ihrem runden Geburtstag eine coole Wendetasche, nach dieser Anleitung. [...]

  27. Lucyfil says:

    Thank you so much for the tutorial and the very helpful instructions.

  28. Flavie says:

    Merci pour ce superbe tuto. J’ai une petite boutique au centre de la France mais promis je ne vais pas en faire une grosse production. ;0)

  29. jessica says:

    I am a beginner and had trouble with the darts. When I pulled my bag through the straps and shaped it, it just didn’t look right. Any tips on sewing the darts and shaping the bottom of the bag when completed? Thank you!

  30. dawn w. says:

    I made this bag tonight and i have to say that it was easy except for the part of turning it inside out. What i did different was i left an opening at the bottom of one of the bags and it was a lot easier to turn it inside out and then i just slip stitched the opening closed. The other thing that i wish i had done is before turning it right side out is to clip the rounded corners so that when you do turn it right side out that the corners lay flat for when you top stitch. It’s really cute when you get done, i love it.

  31. Judy Sparks says:

    Thanks so much for sharing this! I can’t wait to make it! love love love it!:)

  32. Raquel says:

    Thank you so much for the clear directions i cant wait to make this!

  33. Mme Valérie says:

    Thank you so much!!!!!

  34. Ruth says:

    Have just made a reversible bag and am delighted with it! Excellent pattern and instructions. One problem, I just couldn’t get the bag through the strap to turn it inside out, so I opened one strap down the side and sewed it up afterwards – invisibly! Thank you for a great pattern.

  35. [...] pour m’exercer à installer des pochette fermeture éclaires. Comme j’utilisais cette technique en me contre foutant ( quel beau mot français ) de l’aspect réversible ( Parce que [...]

  36. Ronda says:

    I am making similar handbags but I am putting a zipper in the top of it, my problem is I can’t figure out the best way to put a reversible zipper in so I can still make the bag reversible. Can anyone help? Thanks.
    rondaandrandy@windstream.net

  37. [...] szabásminta innen származott. Nagyon megtetszett nekünk ez a fazon, úgyhogy biztosan nem kell hónapokig várni a [...]

  38. Renee says:

    Thank you so much for the tutorial and free pattern. Im a beginner sewer and couldn’t believe how easy your directions were. It turned out fantastic. Thank you so much!!

  39. Ashlee says:

    I plan on using this pattern, thanks for sharing! I can’t seem to find any place that tells how much fabric is needed for each part though… can you tell me?

  40. [...] oui, je m’égare ! Donc, je compte faire ce Reversible bag mais avec un jeans récupéré. ( En plus, j’aime trop récupérer mes vieux jeans pour des [...]

  41. nina says:

    fantastic, thanks can’t wait to sew myself a new bag with fabrics i have collected for a while

  42. Isabellagarden says:

    I just made this bag today with fabric that my son brought me from Sweden. The directions were clear and concise and it came out just as you’ve pictured it. Thank you for the pattern. I plan on making more as gifts.

  43. Jayne says:

    I meant prewash, dang predictive speller

  44. Jayne says:

    Do you per wash the fabric? I think not washing would give a crisper look, but one might need to was the bag after some use and maybe not like the result?

  45. lau says:

    merci beaucoup !!!!!!!!!

  46. Anna says:

    I just made two of these as gifts for my sisters. They look great and only took a few hours. Thank you for the detailed instructions!

  47. Brittany says:

    I just made one for my daughters’ stuff when they go to the babysitters and it only took about 3 hours from start to finish! I love it! I will definitely be making more for my kids and my self and my friends and for the car and for my knitting….

  48. Maureen King says:

    Thanks very much for putting that free reversible bag pattern on your webpage/blog. I found it via my sister’s Facebook page. The timing was brilliant as I was looking to make two or three bags for Xmas presents and had looked in the haberdashery shop in the City and could not find the type of bag I had in mind, and then it turned up like magic in a post in my email from my sister. I have only started sewing again as my eldest daughter has shouted me a new sewing machine for my birthday. So thanks again for the pattern and the very helpful instructions, and I will only be using it for personal reasons like presents for friends and relatives. Cheers and Happy Xmas and New Year from Maureen King in Sydney.

  49. yuli says:

    hello mba novita,

    izin download tutorialnya ya… makasih :)

    salam,

    yuli

Thank you for leaving a comment!