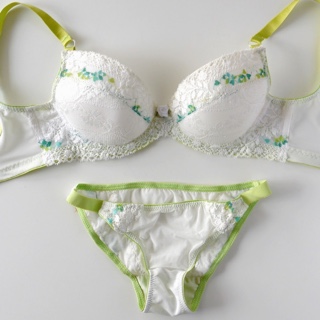
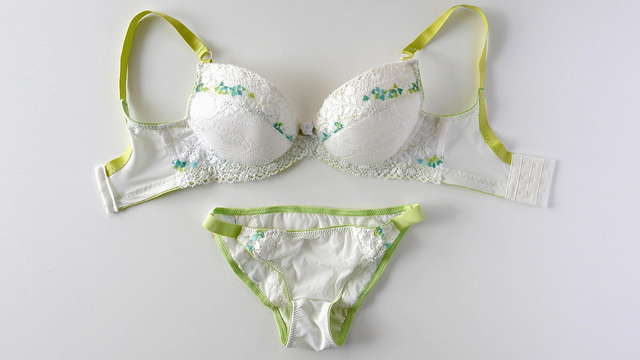
 Plunge bra set
Lately I have been feeling very inspired after finished watching the latest Beverly Johnson’s class on Craftsy, ‘Sewing Bras: Foam, Lace, and Beyond’. If you are interested in bra making, I really recommend this class, along with Beverly Johnson’s first and second classes: Sewing Bras: Construction & Fit and Sewing Bras: Designer Techniques.
Actually I have bought her first two classes sometime ago, but only recently managed to watch them all. I got bored easily when watching video classes, then I found out that I can avoid boredom if I watch these classes on 2X speed! I’m very happy that I can watch these valuable classes now. A little fact: I am diagnosed with mild ADD.
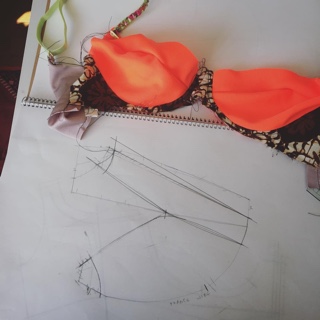 Cup drafting
Anyway! I also have several books on bra and lingerie pattern drafting such as The Bra-makers Manual 2 by Beverly Johnson, Patternmaking for Underwear Design by Kristina Shin, and Become a Pattern drafter: Women’s Underwear by Najah Ouahab Rassas.
Now it is time to try all the new techniques that I have learned. I decided to draft a bra that have the following:
- diagonal seam
- lowered bridge
- pockets on lower cups for removable ‘cookies’
- very narrow bridge (about the width of the channeling under the cups)
- gothic arch on center front seam
- back strap extension
On the right, you can see my drafting for the cup with diagonal seam. After drafting the pattern, I made a muslin bra from scraps. I have a box of used straps, hook and eye, and fabric scraps that is used for making muslin.
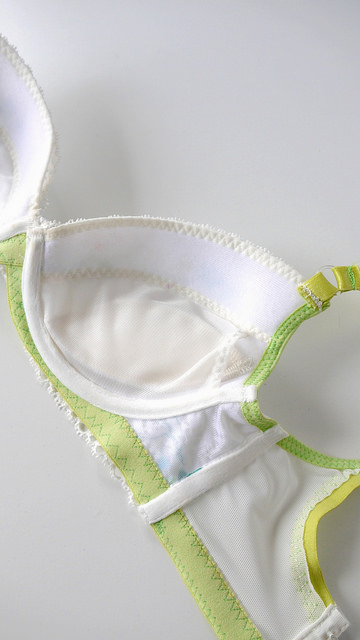
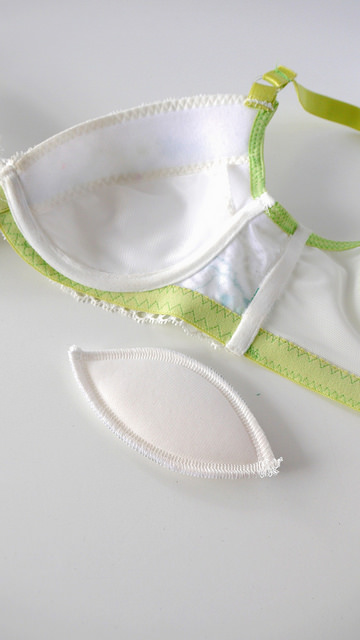
The cups are cut and sew foam, finished with foldover elastic on top. The lower part of the cups have pockets made with knit lining. The removable cookie is made with foam lining, it has layers of smaller foam pieces inside. Making your own removable cookie is great since you can adjust the thickness and the shape. My right breast is slightly smaller than the left, so I only need a thin pad on the right side. Technically I don’t need pocket on the left cup, but I made it anyway so the cups look even.
The bra has very narrow bridge, about the width of the channeling (1 cm) under the cups. The elastics under the cups have to be trimmed a bit to allow the channeling to be stitched over them.

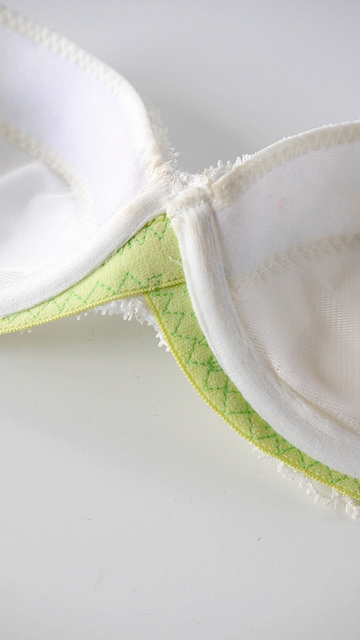
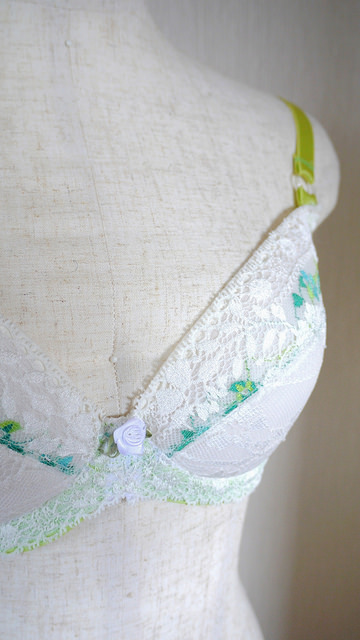
The center front has an upside down V shape, or also known as ‘gothic arc’. The elastic is not stitched as continuous line but overlapped on top of each other in this area. I find that the gothic arc, in combination with the narrow bridge, is very comfortable.
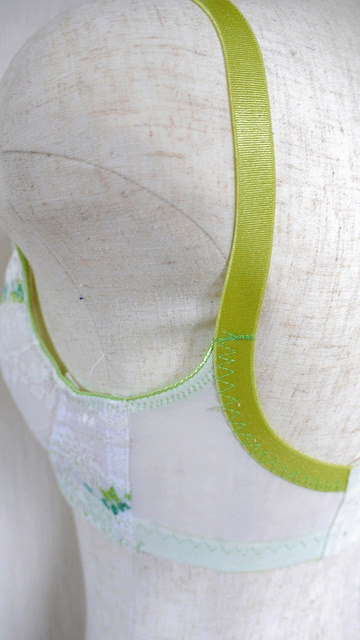
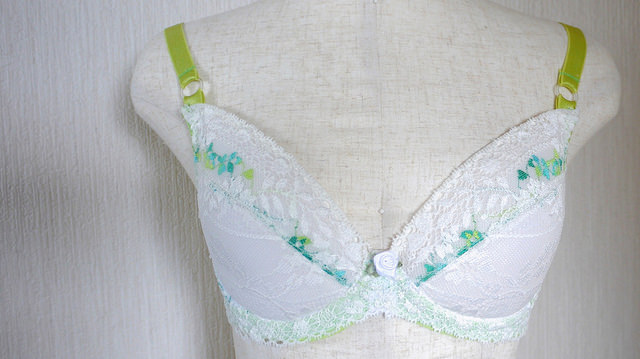
The back band has back strap extension that curved over to keep the straps from falling off the shoulder. The dummy has wider body than mine so it looks that the back strap is placed too far to the side.
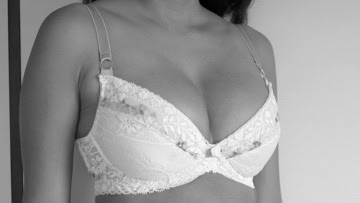
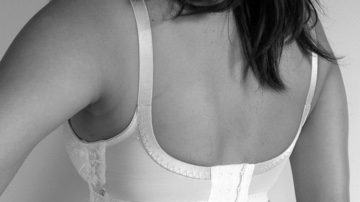
Here is the plunge bra on me. The back strap placement is right on this picture. I naturally have almost no space between the breasts. Interestingly, it is something that I just noticed after I started to learn making my own bra. Making your own clothes is really a way to know your body better.
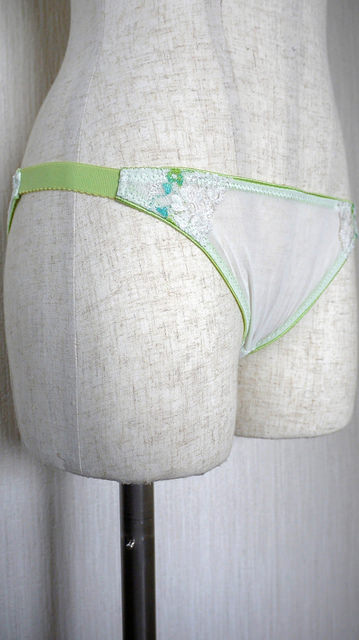
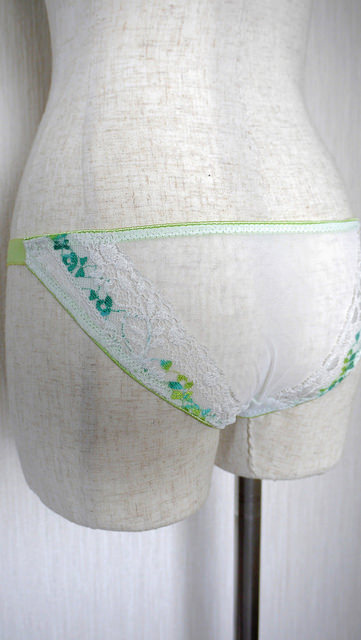
The panties are made with Merckwaerdigh low rider pattern. Merckwaerdigh has recently launched several PDF patterns, and it is such a great news because I like PDF patterns. Bra and panties pattern pieces are usually small so printing the PDF patterns don’t waste too much paper.
So I’m not very happy to find that Merckwaerdigh don’t place all the pattern pieces close to each other. This low rider panties have four pattern pieces, each is placed in different page with instructions next to the pattern. Maybe the patternmaker meant that these pages are to be kept as they are, and the pattern pieces have to be traced before being used. But I’d rather printed the pattern pieces only and read the instructions on the computer. So I traced the size S of the pattern on Illustrator, added the seam allowances and placed them so they can be printed on two A4 paper.
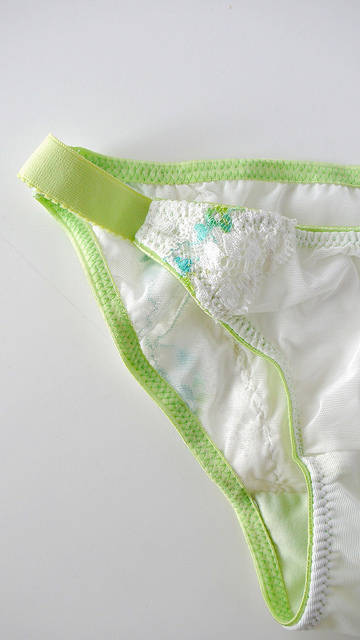
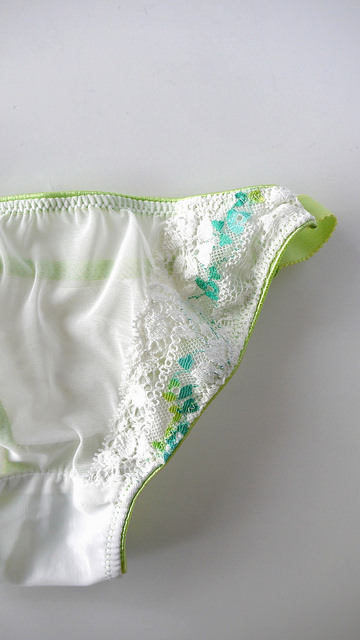
The pattern itself is lovely. It sits very low on the hip, the front and back is connected with a little bar on the side. You can make lots of variation with this pattern, or even make a swimwear bottom with it. I use soft powernet as the main fabric, and placed scraps of lace on side edges of the front and back pieces. Instead of side bars, I used pieces of wide elastics on the side.
Overall, I’m very happy with this set, an especially with what I have learned while making it!
Patterns:
- Bra pattern is self-drafted.
- Panties pattern is Merckwaerdigh low rider panty (PDF), size S.
Notions:
- Lingerie kits from Merckwaerdigh.
- France underwire from the Emerald Studio, size 36.
- Foam lining from Makebra.
Learning tools:
- Craftsy class: Sewing Bras: Construction & Fit and
- Craftsy class: Sewing Bras: Designer Techniques.
- Craftsy class: Sewing Bras: Foam, Lace, and Beyond
- Book: The Bra-makers Manual 2 by Beverly Johnson (CD version)
- Book: Patternmaking for Underwear Design by Kristina Shin
- Book: Become a Pattern drafter: Women’s Underwear by Najah Ouahab Rassas.
9 Comments
Dear friend, Could you please tell me if you have draft the Plunge Bra based on The Bra Maker Manual or other book… Thank you Vandi vandi1012@gmail.com
Gorgeous! Your sets always amaze me. (You’re not the only one that has trouble watching video classes! I must try your trick)
Such beautiful spring colours!
This set looks lovely, as always! I can’t believe you drafted it yourself!
I have a question with bra pattern drafting. Do you recommend the bra makers supply for drafting your own patterns? I’ve been debating about the book. Do you like Kristina Shin’s more? Any help would be grateful! :)
Both books use your underwire as your base of bra pattern drafting. But the Kristina Shin’s book only uses example for size 34B. Her book also covers other types of lingerie: garter belt, bodysuit, panties, etc, while Beverly’s book is more focused on bra: modifying cup styles, grading, etc. Personally I like Beverly’s book more because it is what I want to learn more now.
This is just lovely, and I am impressed with your drafting. I really need to get into this as I have different size breasts as well. It’s hard to find a bra that works! I just can’t seem to find the time to learn more about it. Your continued success is inspiring!
I’ve started the Sew Your Own Bra class; my problem is that it’s hard to carve time out to do the class, but I’m committed and know it’ll happen sometime. Your success with lingerie, as I’ve mentioned before, is encouraging!
This is a great set! Wonderful job.
wow, so beautiful and professional!! lately I’ve been thinking about starting a bra sewing adventures myself and this post (and your blog) is such a nice reference, thanks for sharing your gorgeous work! love it.
http://www.studiocostura.com