
Bag dimensions in approximate:
- from top of straps to bottom of bag: 50 cm / 20 inches
- height: 28 cm / 11 inches
- width: 40 cm / 16 inches
Fabric needed:
I don’t know because I used leftover fabric for my bag. You can print the pattern and place it on your fabric to make an approximation. It is only one piece of pattern.
Fort similar bag, you can check Charlie bag by Burdastyle ($1.99). It is a bit bigger and has squared bottom.
Please go to the bottom of this post to download the PDF pattern and tutorial.
Disclaimer: You may use the finished products for both personal and commercial use (craft shops or markets only – no mass production). Please do not pass off the pattern and tutorial as your own. Thank you!
The Tutorial
1. Here is 4 pieces of fabrics after being cut. We’re gonna refer them as set A and set B. If you want pockets, sew them before going to the next step.
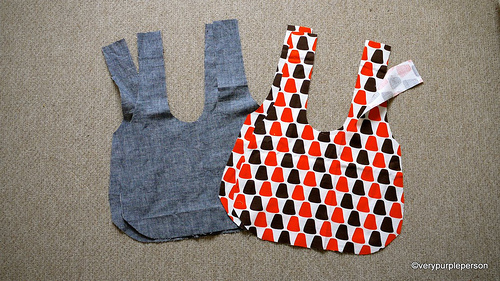
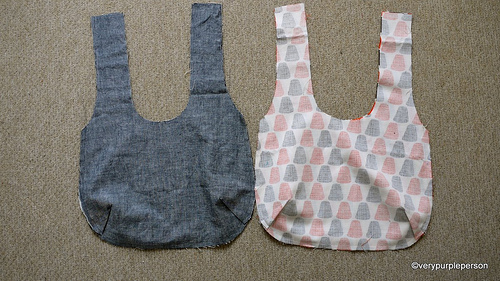
2. Sew the bottom and sides of each set. My bag has a rounded bottom and a dart, Charlie bag has straight edges.
If you use my pattern, sew the darts before sewing the bottom and sides of bag. My apology for not showing how to sew the darts, please do a google search if you don’t know.
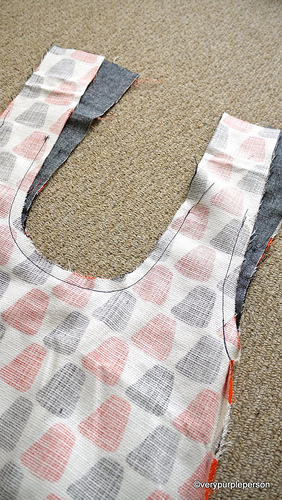
3. Put set B in set A, right sides together, and sew around the straps. Stop stitching about 20 cm before the tops of the straps. If your machine has reverse stitch, use it on each end of stitchings to secure it.
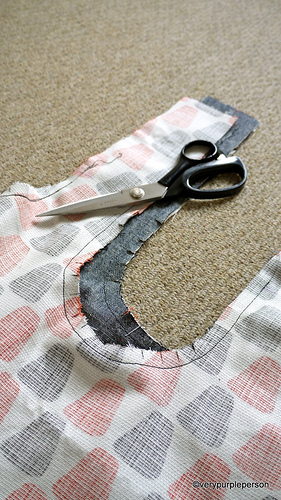
4. Clip rounded corners.
5. Turn the right sides out through one of the straps. It will be a bit difficult at first and you’re gonna wonder if you’re doing it right, but just keep doing it. You will feel a thug and after that the bag will turn right sides out smoothly.
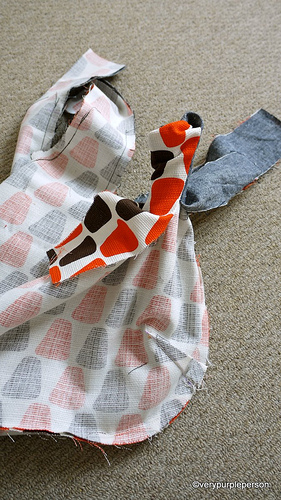
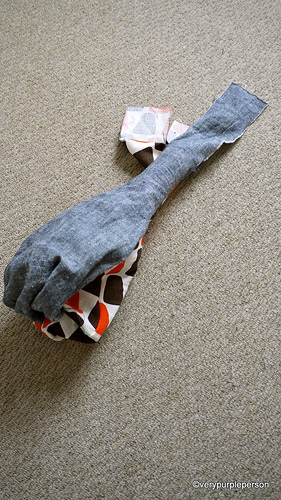
Pull out each of the remaining straps.
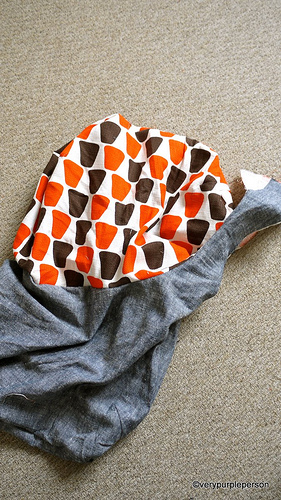
6. Look! You almost have a bag!
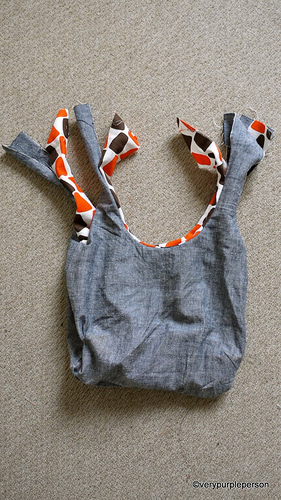
7. Sew the straps of each set together. I often sew the straps absent-mindedly and then found out that I’ve attached them wrong! So please make sure that you sew each strap to the strap beside it, NOT the strap that is in front of it.
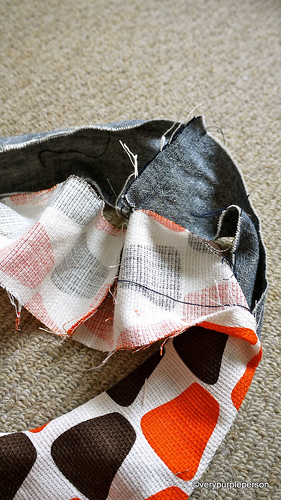
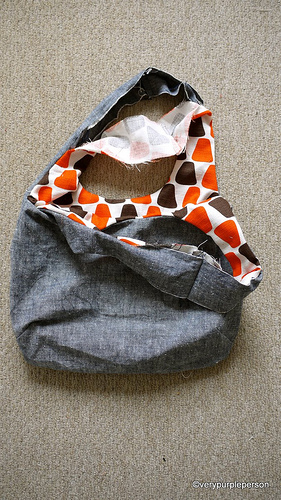
8. Press the seams open. Fold seam allowances on straps and press. Also press edges of bag to make it easier for topstitching.
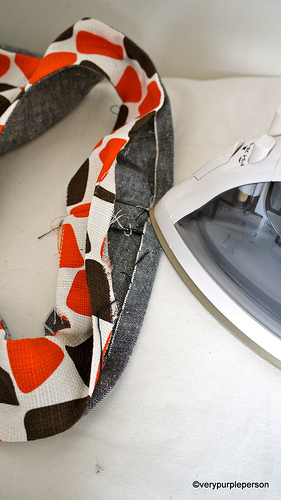
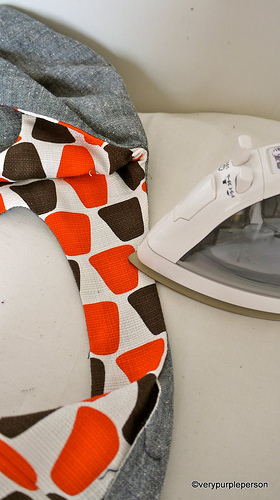
9. Match the tops seams together and pin all open edges of straps. You can also use fusible tapes to make sure it is neat. But I will use pins here.
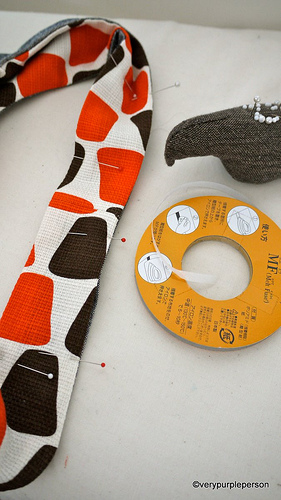
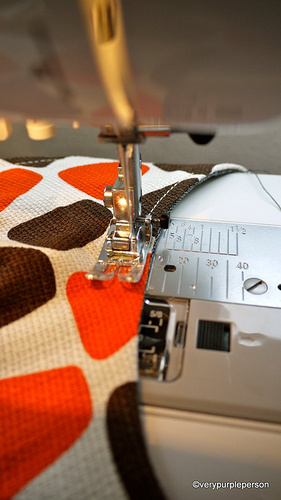
10. Topstitch all edges of bag. I use different colour thread for the bobbin.
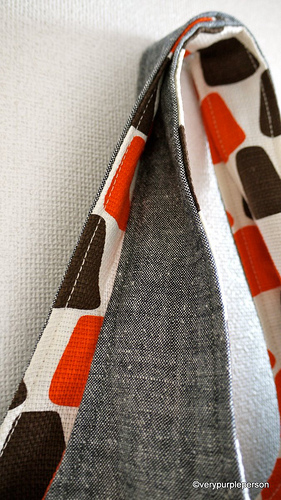
A reversible bag!
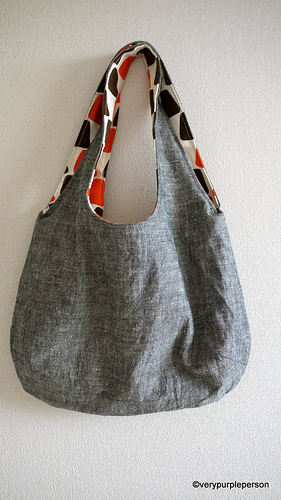
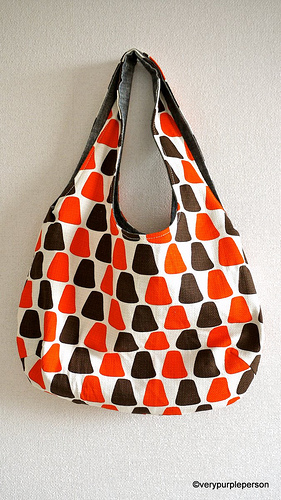
Thank you for reading and I hope this post is useful for you!
Click to download:
REVERSIBLE BAG PATTERN
REVERSIBLE BAG TUTORIAL


421 Comments
I have a question: Is one set (e.g. set a and set b) two pieces of the same fabric, or a piece of each of the two fabrics? That is the only thing I cannot quite figure out from the instructions or photographs. Thank you for a great-looking pattern! I’m looking forward to sewing.
There are 4 total pieces of fabric. 2 of each print.
Sorry, this doesn’t really answer Jo’s question. Is each set -one print- (so, A is both pieces of the dark gray, and Set B is both pieces of the red pattern?) or is a set one of each (one dark + one red; one dark + one red). While I think it’s each set is the same fabric, I agree with Joy; the instructions really aren’t clear on this and it’s a guess to me (someone who hasn’t sewn a bag like this) which way to go.
I love this design, but it looks about 33% bigger then what I would like. Has anyone tried making this, but smaller? If so, was it successful & how did you go about doing it?
So I love the idea of this pattern but I’m such a new beginner that for whatever reason (I’m sure it’s totally me), I can’t get past the step where you have to put the two bags inside one another then sew around the middle. It looks like you’re supposed to sew all 4 layers together but then when you flip it, it doesn’t have an openeing. So I then ripped it all out about 10 different times trying to figure it all out, then sewed two and two and it still doesn’t have an opening when flipped. What did I do wrong? For whatever reason the directions are so confusing to me and I can’t find a video tutorial that shows how to make this exact bag- which is what would really help me…help anyone?
You need to separate the layers into two pieces of fabric. Say your fabrics are blue on the outter red on the inner; when you top stich around you separate one red obe blue then go around to the other side and do the other red/ blue. So basically you’ll sew with the bag pulled open as to avoid sewing shut
Thank you so much for the possibility to make this wonderful bag!
A lot of my friends want to have one.
Now I have a idea: my husband was born in The Gambia, Africa. His family need to have work. They have a very bad dictator in this country, called himself president…Many prople run from there. Help them keeping in their beloved Homeland!
Now my question on you: Is it ok for you, that I give work to this poor People? That they sew your bag- and I try to sell it in Germany? Maybe two or three families have a chance for a little better life? Never give up hope!
I’ll be honest and say that in step three I thought I was supposed to sew the whole thing together instead of the individual sides! Oopsies..
I just want to thank you so much for sharing this pattern and instruction! I did not use your pattern because I already had a one piece tote pattern from Sew Easy. I threw away all the instructions in the envelope, to go ahead and use yours! It all went well and the Hello Kitty bag I sewed for my daughter, is wonderful !!!!!
You can see pics (I have credited you for the instructions) on my blog “A Succulent Life”.
Your blog is fantastic! Thanks for being such an inspiration!!!!!
xoxo-Julie
I’m sewing beginner and have tried the bag(After using the Google Translator;-) ) It worked great. Thanks for the instructions. Since that we using the bag for our visits to the library.
Love it.
Greetings from Germany and Sorry for my bad english.
Jitka
This is absolutely gorgeous. It’s adorable.
Love from The Netherlands
Demi
I looked at all your hand made work and was totally impressed! You are very talented! I’m going to try making some of the items. Thank you very much for sharing!
I live on Vancouver Island in Canada. Was born and raised in Denmark close to the Border between Denmark and Germany, so I do understand German, at least most of it.
I love the colors you have used in your projects!
Greetings,
Rohanna
Thank you for this tuto. Your photos will help me.
My brother suggested I might like this website. He used to be totally right.
This post truly made my day. You can not imagine simply how much
time I had spent for this information! Thanks!
Thank you so much! I’ll try to do it for my sister!!
I’d pinned this tutorial some time ago and just made it this morning. I can’t wait to post it on the Flickr group! You’re right, turning the bag through the straps are TOUGH! Annie T, I bet it’s sewn right, you just can’t believe the two sewn together bags can squeeze through a tiny strap that isn’t sewn at the top. I started pushing through the furthest end to go through the strap first, and gradually, pulled and tugged and pulled until it came out. I’d stabilized each of the 4 pieces before sewing it, and it was pretty thick, but it finally made it! Thanks for sharing the pattern – I love it!
Like beryl lloyd, I am having problems with the straps. Can’t seem to turn them correctly – does anyone have a video tutorial that shows how to bring the straps through for the final product? I have gone back and checked all my sewing, and according to the picture tutorial I have done everything correctly. I’m getting frustrated as I know there has to be an easy answer to this. Thank you.
Hello, Thank you for sharing the tutorial. I’ll try to make it. Warm regards from France
Hi,
How much of each fabric do I need for this bag? Thanks
Thank you for your pattern.
Made it and presented for my friend!
Bag—–>
http://lilitetta.exblog.jp/21752393/
I am from Japan,Ehime pref.Thank you for your cute bag pattern!! 🙂
Hi, everyone is saying how easy this is for beginners… I’m a beginner and would not have a clue how to see a dart. Anyone able to help? I’ve cut out all my pieces and am ready to go otherwise! 🙂
I have made the reversible bag having trouble I turn it in though the strap I get a one sided bag can u help beryl
Thanks so much for this tutorial and THANKS for making it printable!!!
Thank you SO much for sharing your pattern.
I am a novice sewer but I found it really easy to do.
I tried one side in PVC oilskin. I wasn’t sure if it
would be too thick but it worked well. Thank you xx
graciaspor estos patrones estan muy lindos las felicito
I am a beginner in sewing and just finished making this bag. It is adorable and my husband was really impressed. Thank you for the easy to follow instructions.
Great idea! Wonderful bag… I am from Germany and everyone find the bag great! Here’s my Bag -> https://www.facebook.com/Wiwikuss … Greetings