
Bag dimensions in approximate:
- from top of straps to bottom of bag: 50 cm / 20 inches
- height: 28 cm / 11 inches
- width: 40 cm / 16 inches
Fabric needed:
I don’t know because I used leftover fabric for my bag. You can print the pattern and place it on your fabric to make an approximation. It is only one piece of pattern.
Fort similar bag, you can check Charlie bag by Burdastyle ($1.99). It is a bit bigger and has squared bottom.
Please go to the bottom of this post to download the PDF pattern and tutorial.
Disclaimer: You may use the finished products for both personal and commercial use (craft shops or markets only – no mass production). Please do not pass off the pattern and tutorial as your own. Thank you!
The Tutorial
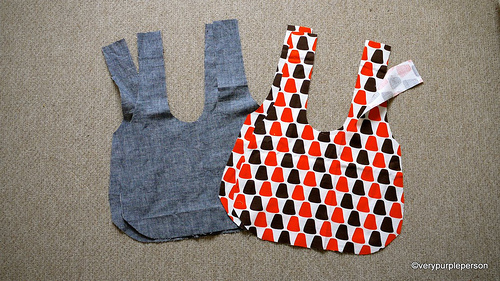
1. Here is 4 pieces of fabrics after being cut. We’re gonna refer them as set A and set B. If you want pockets, sew them before going to the next step.
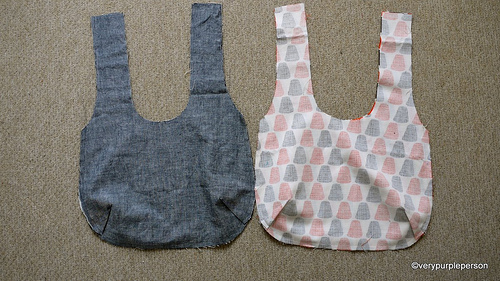
2. Sew the bottom and sides of each set. My bag has a rounded bottom and a dart, Charlie bag has straight edges.
If you use my pattern, sew the darts before sewing the bottom and sides of bag. My apology for not showing how to sew the darts, please do a google search if you don’t know.
3. Put set B in set A, right sides together, and sew around the straps. Stop stitching about 20 cm before the tops of the straps. If your machine has reverse stitch, use it on each end of stitchings to secure it.
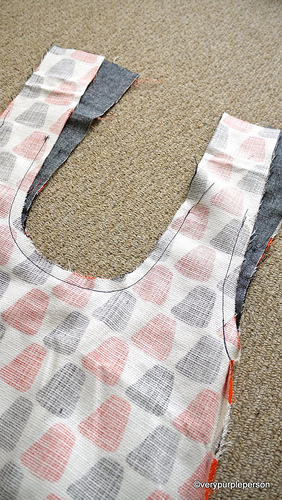
4. Clip rounded corners.
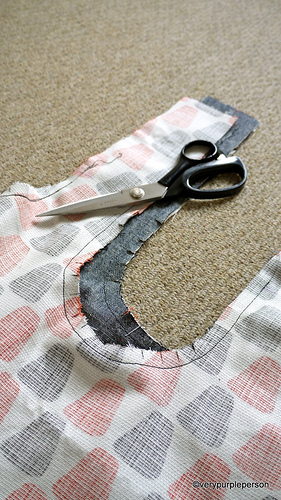
5. Turn the right sides out through one of the straps. It will be a bit difficult at first and you’re gonna wonder if you’re doing it right, but just keep doing it. You will feel a thug and after that the bag will turn right sides out smoothly.
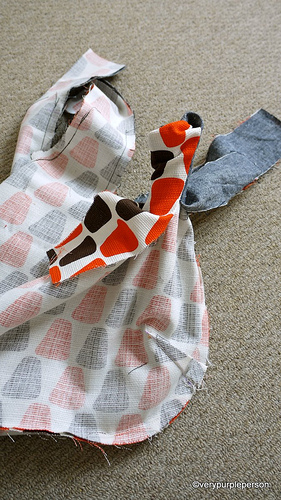
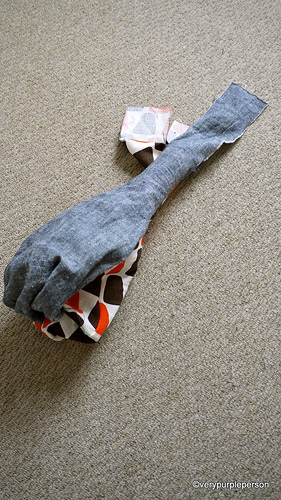
Pull out each of the remaining straps.
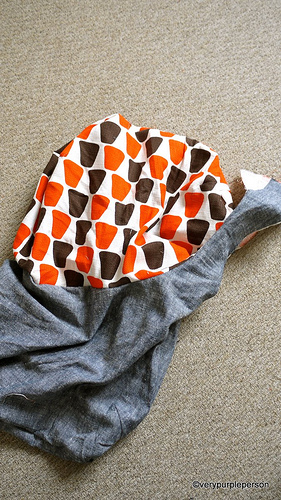
6. Look! You almost have a bag!
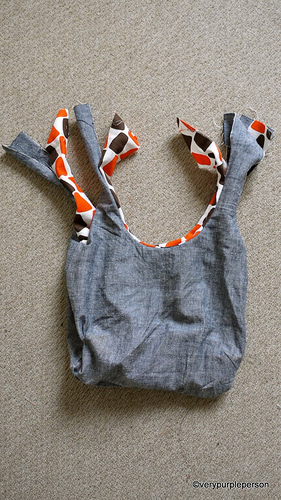
7. Sew the straps of each set together. I often sew the straps absent-mindedly and then found out that I’ve attached them wrong! So please make sure that you sew each strap to the strap beside it, NOT the strap that is in front of it.
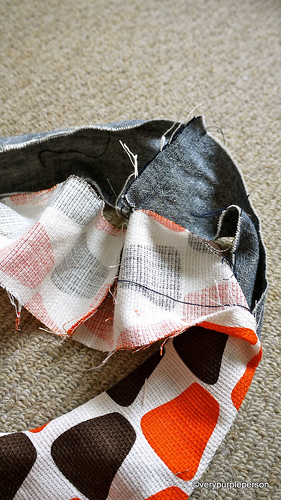
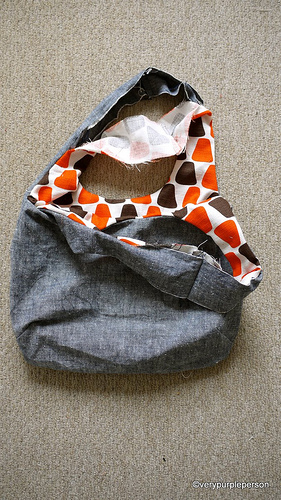
8. Press the seams open. Fold seam allowances on straps and press. Also press edges of bag to make it easier for topstitching.
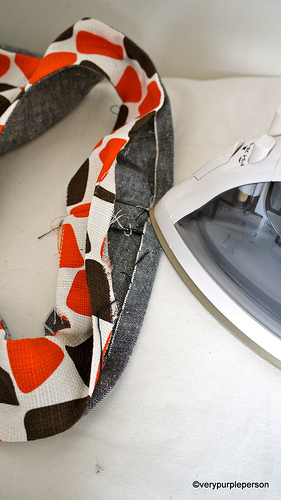
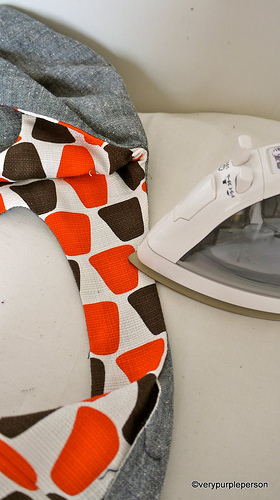
9. Match the tops seams together and pin all open edges of straps. You can also use fusible tapes to make sure it is neat. But I will use pins here.
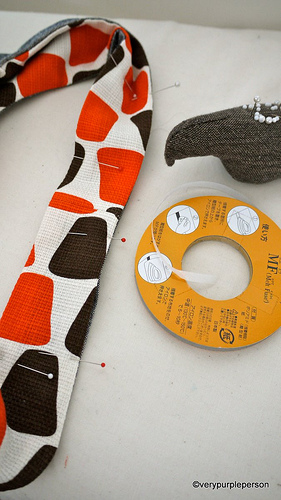
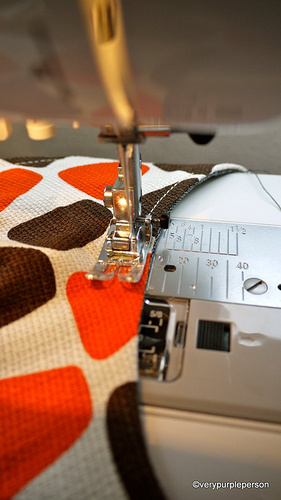
10. Topstitch all edges of bag. I use different colour thread for the bobbin.
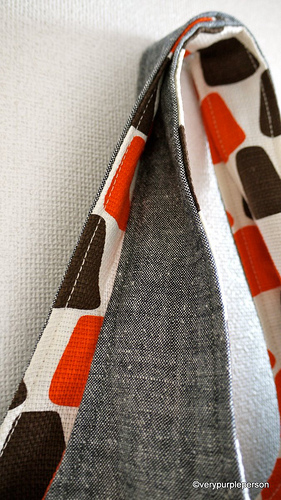
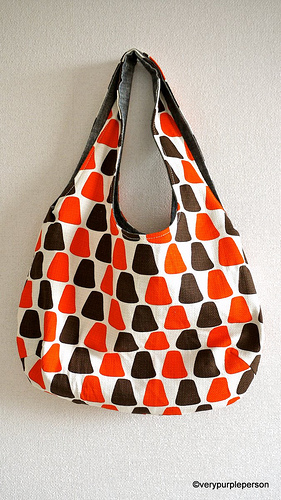
A reversible bag!
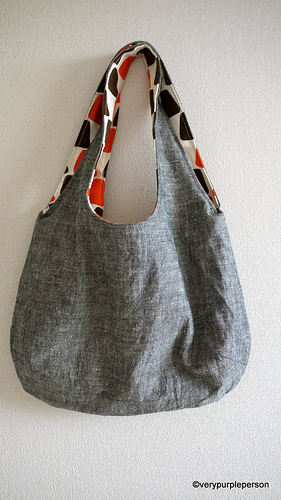
Thank you for reading and I hope this post is useful for you!
Click to download:
REVERSIBLE BAG PATTERN
REVERSIBLE BAG TUTORIAL


421 Comments
Great tutorial how much fabric or yards do you need to make this bag?
Thanks a lot, I think I’ll give it a try very soon!
Thank you for sharing. You just solved my problem with the handles….. I’ve been in trouble but now I got it !
Thanks a lot for this great bag tutorial ! I have already made 3 of them as gifts and I’m planing another one for myself this time !
http://lespetitesbetisesdedenise.blogspot.fr/2014/01/sac-main-reversible.html
I finally decided to make one of these bags today and I am so glad I did. It is a very good size and is the simplest bag I have ever made!
Where I live plastic shopping bags have been banned so I was looking for a pattern that was big enough for putting groceries and such in that I could keep in my handbag. This is all that and more.
I have already cut out another one (but made the body larger and the handles longer as you can never have a bag that is too big now, can you?) to use as a tote, and plan to sew quite a few more very soon. Thank you for such a clear, concise and simple pattern.
Thank you for the tutorial. Thought it was an easy, fun project.
I have to say, you must be tiny!! The reversible bag in the picture with you looks quite big, but it is actually a fairly small bag.
I am 5’8″ and it barely falls at my waist, haha! I will have to try the Charlie bag next 🙂
I love your bag and I just made one for a Christmas gift. I mentioned where the idea came from and a link to your site.
you can see it here. http://pequenomundoa3.blogspot.pt/
thank you for a great tutorial!
Hi! Love this pattern, I managed to make it in just few hours, but when I finished pining the handles, I realised that I’ve ended up with “pleates” on the both corners of the bag both inside and outside (both fabrics) .. and I was making it for my mother in law for Christmas. .. I’m so gutted! Where did I go wrong? Please help.
The bag should have darts on both corners.
Hi EB – I nearly did this myself but noticed before I sewed. It sounds like you may have folded your darts to the OUTSIDE finished surface of your bag rather than to the inside where they would have been hidden. Check out the web for many tutorials on darts to see what I mean.
S x
Thanks ladies for the reply. The “pleates” are not where the darts are, i’d love to put the photos up but there’s no option to put the photo on here. It is where the body of the bag meets the strap on the outer part of the straps to body .. It’s a pretty “fat” looking pleates .. 🙁
Hey, I have put the photos on your facebook page. Cheers
Fabulous bag! This would be wonderful for gifts for Christmas when one doesn’t know what to give, this would be perfect
thank you
I made one, yoo can see it at my blog 🙂
I love how mine came out! Just finished it today! I don’t have a blog, so I don’t really know how I can share a pic with you.
Does this size work for fat quarters?
Love the bag, so chic! Thank you for sharing the pattern:)
Thanks for this great tutorial which I came across via Pinterest. I’ve made the bag and blogged about it:
http://thejoyofsew.blogspot.co.uk/2013/10/pinterest-project-reversible-bag.html
Hope that’s okay!
Suze x
I just made your bag for the first time today. I did, however, find that since I used medium weight canvas for both sides of the purse that I had to leave one handle open much lower to facilitate pulling the bag through. Anyway it’s a great bag and I thank you Very Purple Person!
Hello verypurpleperson, and Thanks so much for this pattern. I am planning to use up all my leftover bits of fabric. And even some fabric that was meant to be for a skirt, but would be so much more suited to this bag.
I can’t get the links to work to get the pattern. 🙁
I made this bag the other night using two 1/2-yard cuts of fabric, which was how much was recommended to me to use with this pattern via Pinterest. I love the bag, but I ran into a problem while cutting the pieces–when I folded the cuts of fabric in half lengthwise (selvage to selvage) in order to get 2 pattern pieces from each…there wasn’t enough fabric to fit all of the straps on! I ended up having to piece additional fabric into the straps in order to make them long enough. Has anyone else ran into this problem? It wouldn’t be solved by getting just a little more fabric–the way I folded it, the WIDTH of the bolt of fabric is the issue, not the length of how much I had cut. But to fold it the other direction would require a lot more fabric (at least double what I bought) and would leave a lot of waste. Any suggestions? The fabric I used was your typical width of fabric, and this definitely isn’t the most complicated sewing project I’ve ever done, so I really don’t know why I ran into this issue. Thanks!
I want to tell you the story of 2 bags. The first was made from this very blog post. The second was a Martha Stewart pattern for a Japanese knot bag. The first bag was a fantastic experience and may be my favorite purse, ever. It weighs less than 4oz, which my shoulder really appreciates, it’s cute and was super easy to make. The Martha Stewart (MS) bag ordered me to blow the pattern up, I think it was 200%. I went to my local office supply store only to find that they do not carry paper in their machines big enough for such a task. It took the copy girl and I about 20 minutes to figure it out and we ended up moving the original around so we’d have several pieces and I taped them together, just like I did per your instructions. The difference, with your pattern I was able to stay in my pajamas, save my $1.75 and it took me 5 minutes. Much easier.
I had my pattern printed and set out to make my MS bag. Cutting it out, no problem. I sewed up the bottom and everything was going smooth, until I got to the straps. Martha told me to sew the tops of the strap together, and then to sew up the sides. The Japanese knot bag has mismatched straps. The first has a small hole that you put the longer strap through. Trying to sew the entire circle of the larger strap was near impossible. I ended up ripping out half of the purse and sewing up the straps per your directions. Both were fundamentally the same bag. Yours was a breeze, Martha’s was a nightmare from the get-go. Thanks for such a great tutorial!
Thank you for this pattern,have been makes a lot of this bag s for my friend,and they all love it thank you..
I found this DIY on Pinterest.
I made this bag last weekend for a cousin’s 16th bday. I was successful, without any problems. These instructions were very clear and detailed.
I’ll be make more for myself.
Thank you for making this tutorial.
I have just finished my reversible bag. Thankyou for the pattern!
You can find images at http://penelopecross.wordpress.com/2013/08/01/518/ !
Thank you very much for the tutorial, I got an lovely bag!
When someone writes an piece of writing he/she maintains
the plan of a user in his/her mind that how a user can know it.
Therefore that’s why this paragraph is outstdanding. Thanks!
thank you for this wonderful pattern! i love my new bag! 🙂
Hello, I am new to sewing and I was wondering how much Material do I need to make this Bag? Thank You for your Help!