
Bag dimensions in approximate:
- from top of straps to bottom of bag: 50 cm / 20 inches
- height: 28 cm / 11 inches
- width: 40 cm / 16 inches
Fabric needed:
I don’t know because I used leftover fabric for my bag. You can print the pattern and place it on your fabric to make an approximation. It is only one piece of pattern.
Fort similar bag, you can check Charlie bag by Burdastyle ($1.99). It is a bit bigger and has squared bottom.
Please go to the bottom of this post to download the PDF pattern and tutorial.
Disclaimer: You may use the finished products for both personal and commercial use (craft shops or markets only – no mass production). Please do not pass off the pattern and tutorial as your own. Thank you!
The Tutorial
1. Here is 4 pieces of fabrics after being cut. We’re gonna refer them as set A and set B. If you want pockets, sew them before going to the next step.
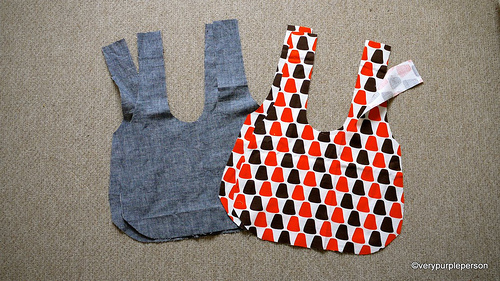
2. Sew the bottom and sides of each set. My bag has a rounded bottom and a dart, Charlie bag has straight edges.
If you use my pattern, sew the darts before sewing the bottom and sides of bag. My apology for not showing how to sew the darts, please do a google search if you don’t know.
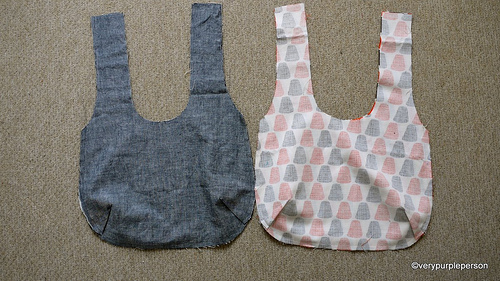
3. Put set B in set A, right sides together, and sew around the straps. Stop stitching about 20 cm before the tops of the straps. If your machine has reverse stitch, use it on each end of stitchings to secure it.
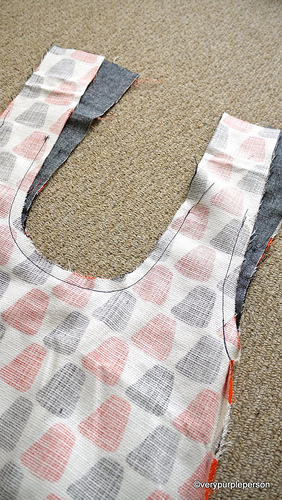
4. Clip rounded corners.
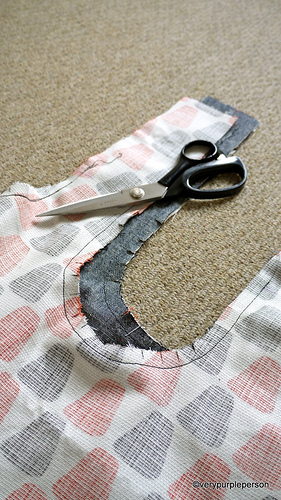
5. Turn the right sides out through one of the straps. It will be a bit difficult at first and you’re gonna wonder if you’re doing it right, but just keep doing it. You will feel a thug and after that the bag will turn right sides out smoothly.
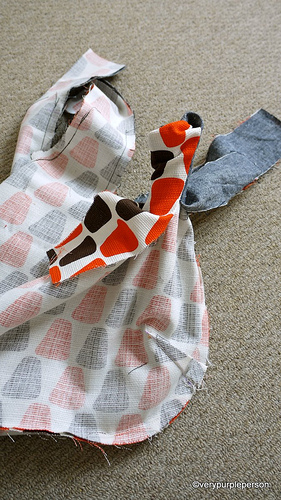
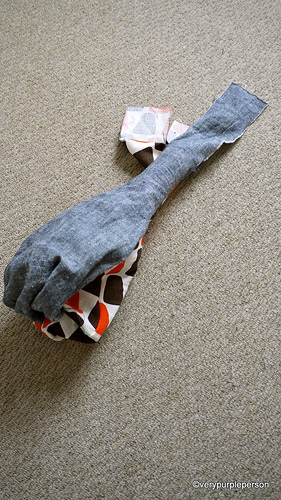
Pull out each of the remaining straps.
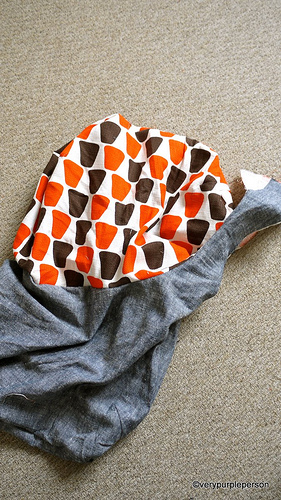
6. Look! You almost have a bag!
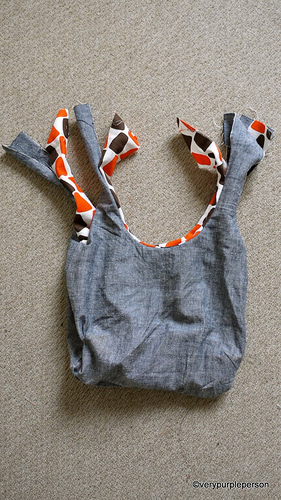
7. Sew the straps of each set together. I often sew the straps absent-mindedly and then found out that I’ve attached them wrong! So please make sure that you sew each strap to the strap beside it, NOT the strap that is in front of it.
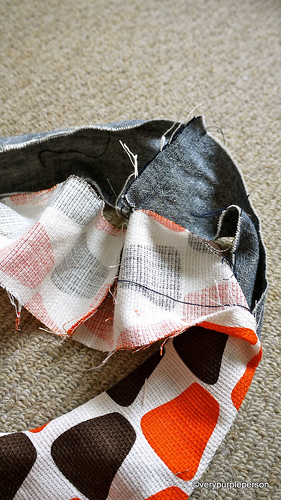
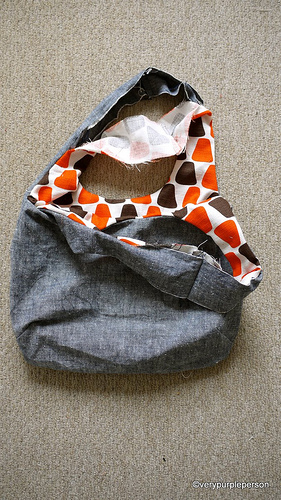
8. Press the seams open. Fold seam allowances on straps and press. Also press edges of bag to make it easier for topstitching.
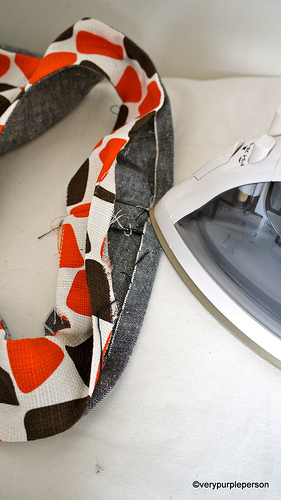
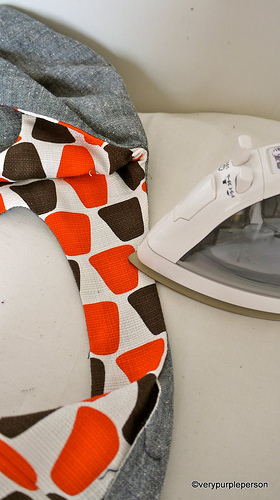
9. Match the tops seams together and pin all open edges of straps. You can also use fusible tapes to make sure it is neat. But I will use pins here.
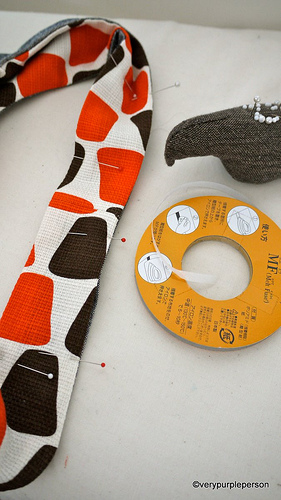
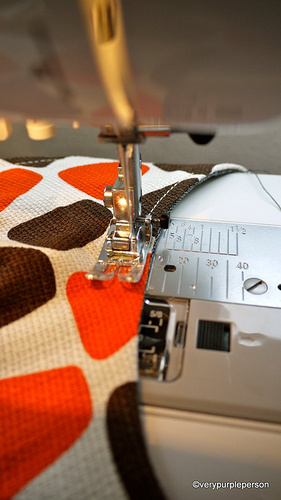
10. Topstitch all edges of bag. I use different colour thread for the bobbin.
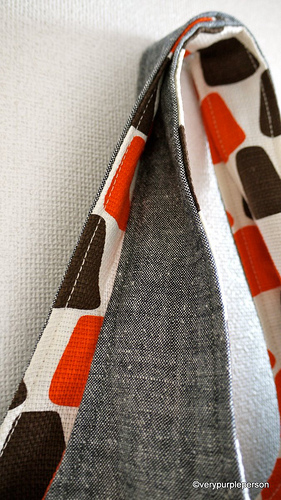
A reversible bag!
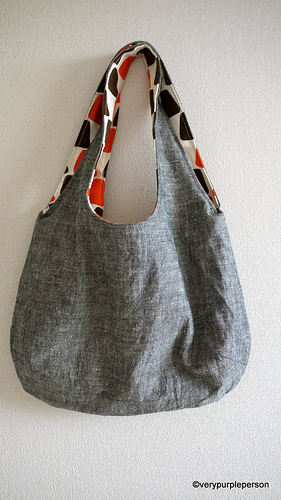
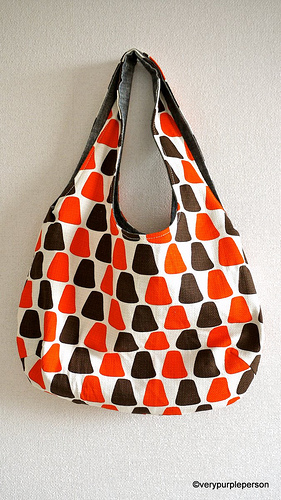
Thank you for reading and I hope this post is useful for you!
Click to download:
REVERSIBLE BAG PATTERN
REVERSIBLE BAG TUTORIAL


421 Comments
Your stuff is amazing, your style is exquisite, your love of life is obvious! Thanks so much for sharing your talent and creativity. Very inspirational!
Heather…totally did most of what you said in your comments! Didn’t realize that the inside material was right side out in #3 either. Whoops. Also did the school girl error of having my main fabric upside down (it had birdies on it…) Other than those two things, very easy to follow. I’ll be able to crank one of these out much quicker (and correctly) next time.
Wonderful ideas! I will be using some of them!
Fantastic tutorial and bag! I made 3 of these this weekend and can’t wait to make more!!
Sometimes I think I am a good beginner seamstress than I attempted this tutorial and I think I suck! I plead the fifth on all my screw-ups, but I thought I could give a bit more detail to some of the instructions as to help the next fledgling seamstress. 1) If you download and print the pattern make sure you put the pattern with the words “cut on fold” onto the fold and DO NOT CUT the material there, but PUT THE DOTTED LINE ON THE FOLD & KEEP THE FOLD IN TACK. 2) Instruction “3”, make sure the inside material (B) is facing right side out. I know it says that in the instructions to put right sides together, but I am just reiterating it here to make it clearer. Plus, it is hard to tell in the picture because you cannot tell her “B” material inside from out. 3) Instruction “3”, when sewing around the straps DO NOT SEW ALL FOUR STRAPS TOGETHER. You should be sewing 4 sets of straps. “A” material to “B” material 4 times! Also then the “horseshoe” part of the purse will be sewn “A” material to “B” material two times. 4) Instruction “5”, when pulling through the strap, you will basically be pulling through the hole with “A” material on one side (like a banana peel) and “B-B-A” material on the other side (other side of the banana peel). Like I said I plead the fifth on my screw-ups, some of them I did and some of them I had to really think of what the instruction was saying or I would have screwed-up. Hope this helps anyone who was like me and kudos to all of you who got it the first time!
Thanks for posting this. It really helped me when I royally screwed up. 🙂
Hi, I bought some material to make this bag, but I have found that the material is a bit see through if I only used these to fabrics (One is a polka dot and the other is striped, but you can see the polka dots though the white on the striped side, if that makes sense). is there a way I can include a lining in between these 2 layers (so that its still reversable?) its such beautiful material and I really don’t want to waist it. Thanks
Thank you so much for sharing this pattern. It’s lovely and looks so easy. I need to make a new bag. Old ones getting very worn! Cant wait to cut it out & sew it up… and take it out with me! fiona x
It’s exatly what I try to find !
Thank you for this precious help.
Merci beaucoup !
From Bretagne in France,
Lydaine.
I am definatly going to try and make one of these but what type of material do you use for this size of bag. Quilting material has a great verirty of patterns but might be a little too light weight for this size of bag?
I just seen this pattern this morning it looks really simple to make thanks so much for posting it I think when I make it I will add the pockets and reverse the material putting opposite patterns on the reverse sides thanks again I know this is going to be fun to make for gifts as well as for myself it will be so handy to have
What a great bag tutorial and pattern! Can’t wait to sew one. Thank you.
Oh, wow! I could totally make this 🙂 THANKS for the detailed instructions and pictures! I pinned this!
As soon as i saw this i knew i had to do it. I made it tonight and i love it. Its big enough to hold everything i need but not overly huge.
It was pretty easy to do. I used cotton for one side and canvas on the other. I had a but of trouble when turning right-side-out with the canvas ripping but it was easy to fix.
My new fave bag.
So excited, I’ve made my own reversible bag, horeeey…. Thanks for your pattern and tutorial, of course. The picture did tell me a lot. I never think about turning the inner side out through the straps, that’s way I need more times sewing a bag 😀
Hi Novita, I loved your pattern, and made a super sized version of the bag – posted on my blog http://made-inhome.blogspot.co.uk/2012/09/two-bags-in-one-sewing.html. Thanks for this free pattern!
I loved making one for a friend. They are so quick, I need to make more 😉
http://wp.me/pK2DW-MH
Am sooooo excited to give this puppy a whirl!! It is just what I have been looking for…and free!! Thank you so much!!
I love this pattern although I’m new at this. The bold line is where I actually cut, or the thinner outer line? And in your pictures you didn’t cut where the dart triangle is shown, do I not cut there? Thank you!
Thank you soooo much for posting this great tutorial! I love the bag!!!
Thank you for taking the time to publish this -such great instructions and step by step images!!
hola, me encanto, pero no puedo ver los patrones, serias amable y mandarmelos por mail, gracias
Best Tutorial I have ever used! Great for beginners and easy to understand thank you so much!
I am only a very ‘beginner’ sewer!!! I found this pattern, got all excited and began cutting and sewing!!! But……I am at the stage of turning it in through the strap….. I have tried possibly 3 dozen times….to no avail!! 1 set of straps on each side are coming out fine, the other???? well, its seems twisted???? So if anyone can save my sanity and offer a suggestion to what I am doing wrong, it would be GREATLY appreciated!!
Thanks so much for the tutorial and pattern. I had found the Charlie bag but, never could get it to download for me. Love this!
I found this pattern Sunday and made the purse yesterday. It is adorable! I cannot wait to gift it. 😀