
Bag dimensions in approximate:
- from top of straps to bottom of bag: 50 cm / 20 inches
- height: 28 cm / 11 inches
- width: 40 cm / 16 inches
Fabric needed:
I don’t know because I used leftover fabric for my bag. You can print the pattern and place it on your fabric to make an approximation. It is only one piece of pattern.
Fort similar bag, you can check Charlie bag by Burdastyle ($1.99). It is a bit bigger and has squared bottom.
Please go to the bottom of this post to download the PDF pattern and tutorial.
Disclaimer: You may use the finished products for both personal and commercial use (craft shops or markets only – no mass production). Please do not pass off the pattern and tutorial as your own. Thank you!
The Tutorial
1. Here is 4 pieces of fabrics after being cut. We’re gonna refer them as set A and set B. If you want pockets, sew them before going to the next step.
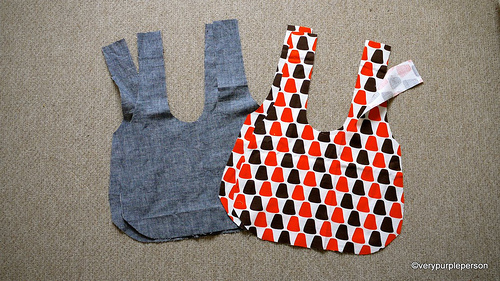
2. Sew the bottom and sides of each set. My bag has a rounded bottom and a dart, Charlie bag has straight edges.
If you use my pattern, sew the darts before sewing the bottom and sides of bag. My apology for not showing how to sew the darts, please do a google search if you don’t know.
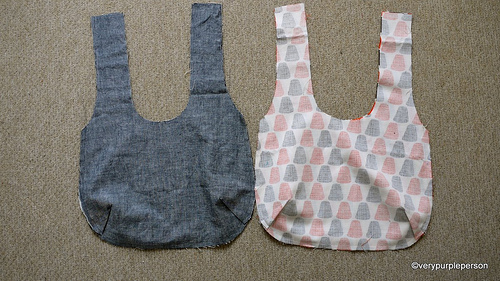
3. Put set B in set A, right sides together, and sew around the straps. Stop stitching about 20 cm before the tops of the straps. If your machine has reverse stitch, use it on each end of stitchings to secure it.
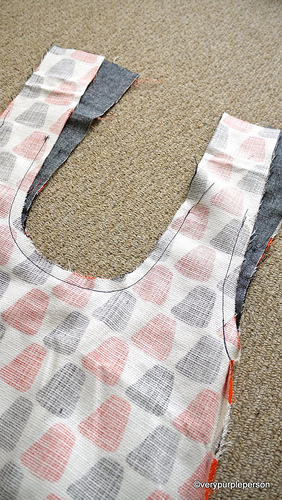
4. Clip rounded corners.
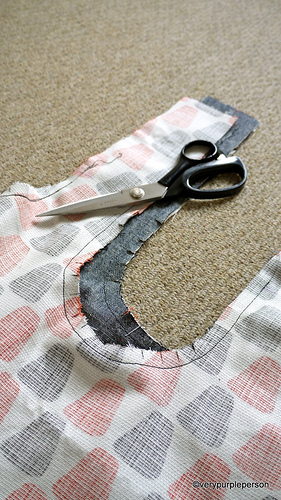
5. Turn the right sides out through one of the straps. It will be a bit difficult at first and you’re gonna wonder if you’re doing it right, but just keep doing it. You will feel a thug and after that the bag will turn right sides out smoothly.
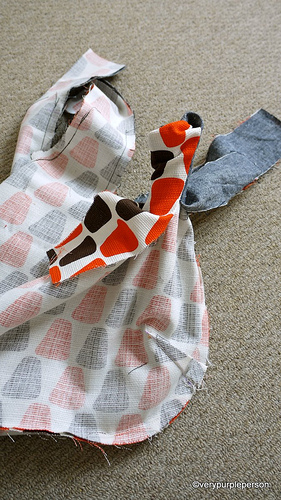
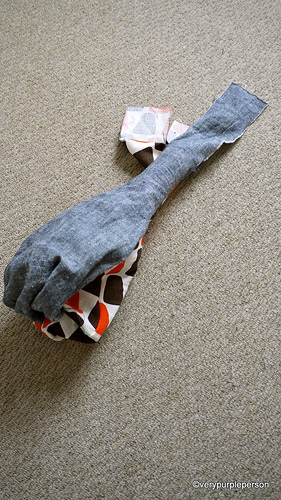
Pull out each of the remaining straps.
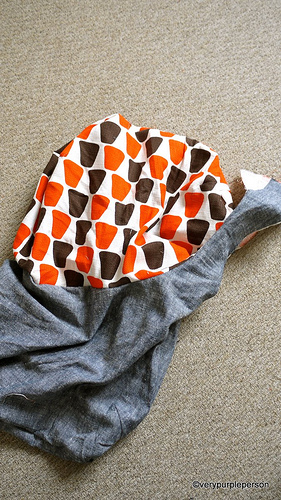
6. Look! You almost have a bag!
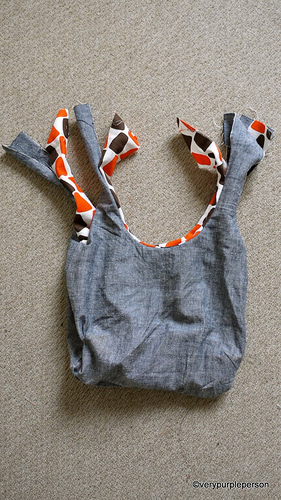
7. Sew the straps of each set together. I often sew the straps absent-mindedly and then found out that I’ve attached them wrong! So please make sure that you sew each strap to the strap beside it, NOT the strap that is in front of it.
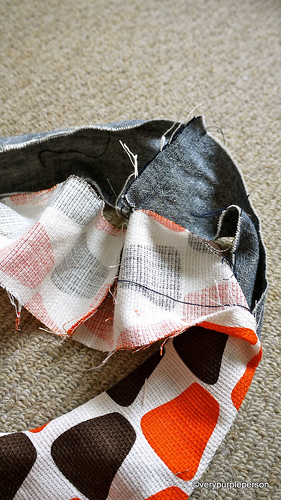
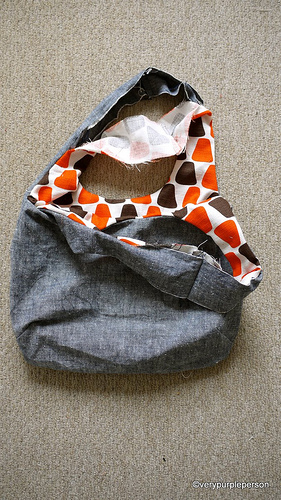
8. Press the seams open. Fold seam allowances on straps and press. Also press edges of bag to make it easier for topstitching.
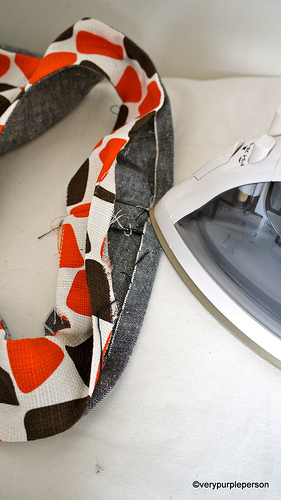
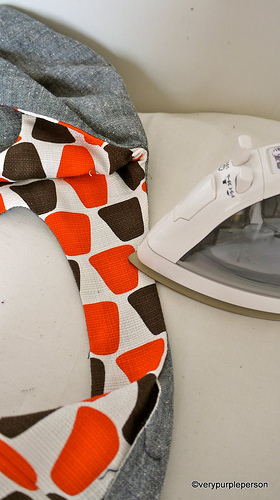
9. Match the tops seams together and pin all open edges of straps. You can also use fusible tapes to make sure it is neat. But I will use pins here.
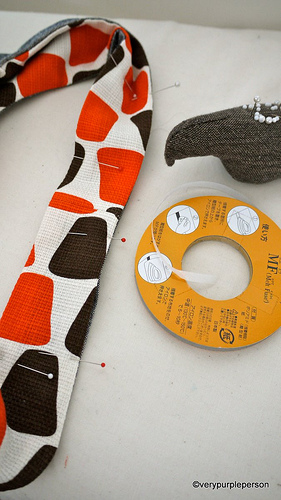
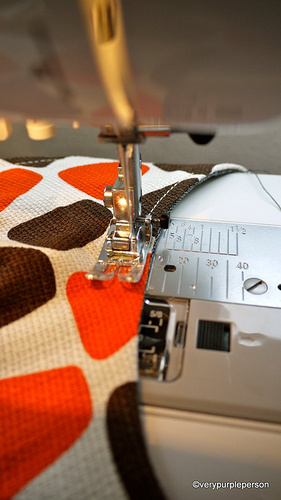
10. Topstitch all edges of bag. I use different colour thread for the bobbin.
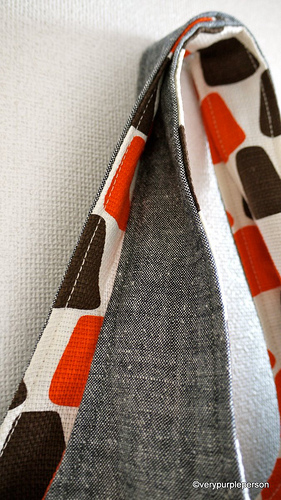
A reversible bag!
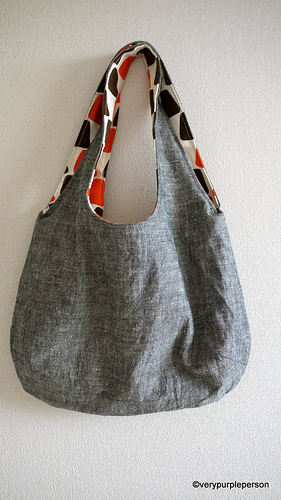
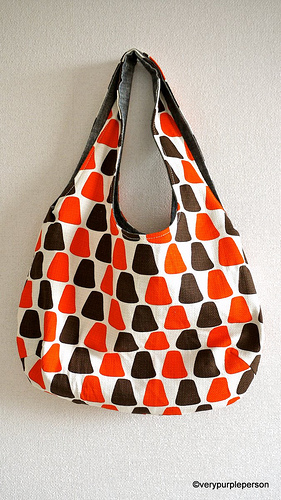
Thank you for reading and I hope this post is useful for you!
Click to download:
REVERSIBLE BAG PATTERN
REVERSIBLE BAG TUTORIAL


421 Comments
hi..i’m new in sewing and i find that these tutorial is awesome..thank you..hope i can make it one for my girl..
Thanks so much for the perfect directions. I absolutely love my new bag!!! YOU ROCK!!!!!!
Merci beaucoup pour ce tuto. Ce sac est vraiment très beau…j’espère pouvoir le faire rapidement.
Thanks for the pattern and tutorial. You make me feel good with myself. 😀
thanks a lot for this tutorial…
Obrigada , parabens pelos seus trabalhos. eu farei siiiim
adorei o paso a paso obrigada mesmo
bjos
Gardenia
Many thanks! This is absolutely fantastic & simple. Thanks for sharin’ it… :0)
Absolutely fantastic! Thanks a lot for the pattern, easy to understand instructions and to sew! I love it!
Hi, thanks so much for your awesome tutorials! I started making this today and had the same issue as Rachel, I ended up sewing set B inside set A without turning it right side out. I turned it inside out so many times I almost gave up. I didn’t notice that was what you’re supposed to do until I read through the comments. Could you change the instructions to make it a little bit more clear for others?
Well I don’t know, I think saying that they are supposed to be ‘right sides together’ in step 3 pretty much sums it up. There are not that many who have the same issue. Thank you for the input though!
I thought this bag is BIG. it looks big on you… I was too excited when I made it then became not- so-so to see the finished product. Maybe I should pay more attention to the measurements given instead of just relying on the pic. I’ll just have to alter the size to my likings.
But the whole Idea is brilliant and thanks for being so generous. 🙂
Yeah I guess you should have. You’re welcome!
I love your pattern, and I jumped into making it right away.
But… I’m a new sewer and I’m stuck!
When you put set B into set A, did you turn B right side out? So in other words, all the right sides (of both sets) should be touching?
Thanks!
Hi Rachel, yes all the right sides of both sets should be touching when you stitch around the strap. I hope you can make it!
I made this bag last night, and I really like it. My only problem is the straps are too short. I can barely get it on my shoulder. Are you a very petite girl? I think the next one I make will have longer straps. I’ll try to post a photo of it on my blog tomorrow. Thanks for the tutorial and pattern! It’s super cute, and just the type of bag I like to carry!
Owww sorry about that!
I am quite small, but the straps were okay for most people. I guess it’s all about preferences then 🙂
Thank you for trying out the pattern and giving me some feedback!
Love the bag!! I just download the pattern and will be sewing shortly. Thanks for sharing the pattern
Many thanks for this tutorial and pattern, this bag is lovely and it is exacty what I was looking for for my nieces.
Cute bag. Thanks for sharing, the pattern is giving me lots of ideas.
I had a BLAST making this bag today. Thank you so much for the excellent tutorial! I got a huge “ooh-ahh” factor from my daughters. I can’t wait to make another one. I ended up following another tutorial for an inside zipper pocket that I added to the lining, as well as an applique idea from Zakka Sewing. I’ll be posting this on my blog on Friday for Sew & Tell Friday with Amy over at http://www.amylouwho.com, if you’re interested in seeing the finished product. Thank you again!
Hahaha I can imagine the ‘oooh-aah’ factor, it always makes me feel like a magician performing tricks! Thank you for trying out the pattern, I really want to see how it looks with zipper and applique!
Sorry that it’s taken me so long to send you the link! If you’d like to see the finished product, you can check it out in my Facebook album (link below). There are a lot of other photos, but the photos of this bag are near the end of the album, if that helps. I’m just getting ready to make another one for my friend’s daughter. They’ll be moving soon, and I really want to make her a bag. Thanks again!
http://www.facebook.com/photo.php?pid=351373&l=f492eee0a8&id=100000117294187
.-= Dayna´s last blog ..Bits of My Weekend — A Swazi Adventure & Other Tidbits =-.
What a cute bag! Thanks so much for sharing! =)
let me tell you some thing interesting a few days ago i lost my lather bag which was pretty similar in shape as yours and i loved it i was realy very sad to loose it but now i can make one easily with your instructions in denim THANK U SOOOOOOOOOOOO MUCH
Oh wow, this is great! I just bought a pattern for the Amy Butler birdie sling bag…this is a WAY better tutorial and much simpler, plus smaller. Boo, too bad I didn’t see this first!
I am wondering – about how much material do you use to make the bag? I didn’t see clear yardage / meters on the instructions.
I used my scraps to make my bag, so I don’t know exactly how much material you need for the bag.
I guess you can find out yourself.
i love the look and style of this bag! I can’t wait to make it i just have to buy the fabric… >_<
Nice tutorial. Made one myself. See my blog.
Thank you! Ingrid.
Great bag! I love that little pocket in that quirky position! 🙂
Arigatou, arigatou, arigatou! You are so generous to put that together for us! Another reason to love your blog…!
Hola. Encontre este tutorial en el blog de whip up, me ha gustado mucho tu bolso, asi que he querido compartir el tutorial en mi blog de labores.
Un saludo
Yolanda
http://intentodelabores.blogspot.com
That’s a very good idea. I guess i can try that to get a replacement for a bag I picked up in a garage sale a couple of months ago. It’s always been my goal of saving and this is surely something new and I hope I can muster my creativity to create something as good as what you’ve made.
Hi,
I just discovered your blog and i LOVE it! Your creations, your stories, your sensibility, your generosity, your shyness, i think you are great!
I just bought my very first sewing machine, i never used one before. I have hopes, but i need confidence and seeing your blog is very inspiring. I’m going to use your wonderful reversible bag tutorial to do my first project. I hope i will be able to make it!
Thank you so much for sharing!