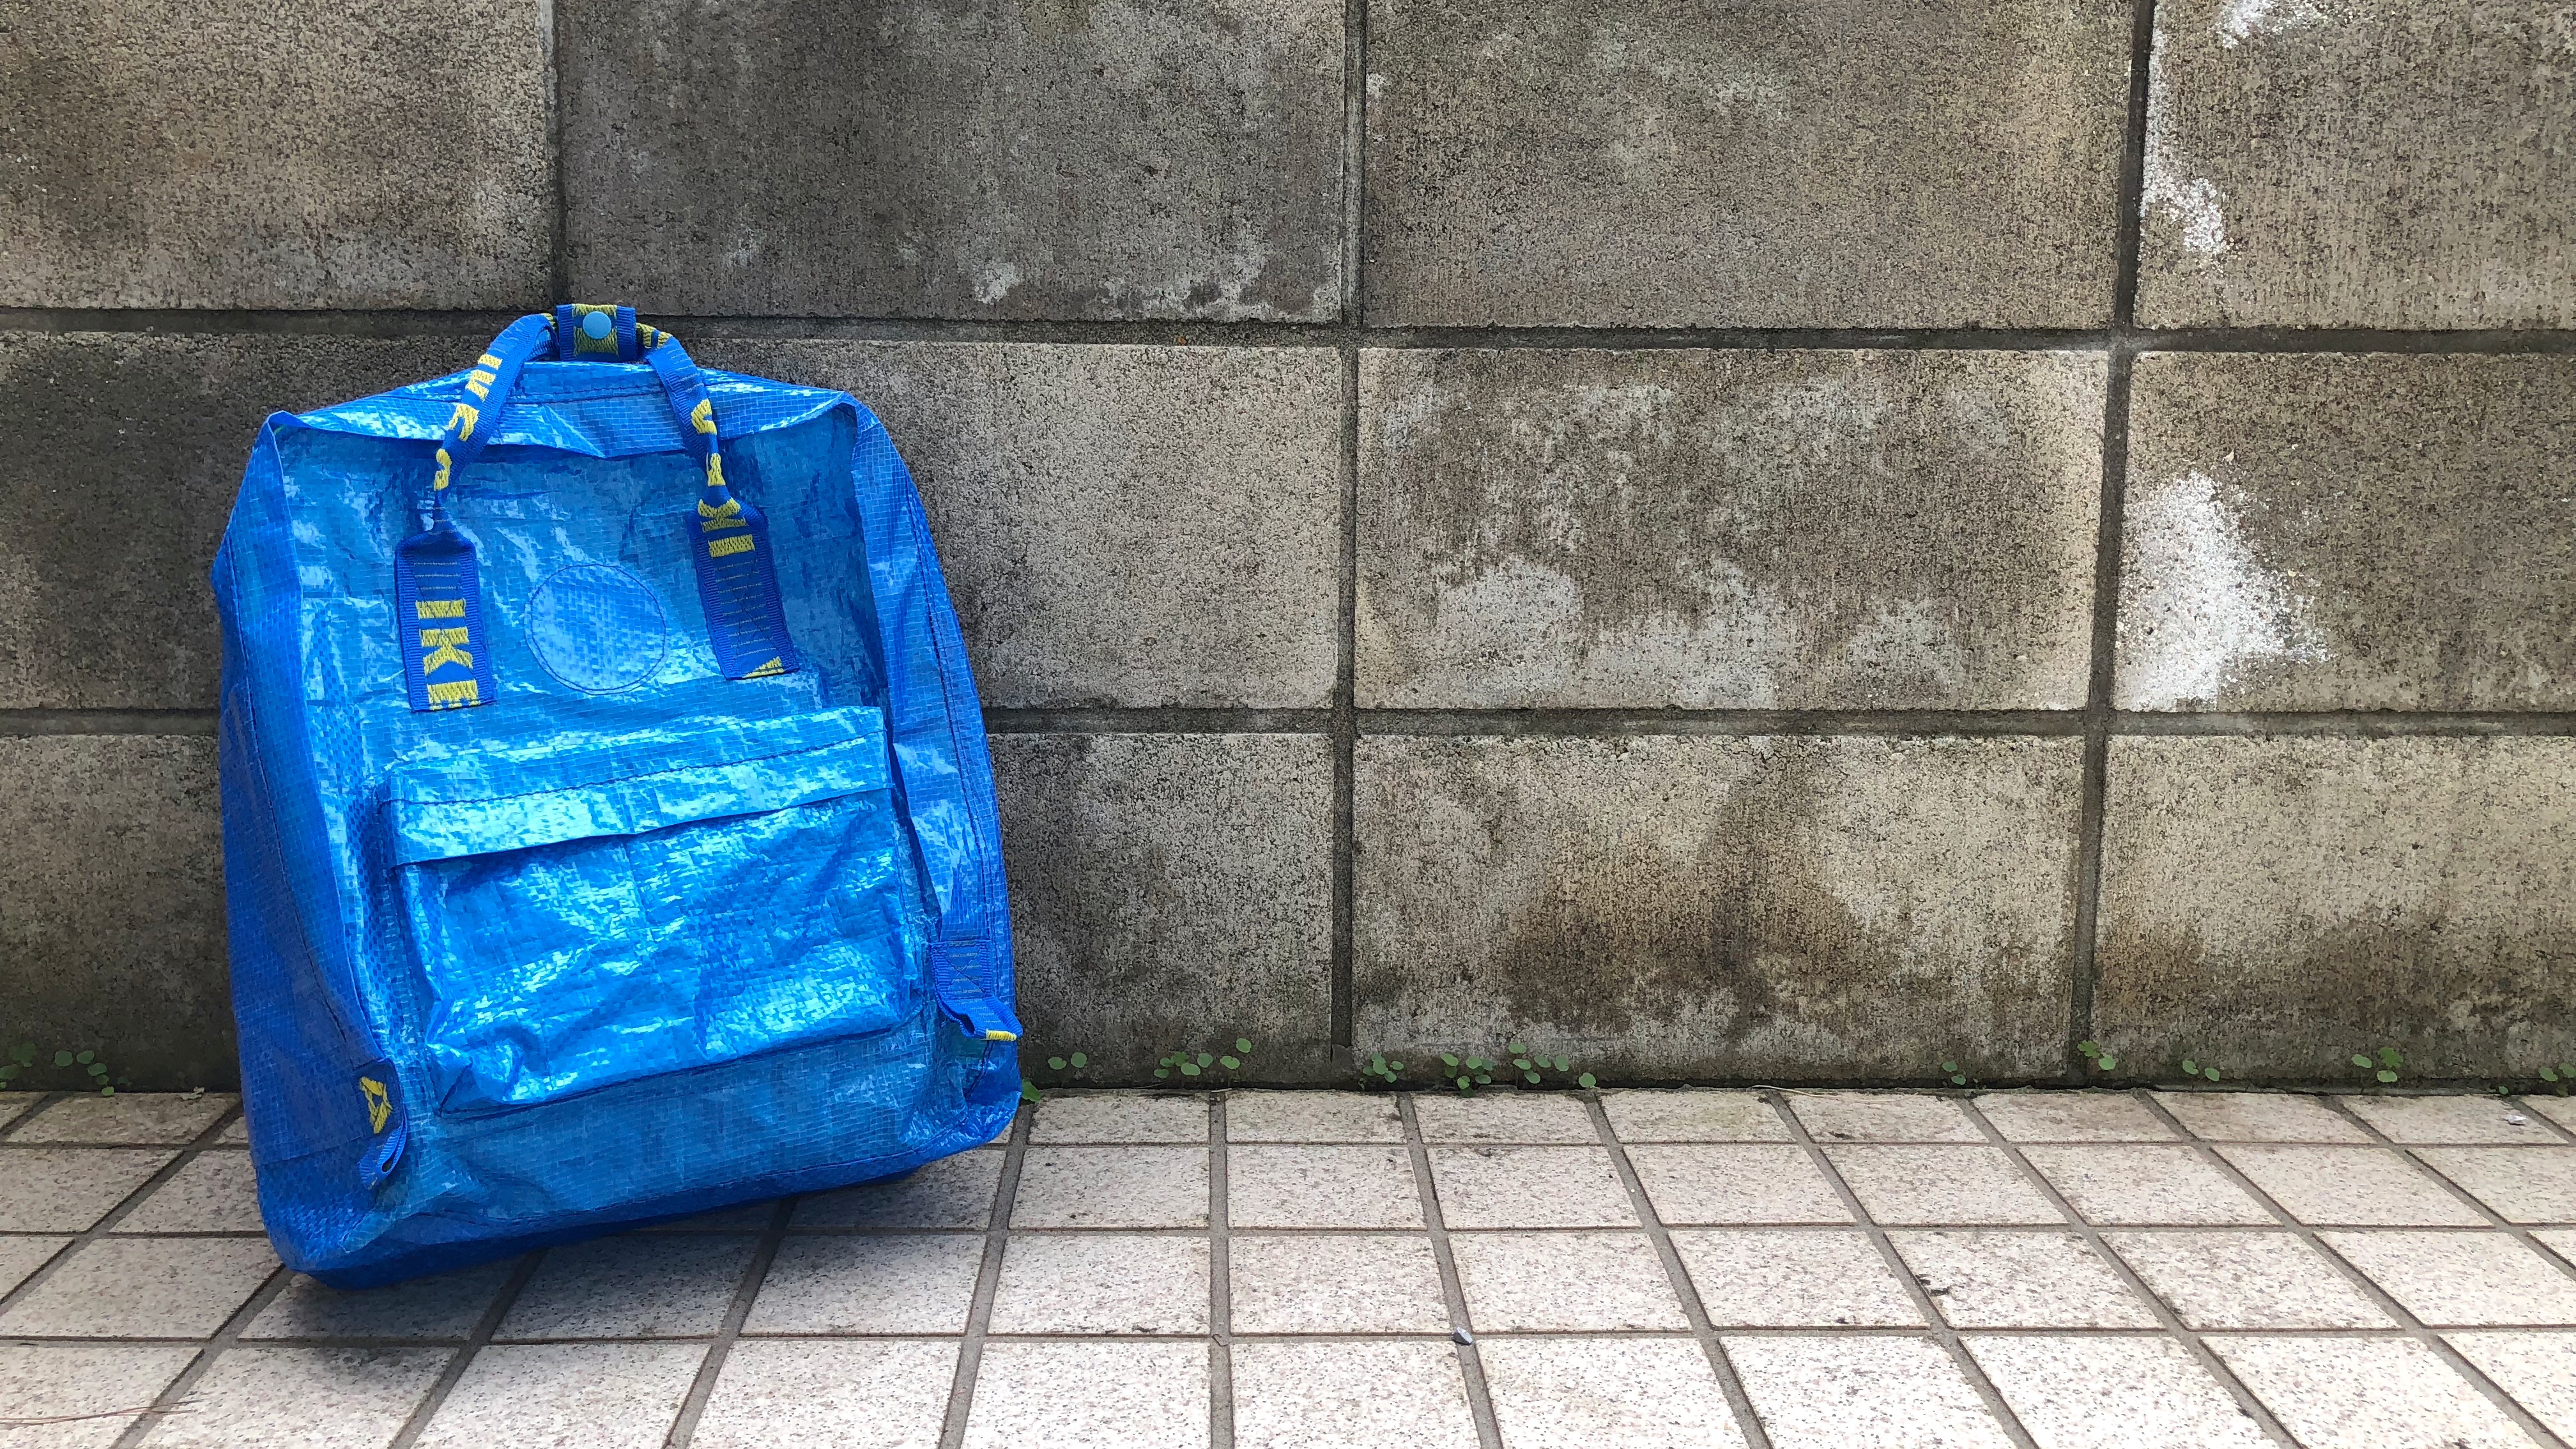
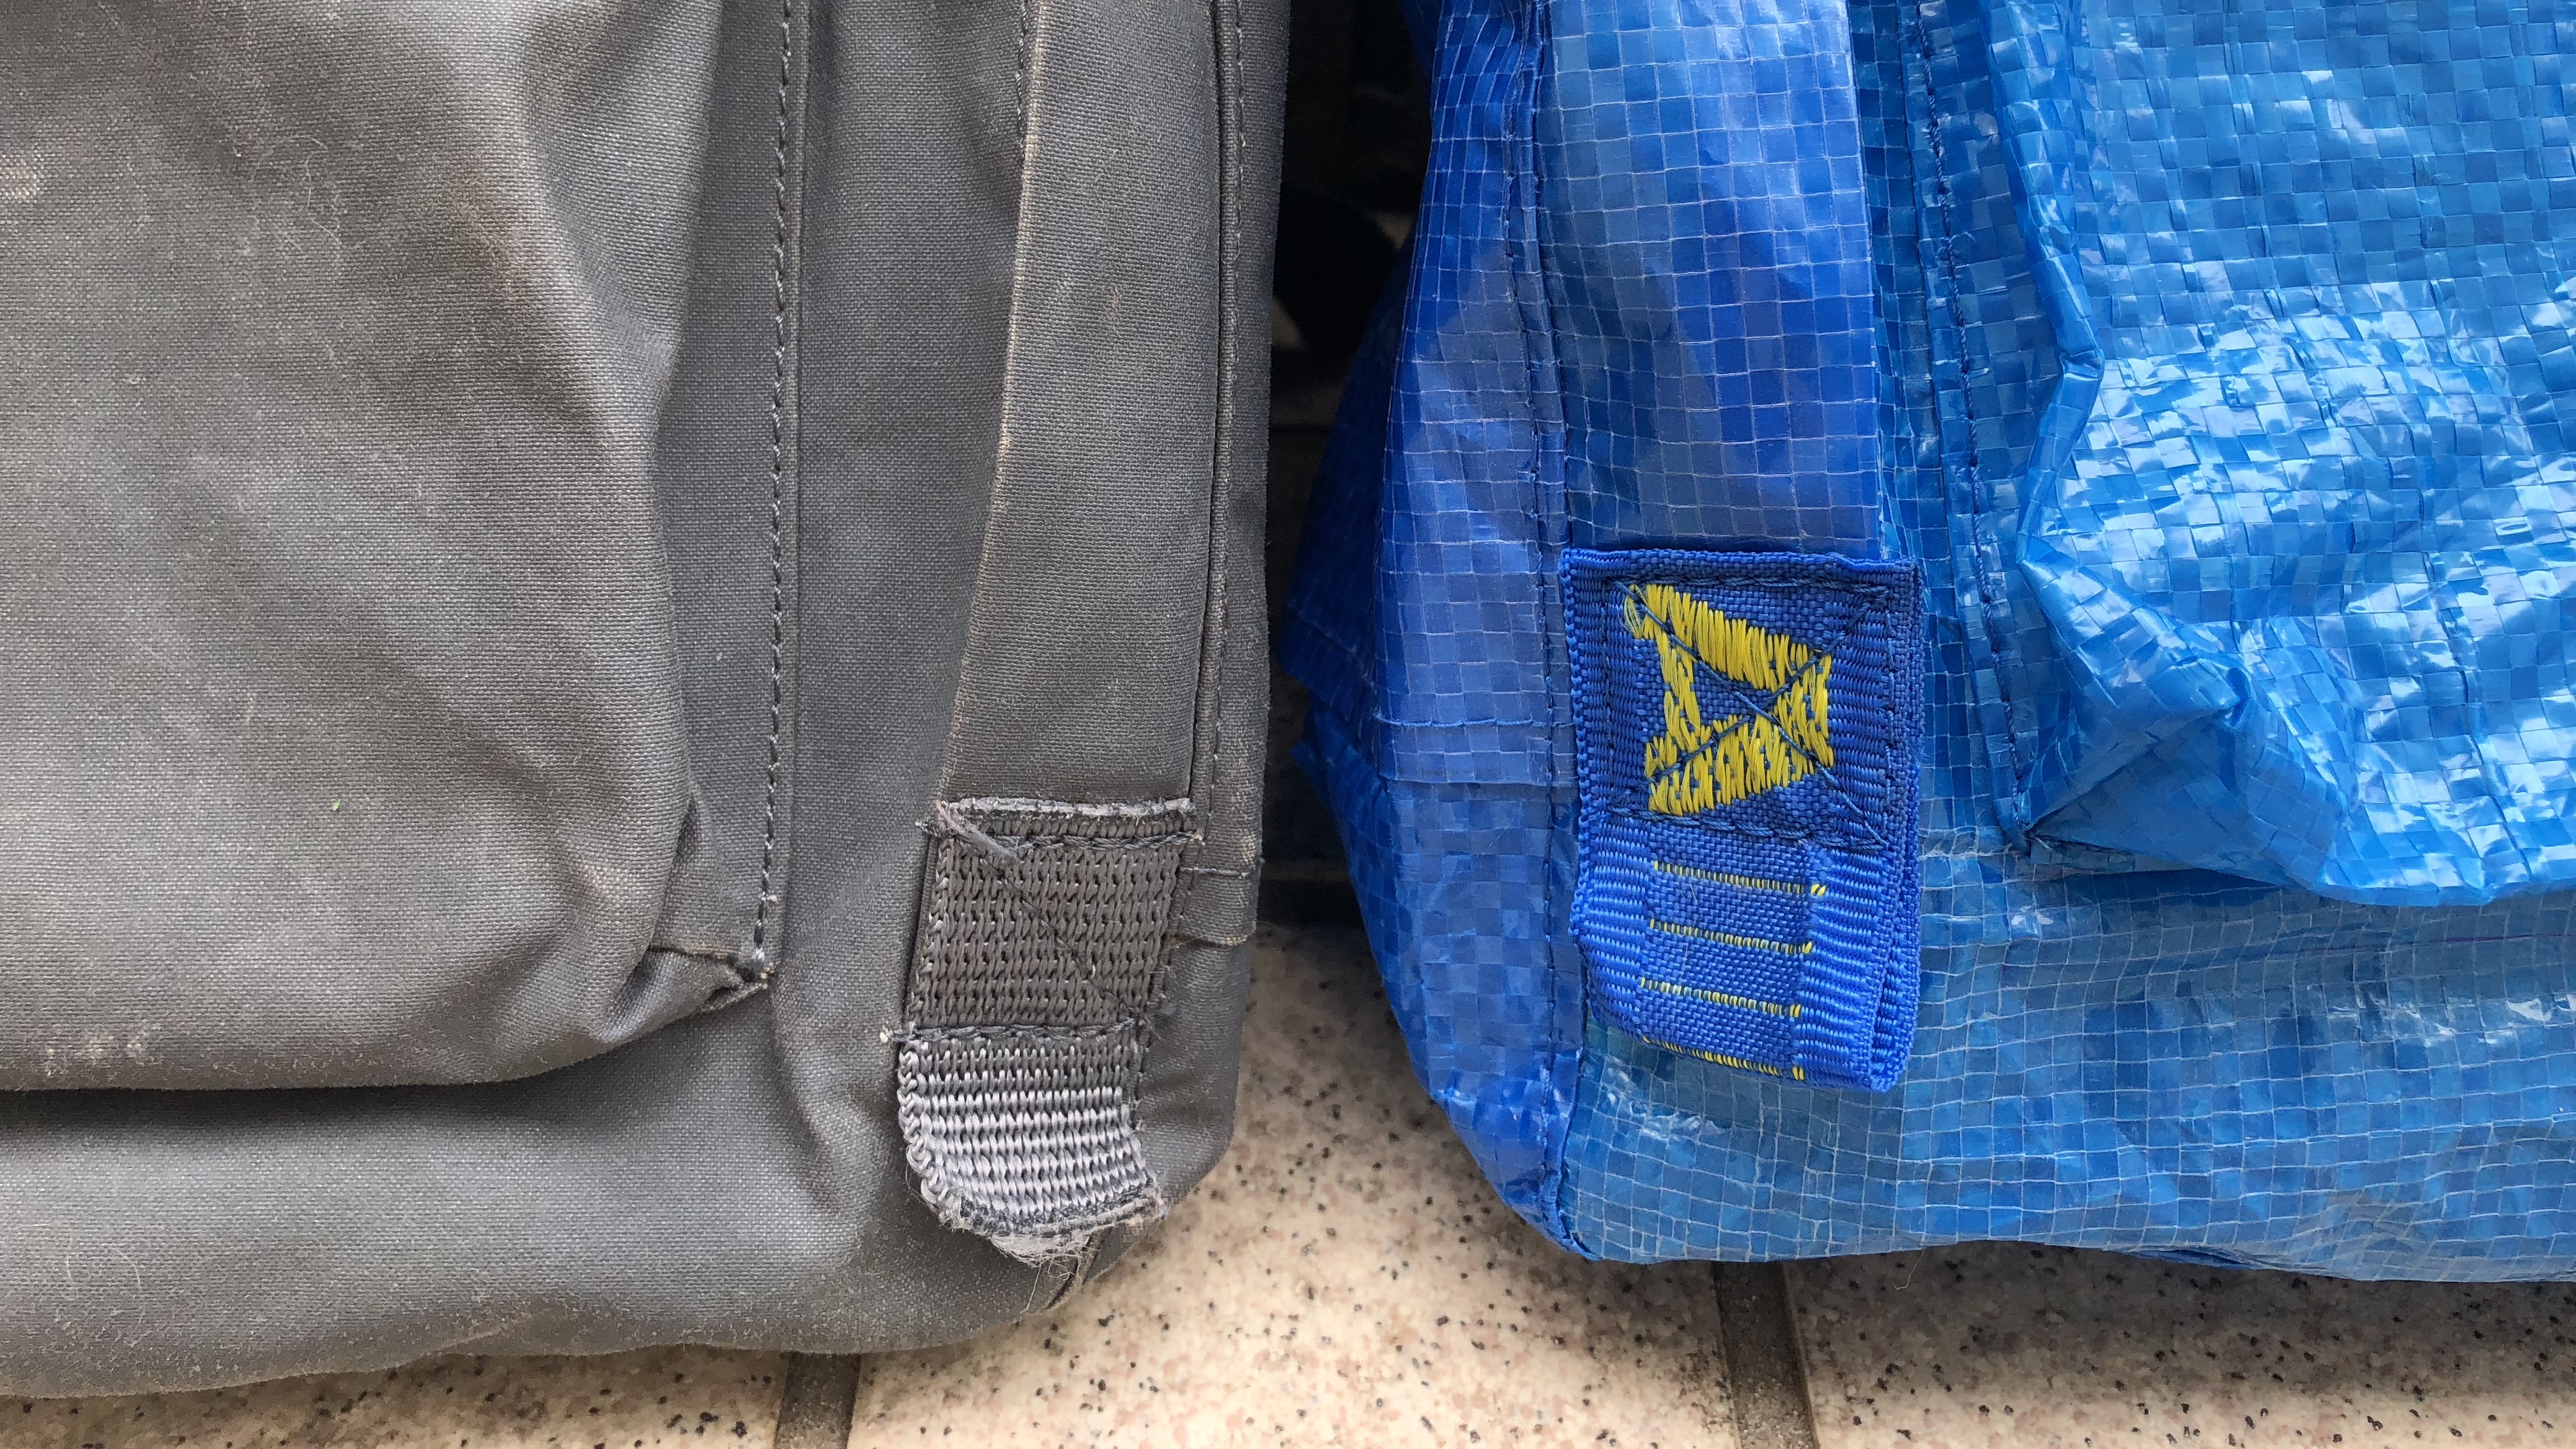
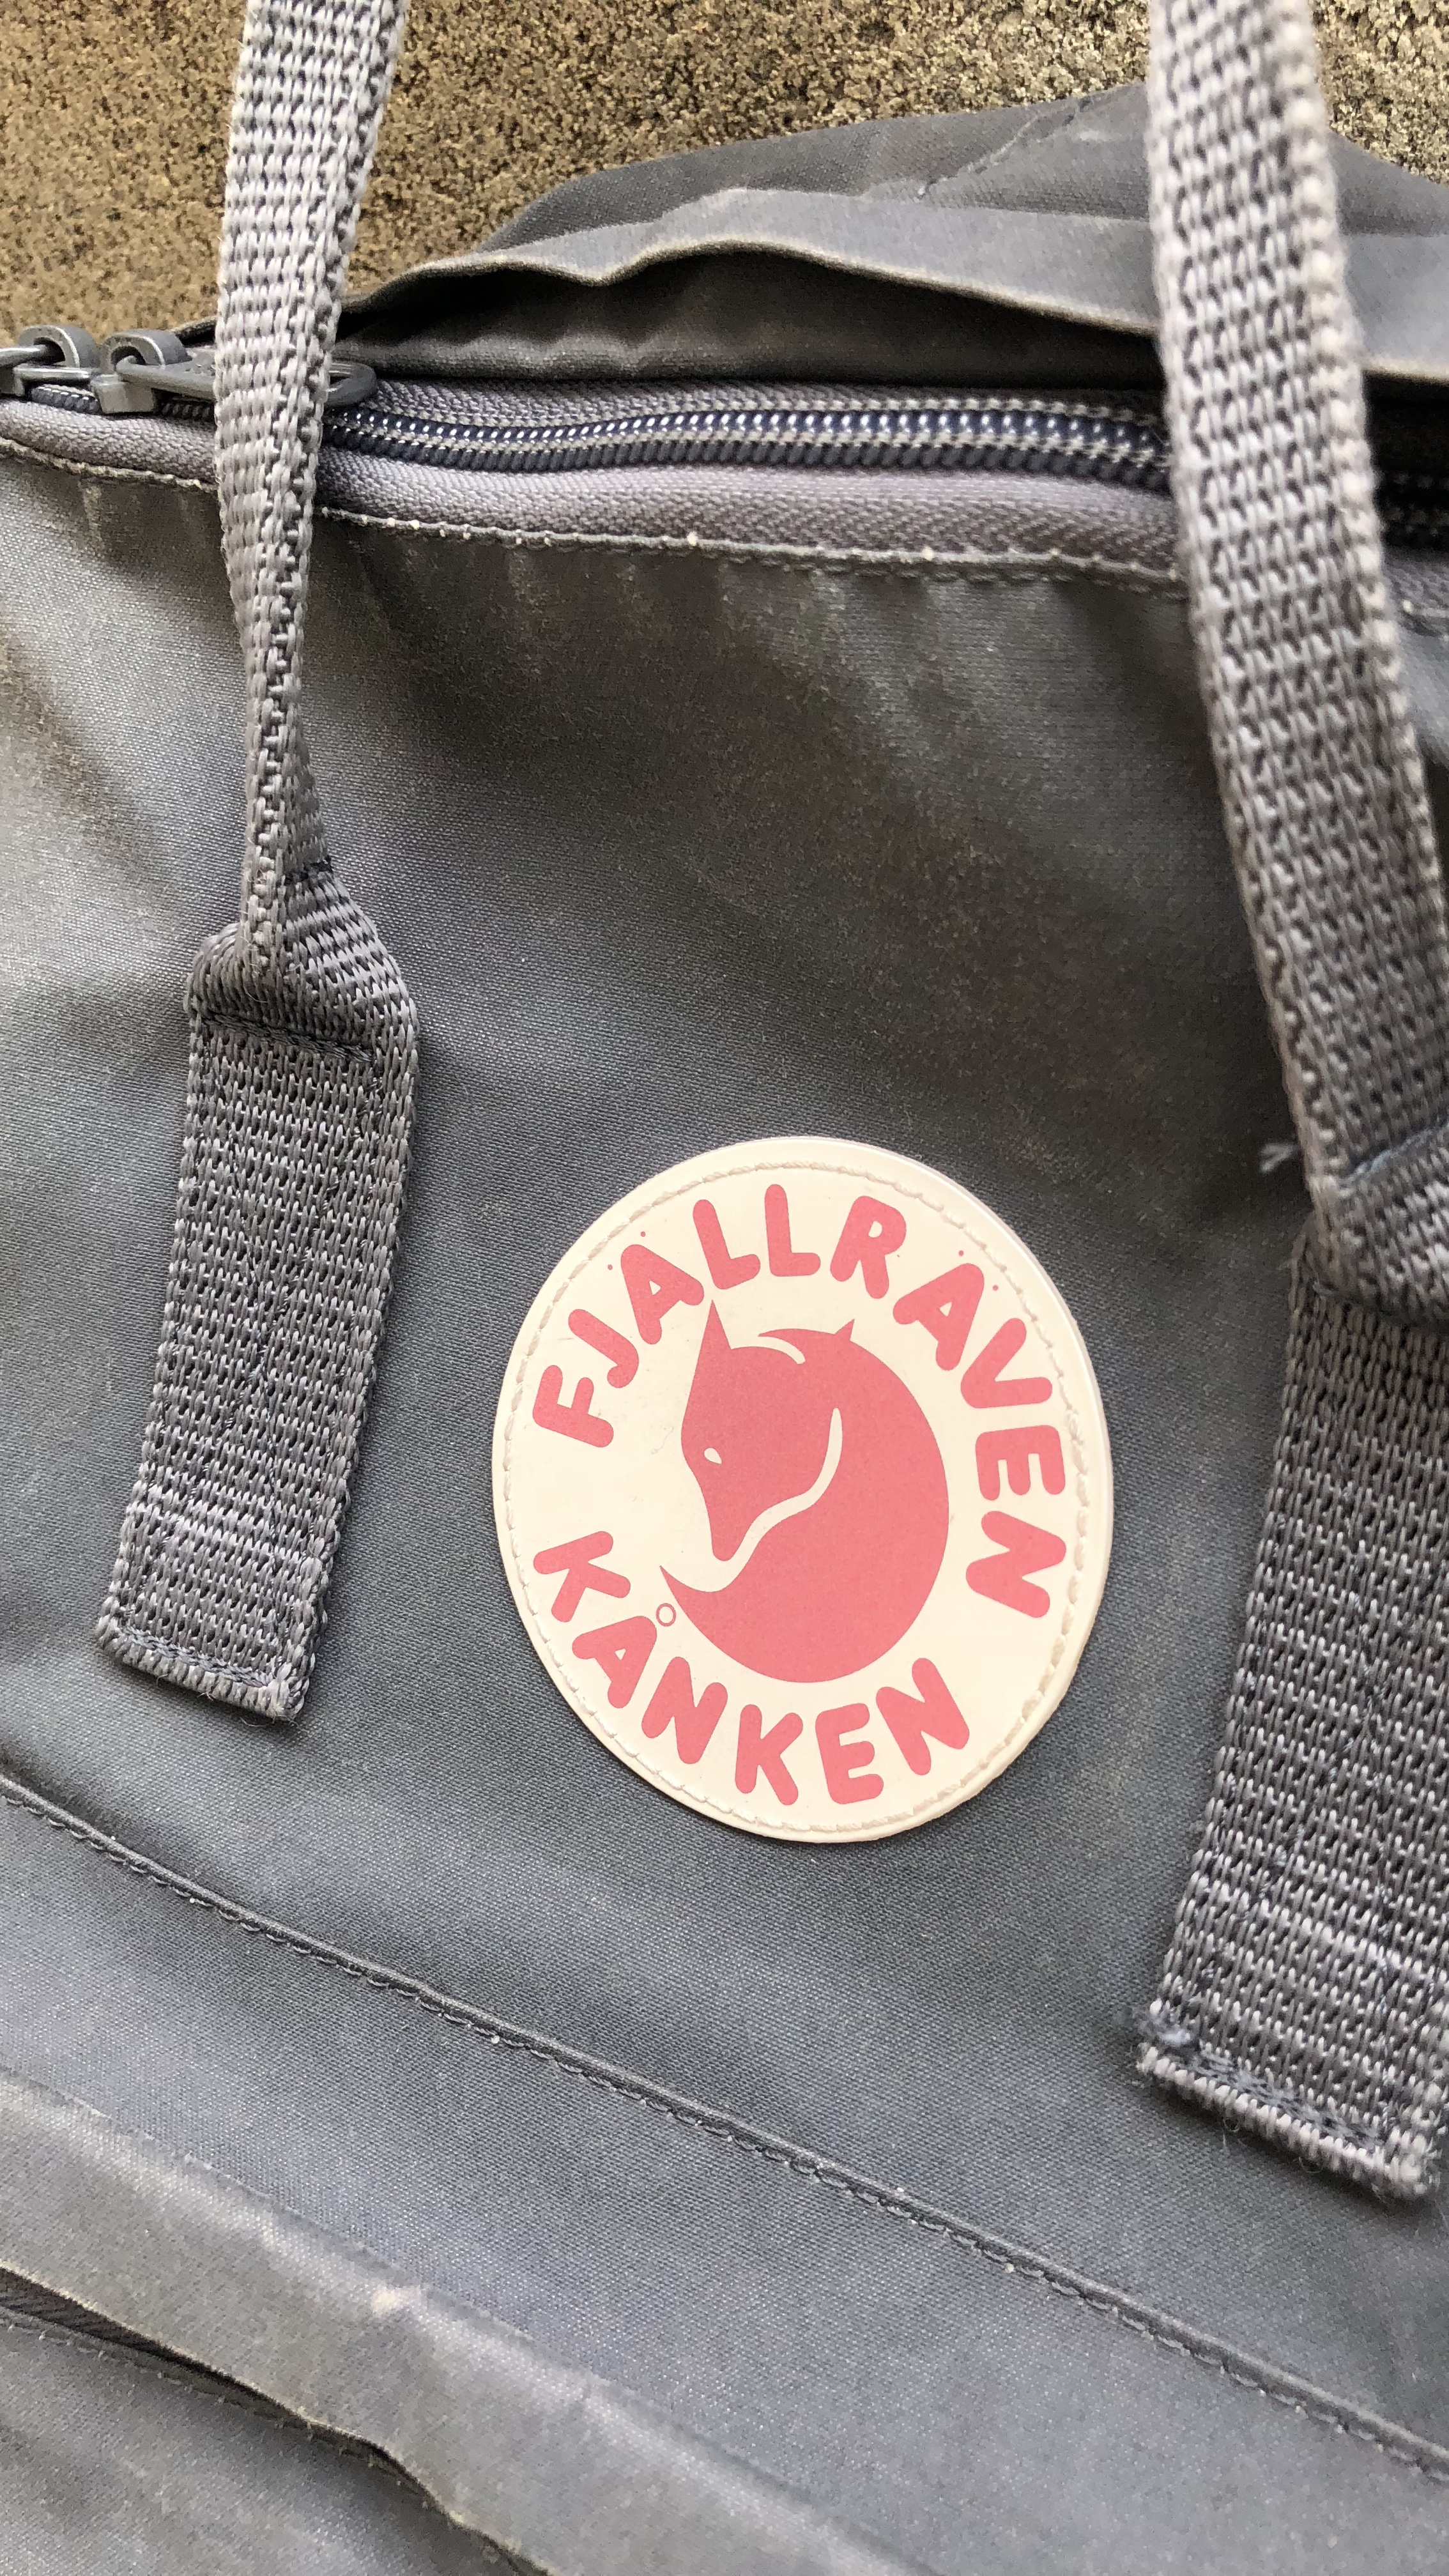
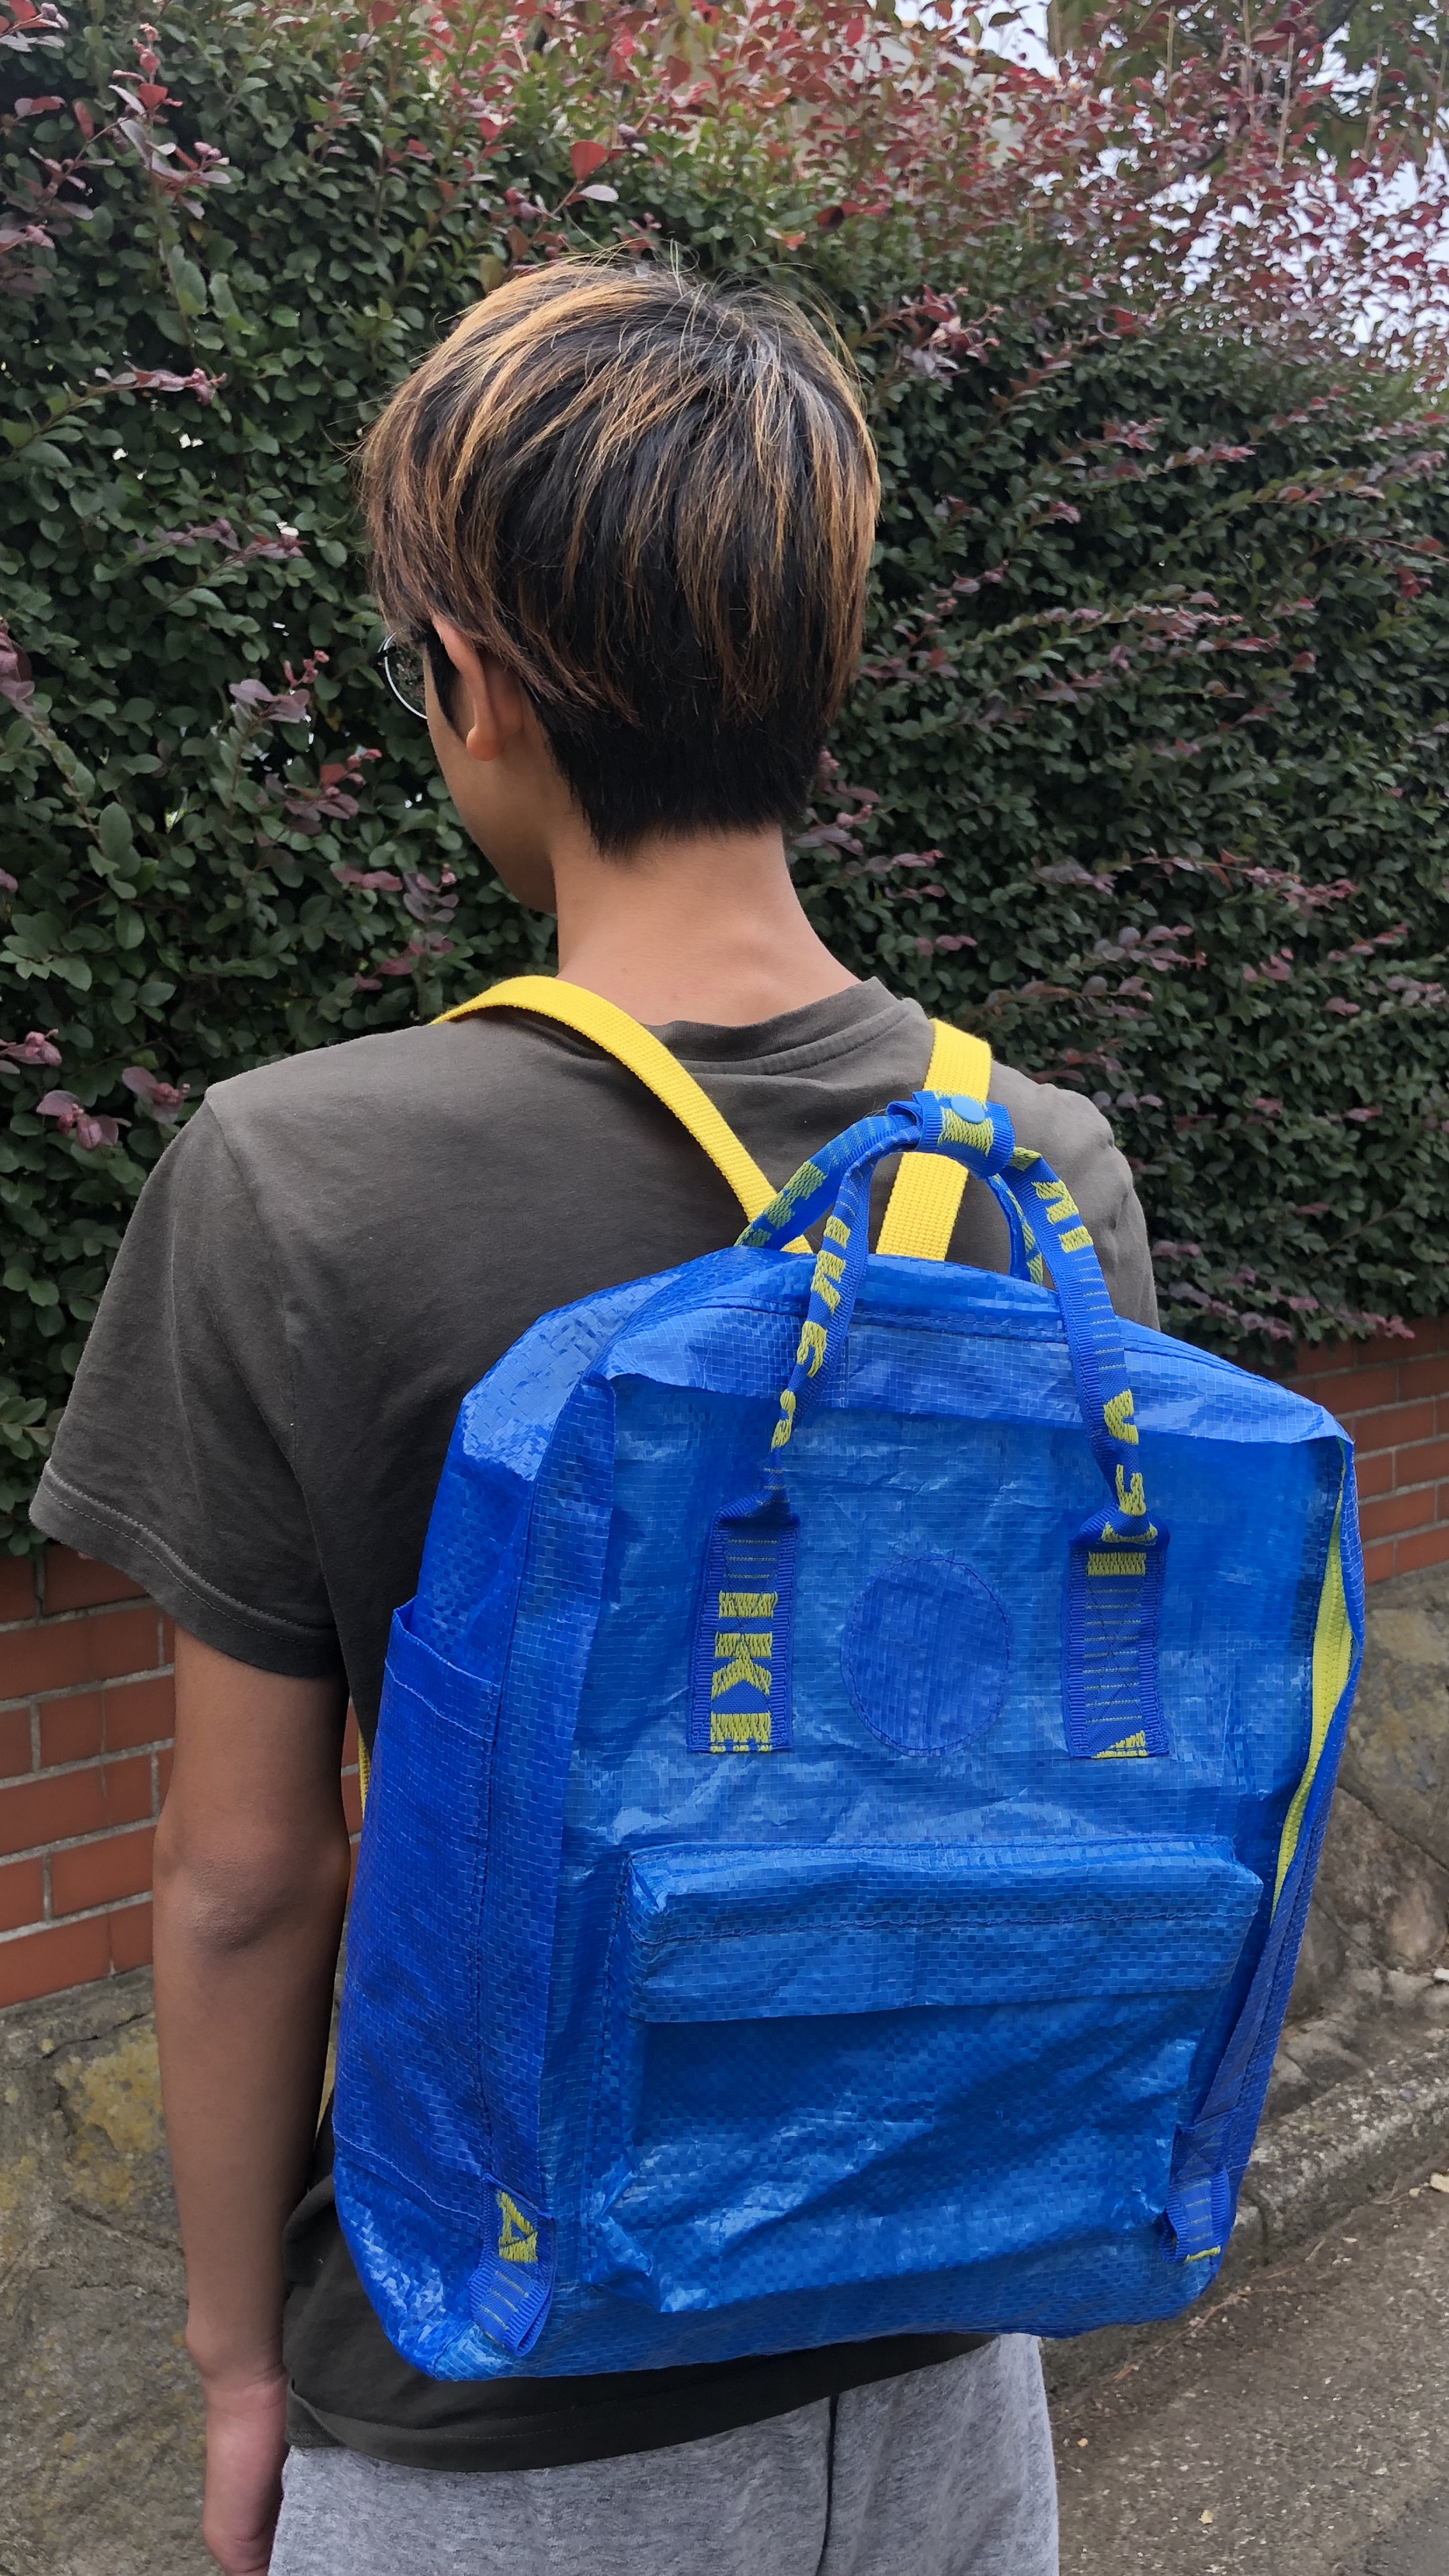
Once in a while, I make something just because of curiosity. Like this backpack that I made a couple of days ago. Perhaps you’re familiar with the general shape, that reminds you of the Kanken bag made by the Swedish company Fjällräven. Or perhaps you recognize the material, that is the Frakta shopping bag by IKEA.

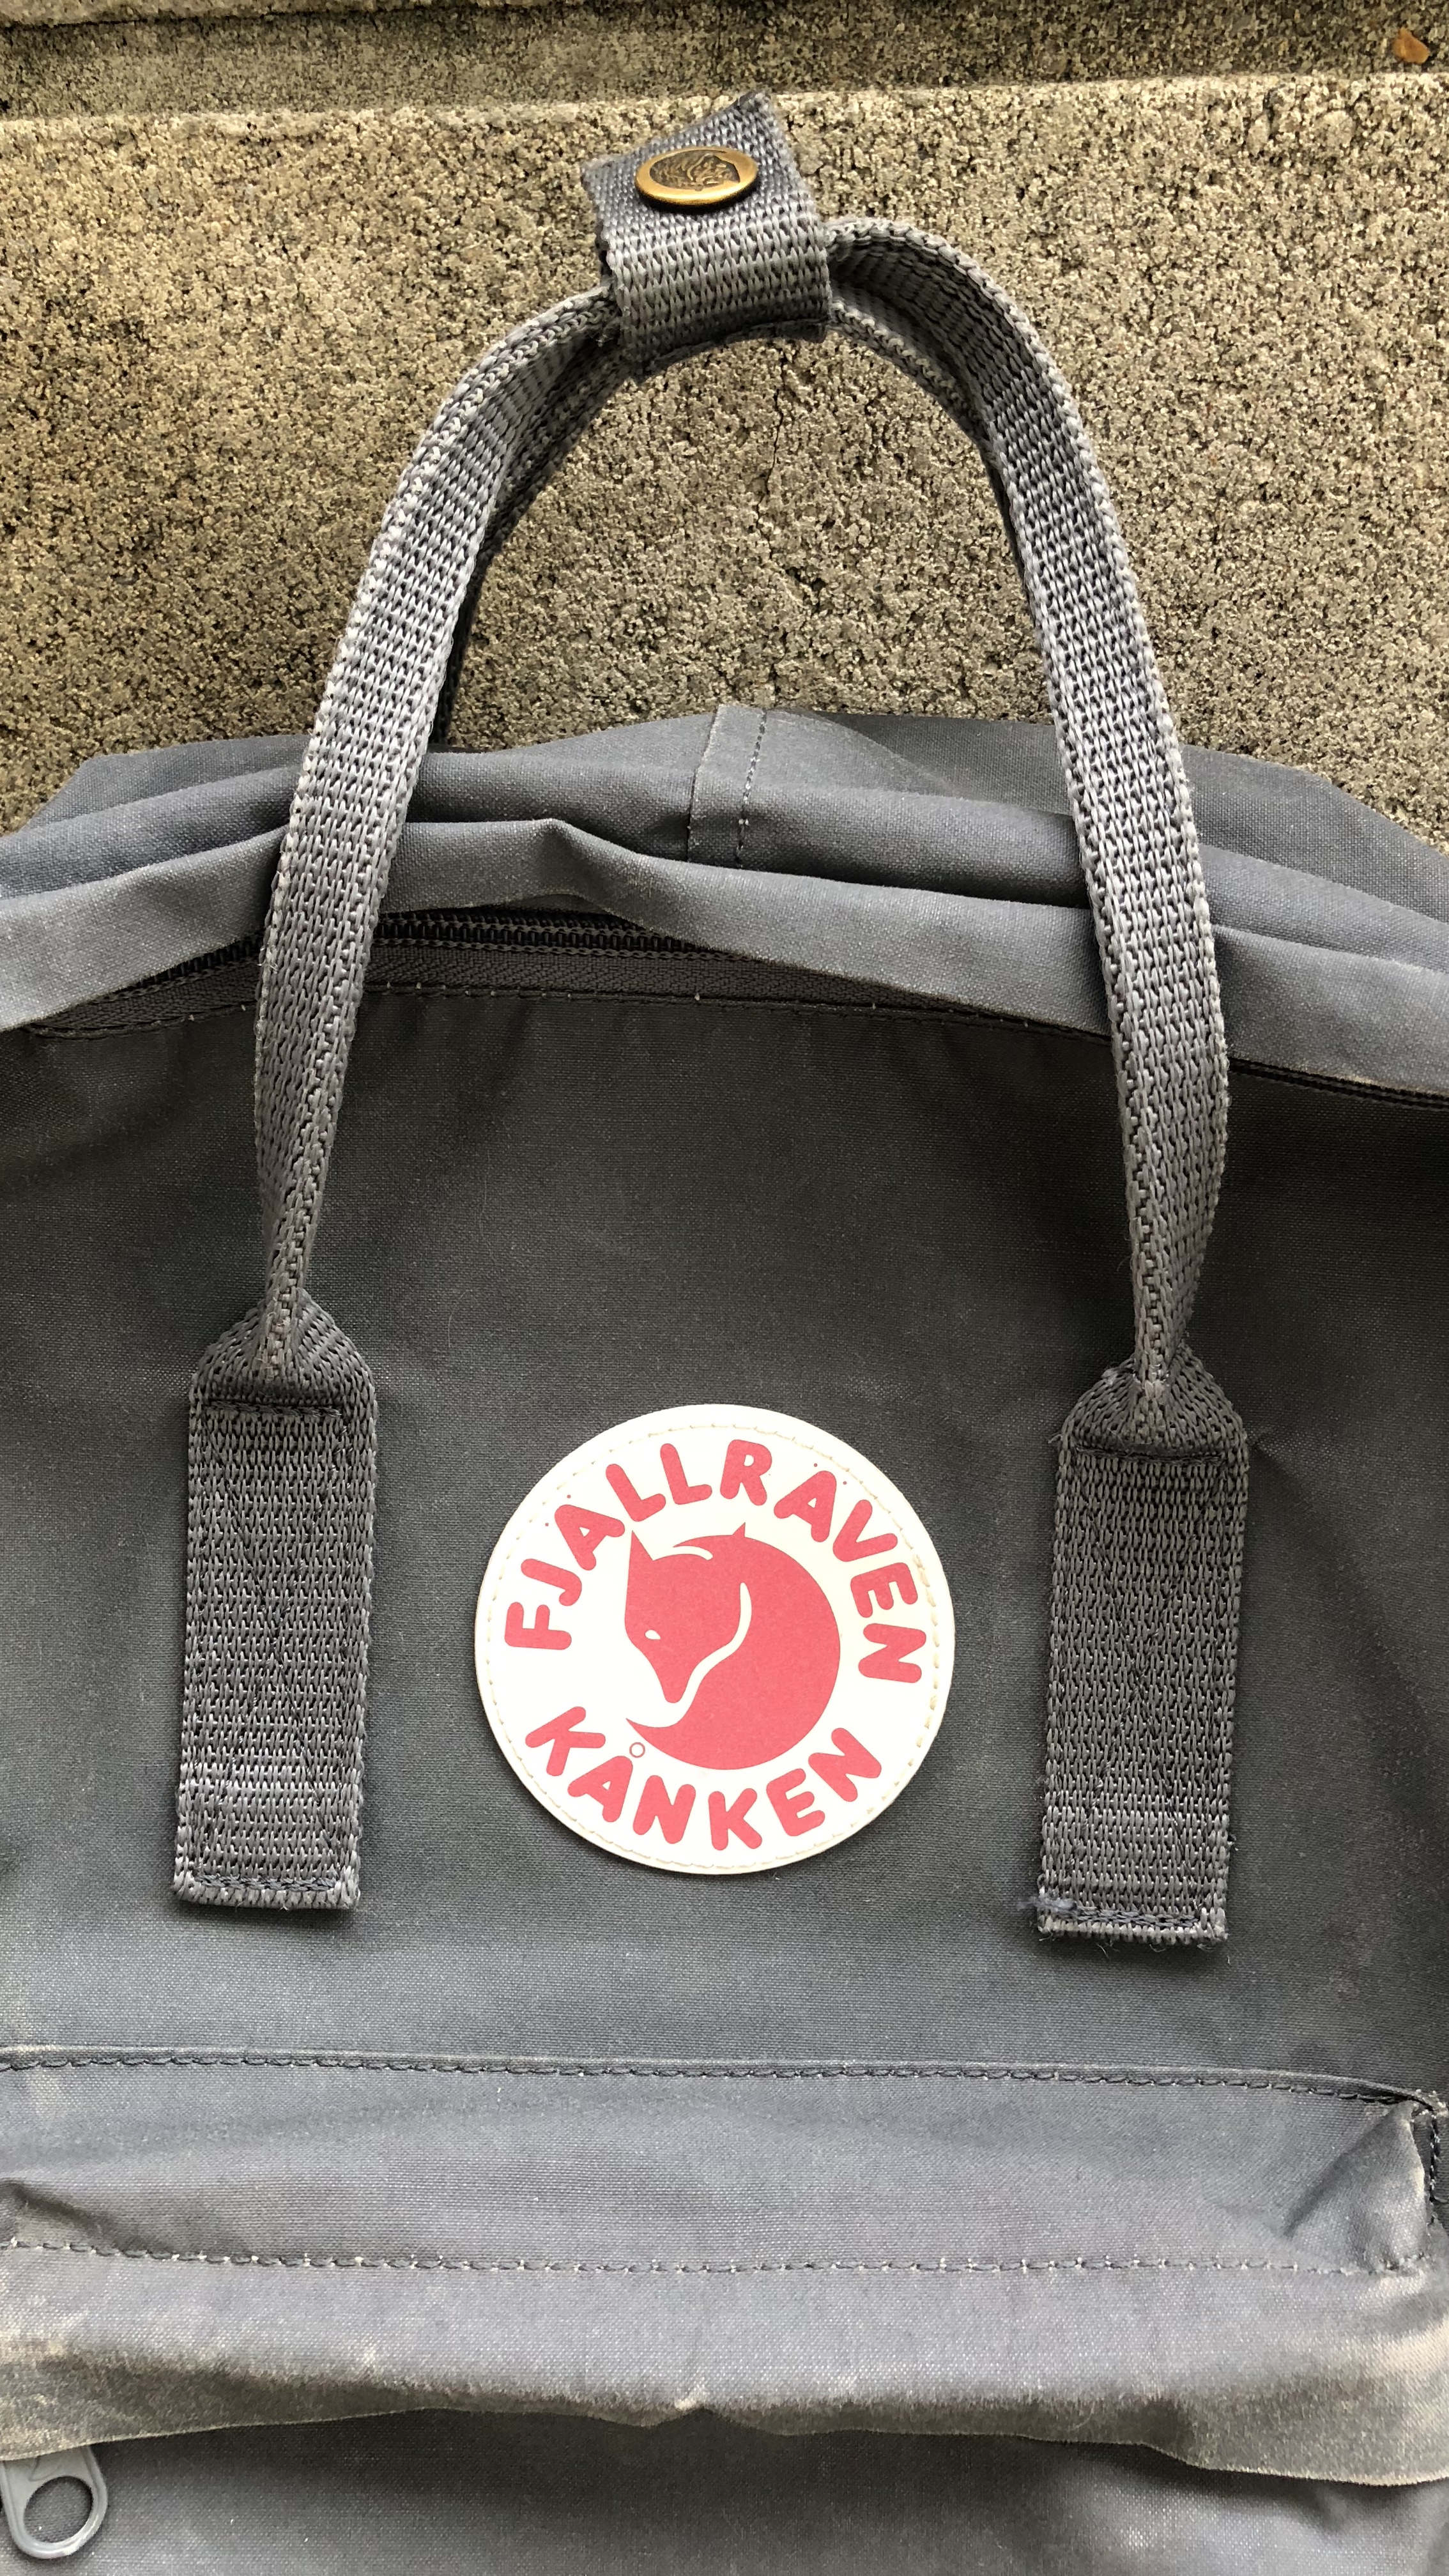
I have several Kanken backpacks, from the mini, original, and big. My son and husband also use them. They’re perfect everyday bag, made from strong materials in many choices of colors. This is not an advertising for Kanken backpacks though, I just really like them. That is why I want to copy it, just to see whether I can.
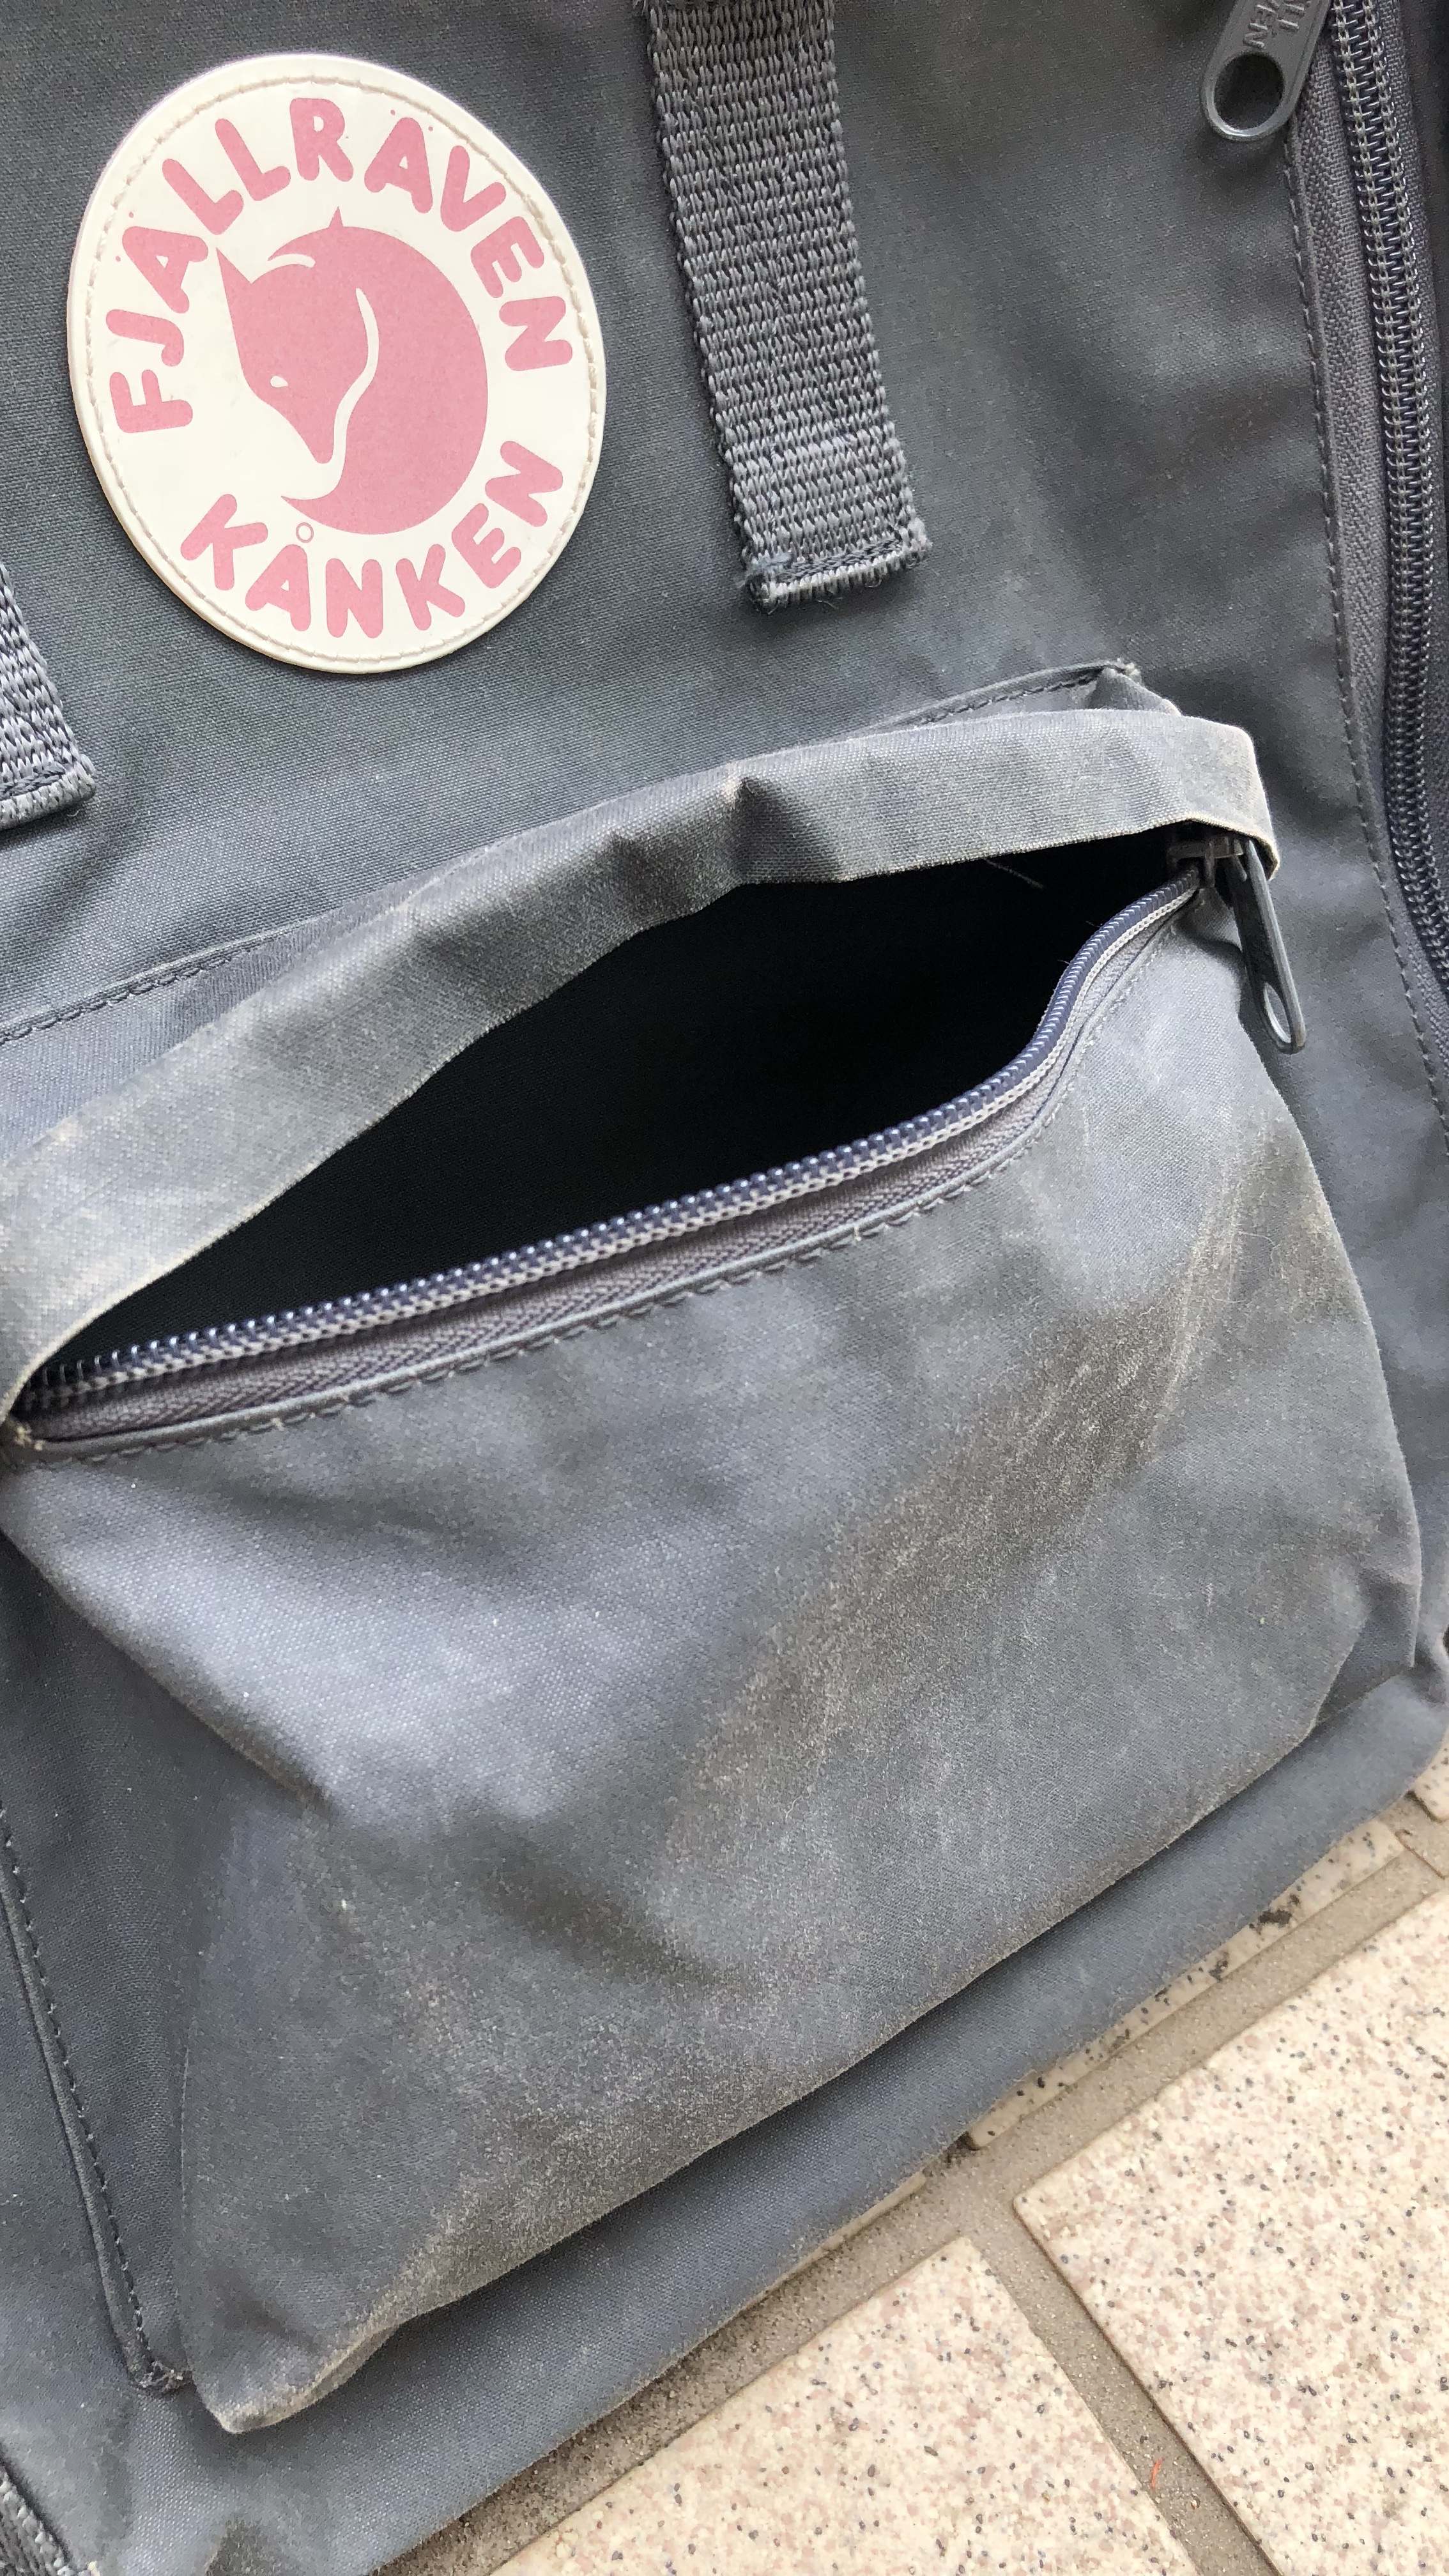
The Kanken backpack is actually a good candidate for copying. The shape is really simple, this bag is literally consisted of a bunch of rectangles with rounded corners. Only the front piece and the bottom part of front pocket are not rectangles, but still some sort of rectangle on top of wider rectangle.
There are not many layers in the bag. All the stitches can be examined easily from both the right and the wrong sides. And finally, all the measurements are round numbers in metrics.
I put a picture of my Kanken x IKEA backpack in my Instagram yesterday, and was a bit surprised of how many people that liked it. There is also a lot of questions about it especially about the pattern and the specific ways to make this backpack.
There is no pattern and I didn’t make a pattern of the backpack. Since it is all just a bunch of rectangles, I just measured my Kanken bag, drew the measurements on the IKEA bag and added seam allowances. I didn’t cut all pieces at once, just the ones that I was about to sew. Of course this is not the most efficient way of using the materials as I just cut as I went.
One of the most interesting thing to think when sewing something is the order of sewing. Which one goes with which one first, and which one goes on top of another. When I sew a ready made pattern with full instructions, I always love to see how the designer presents the order of sewing. It helps me to think in three dimensional ways, which in turn will help when sewing something without instructions.
The order of sewing this backpack is also quite easy to understand. What’s on the surface of one piece should be stitched first before attaching the piece to another. For instance, you have to stitch the front pocket, zipper, zipper cover, and front strap first to the front piece, and the side pockets to the side piece; before attaching the front piece to the side piece.

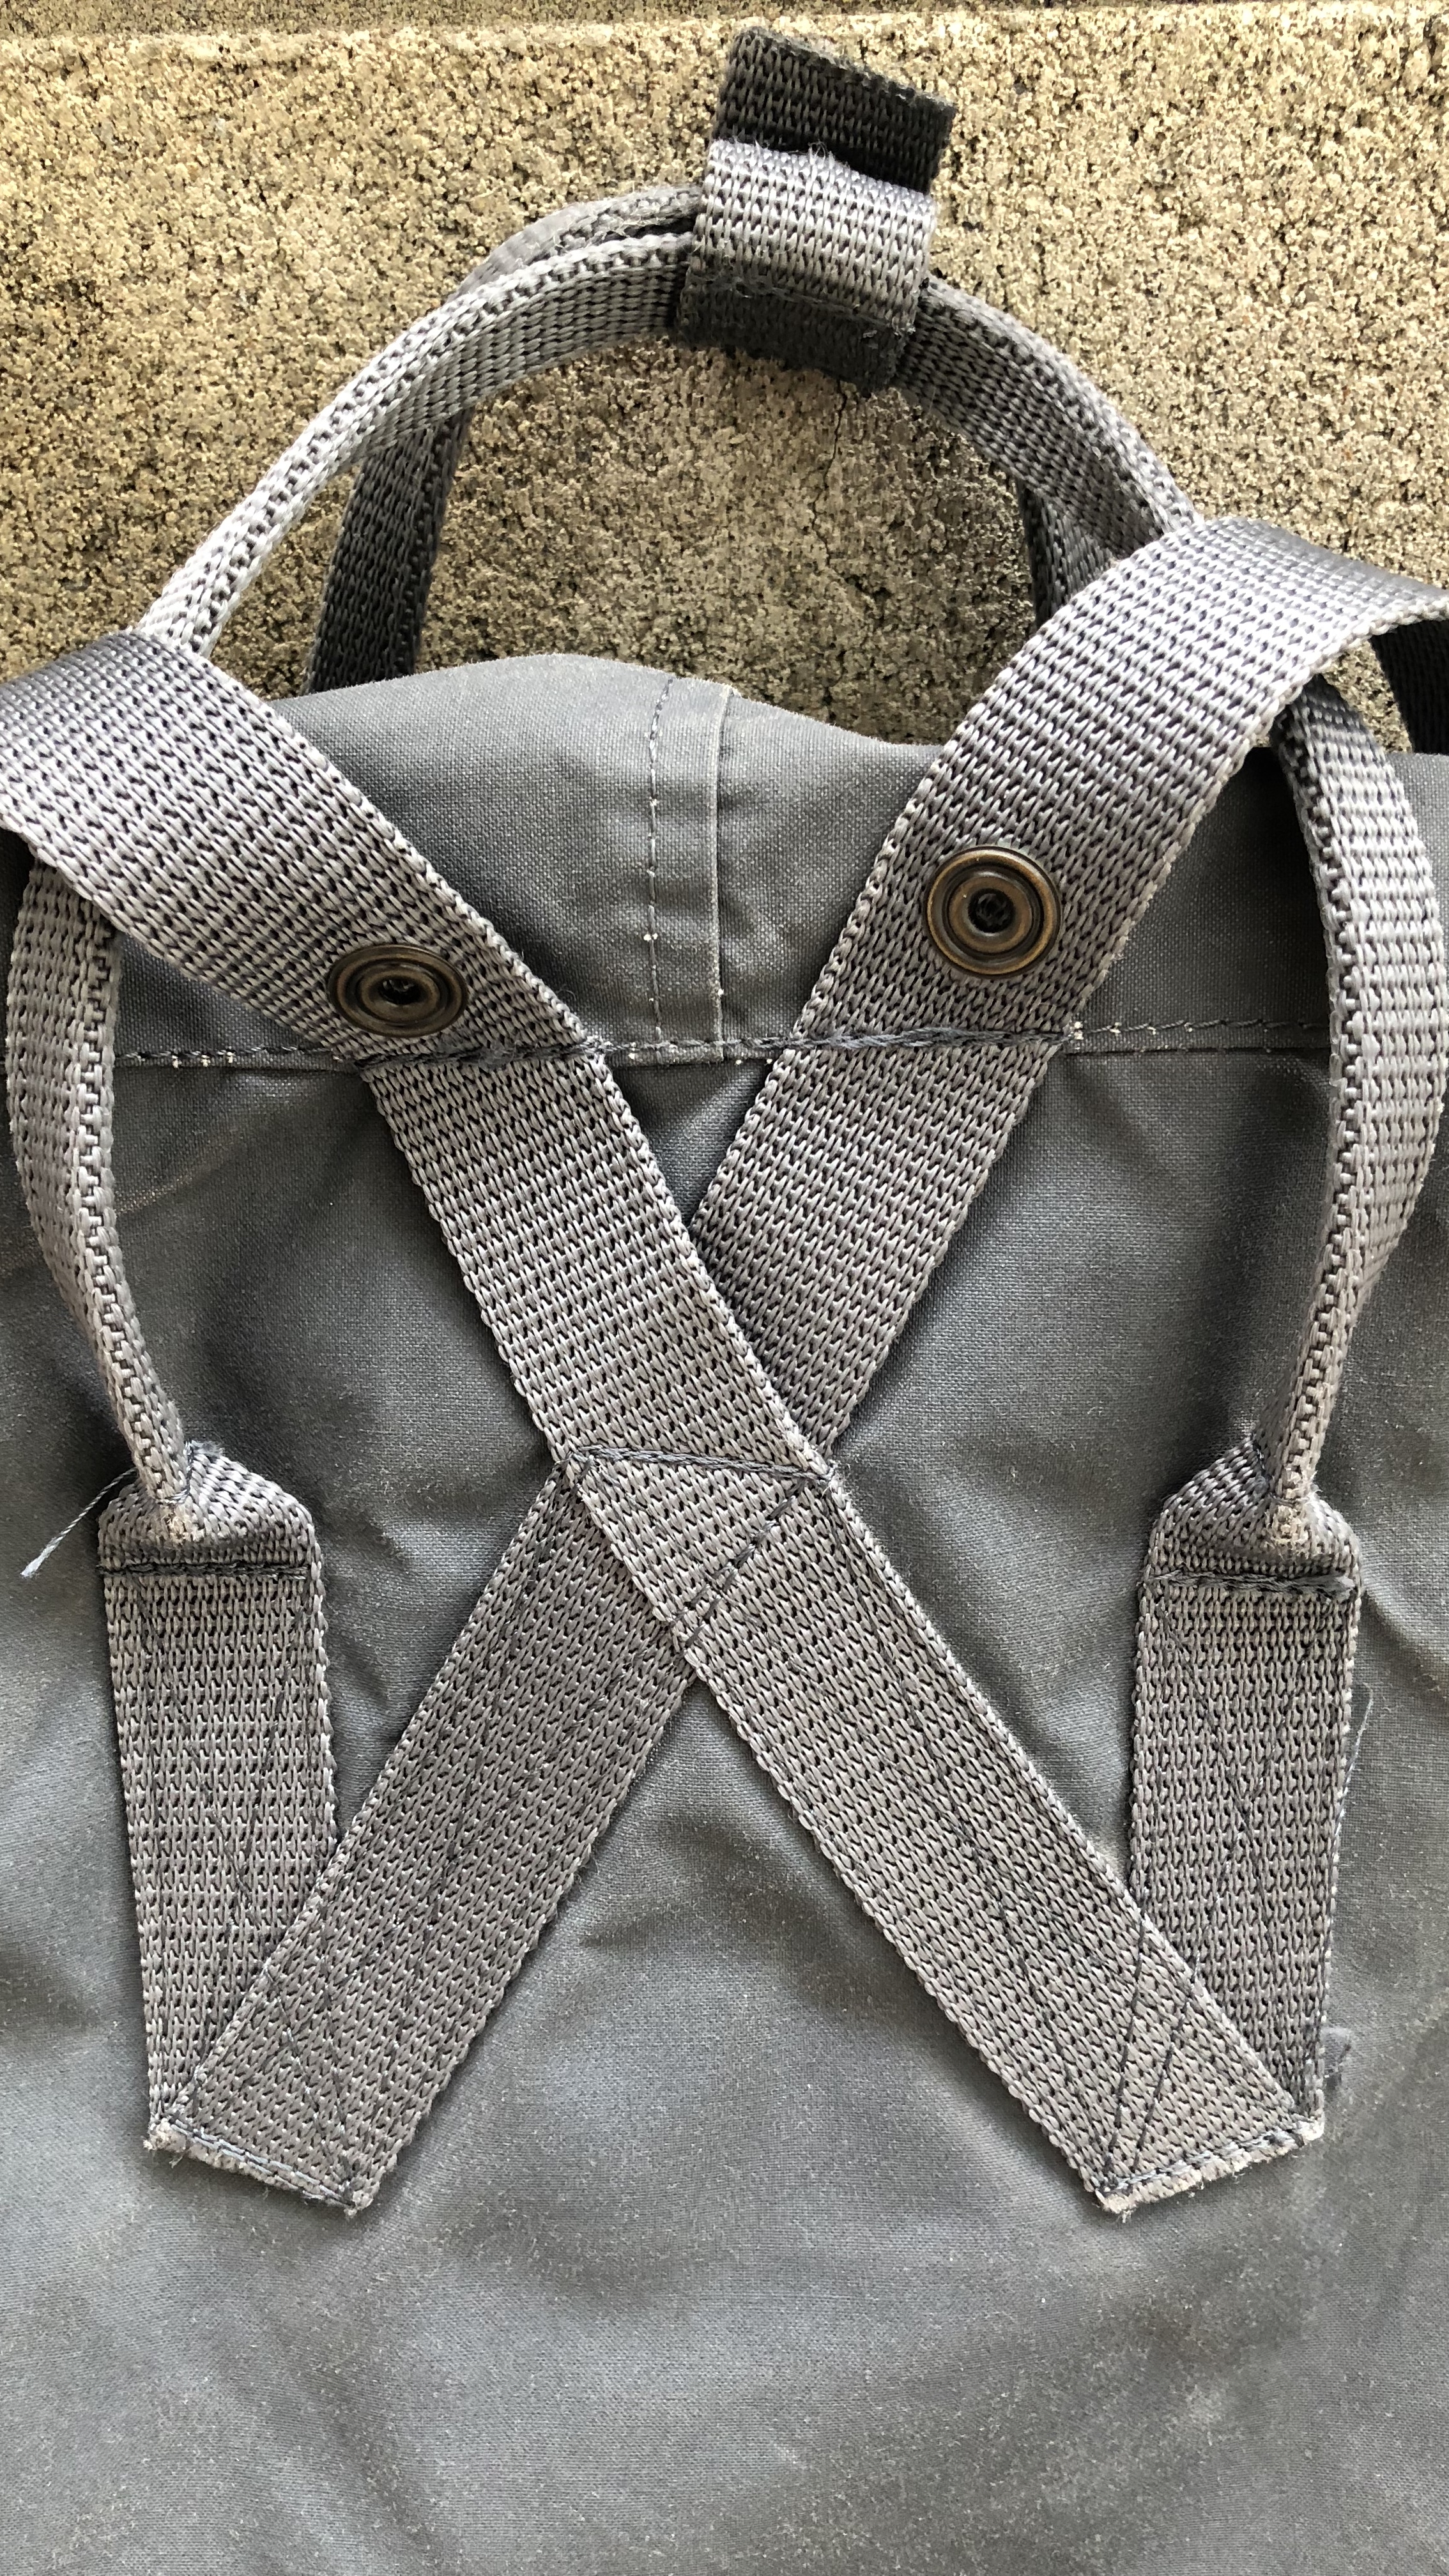
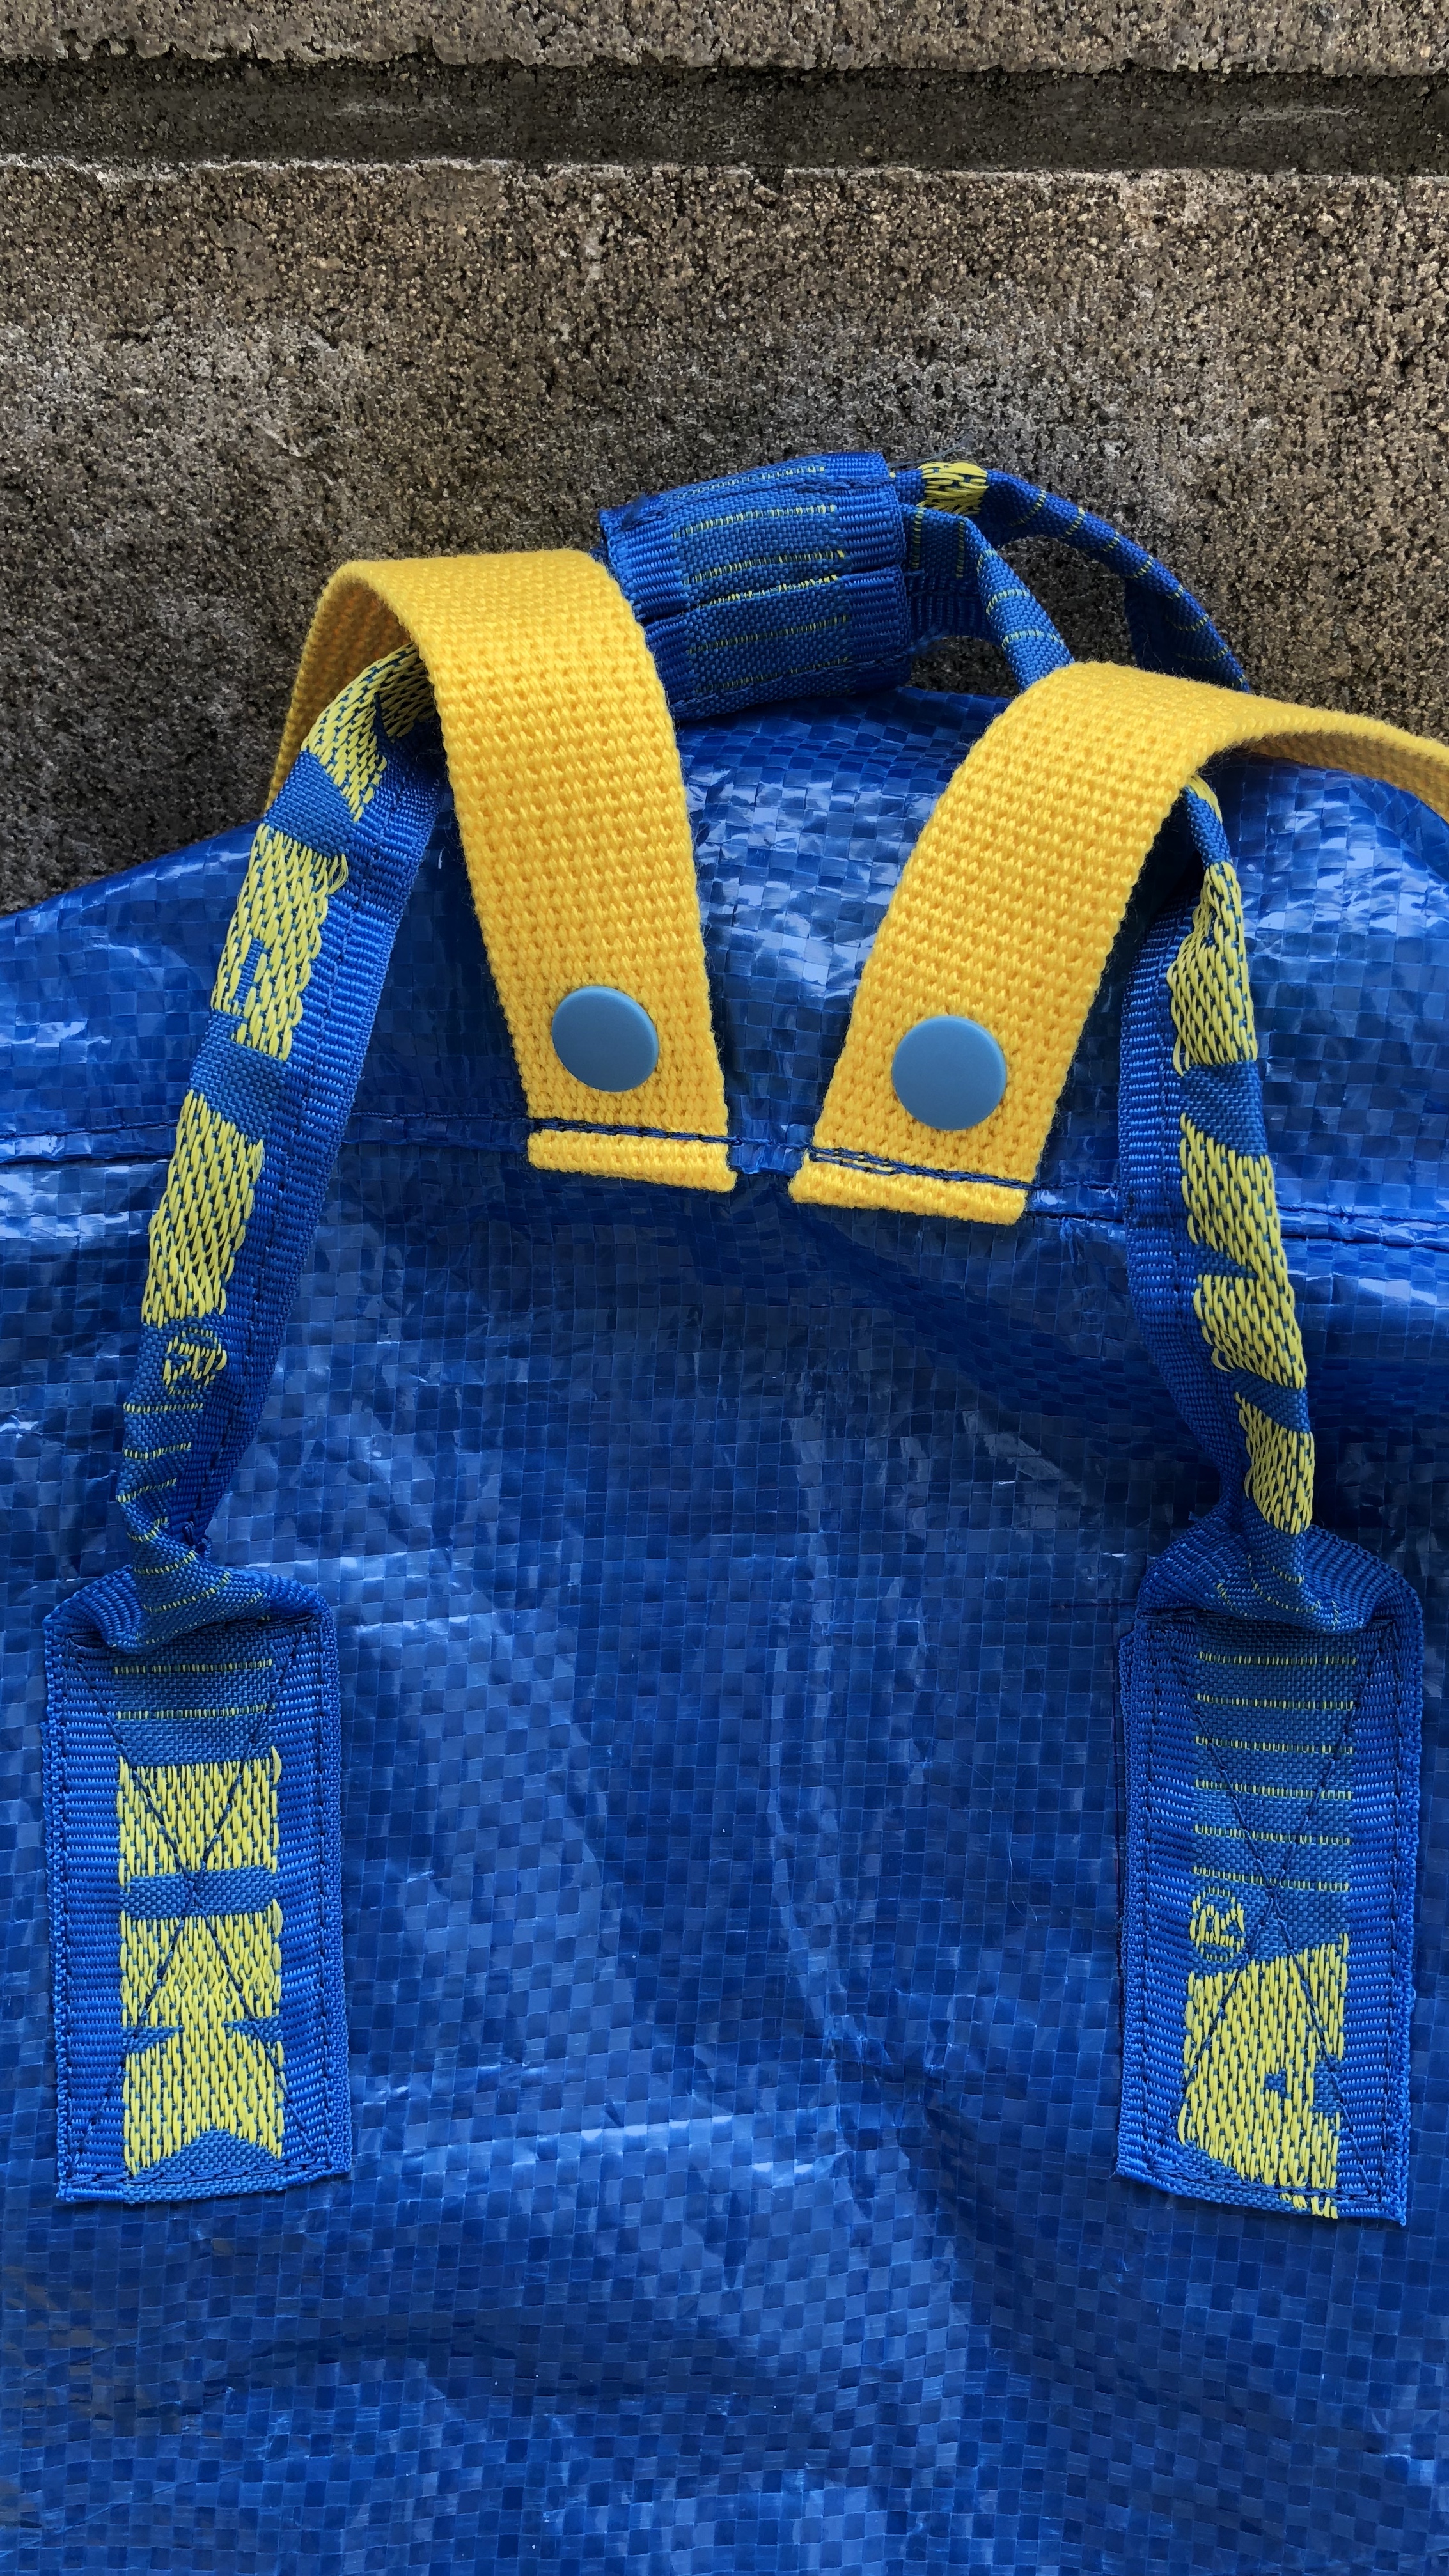
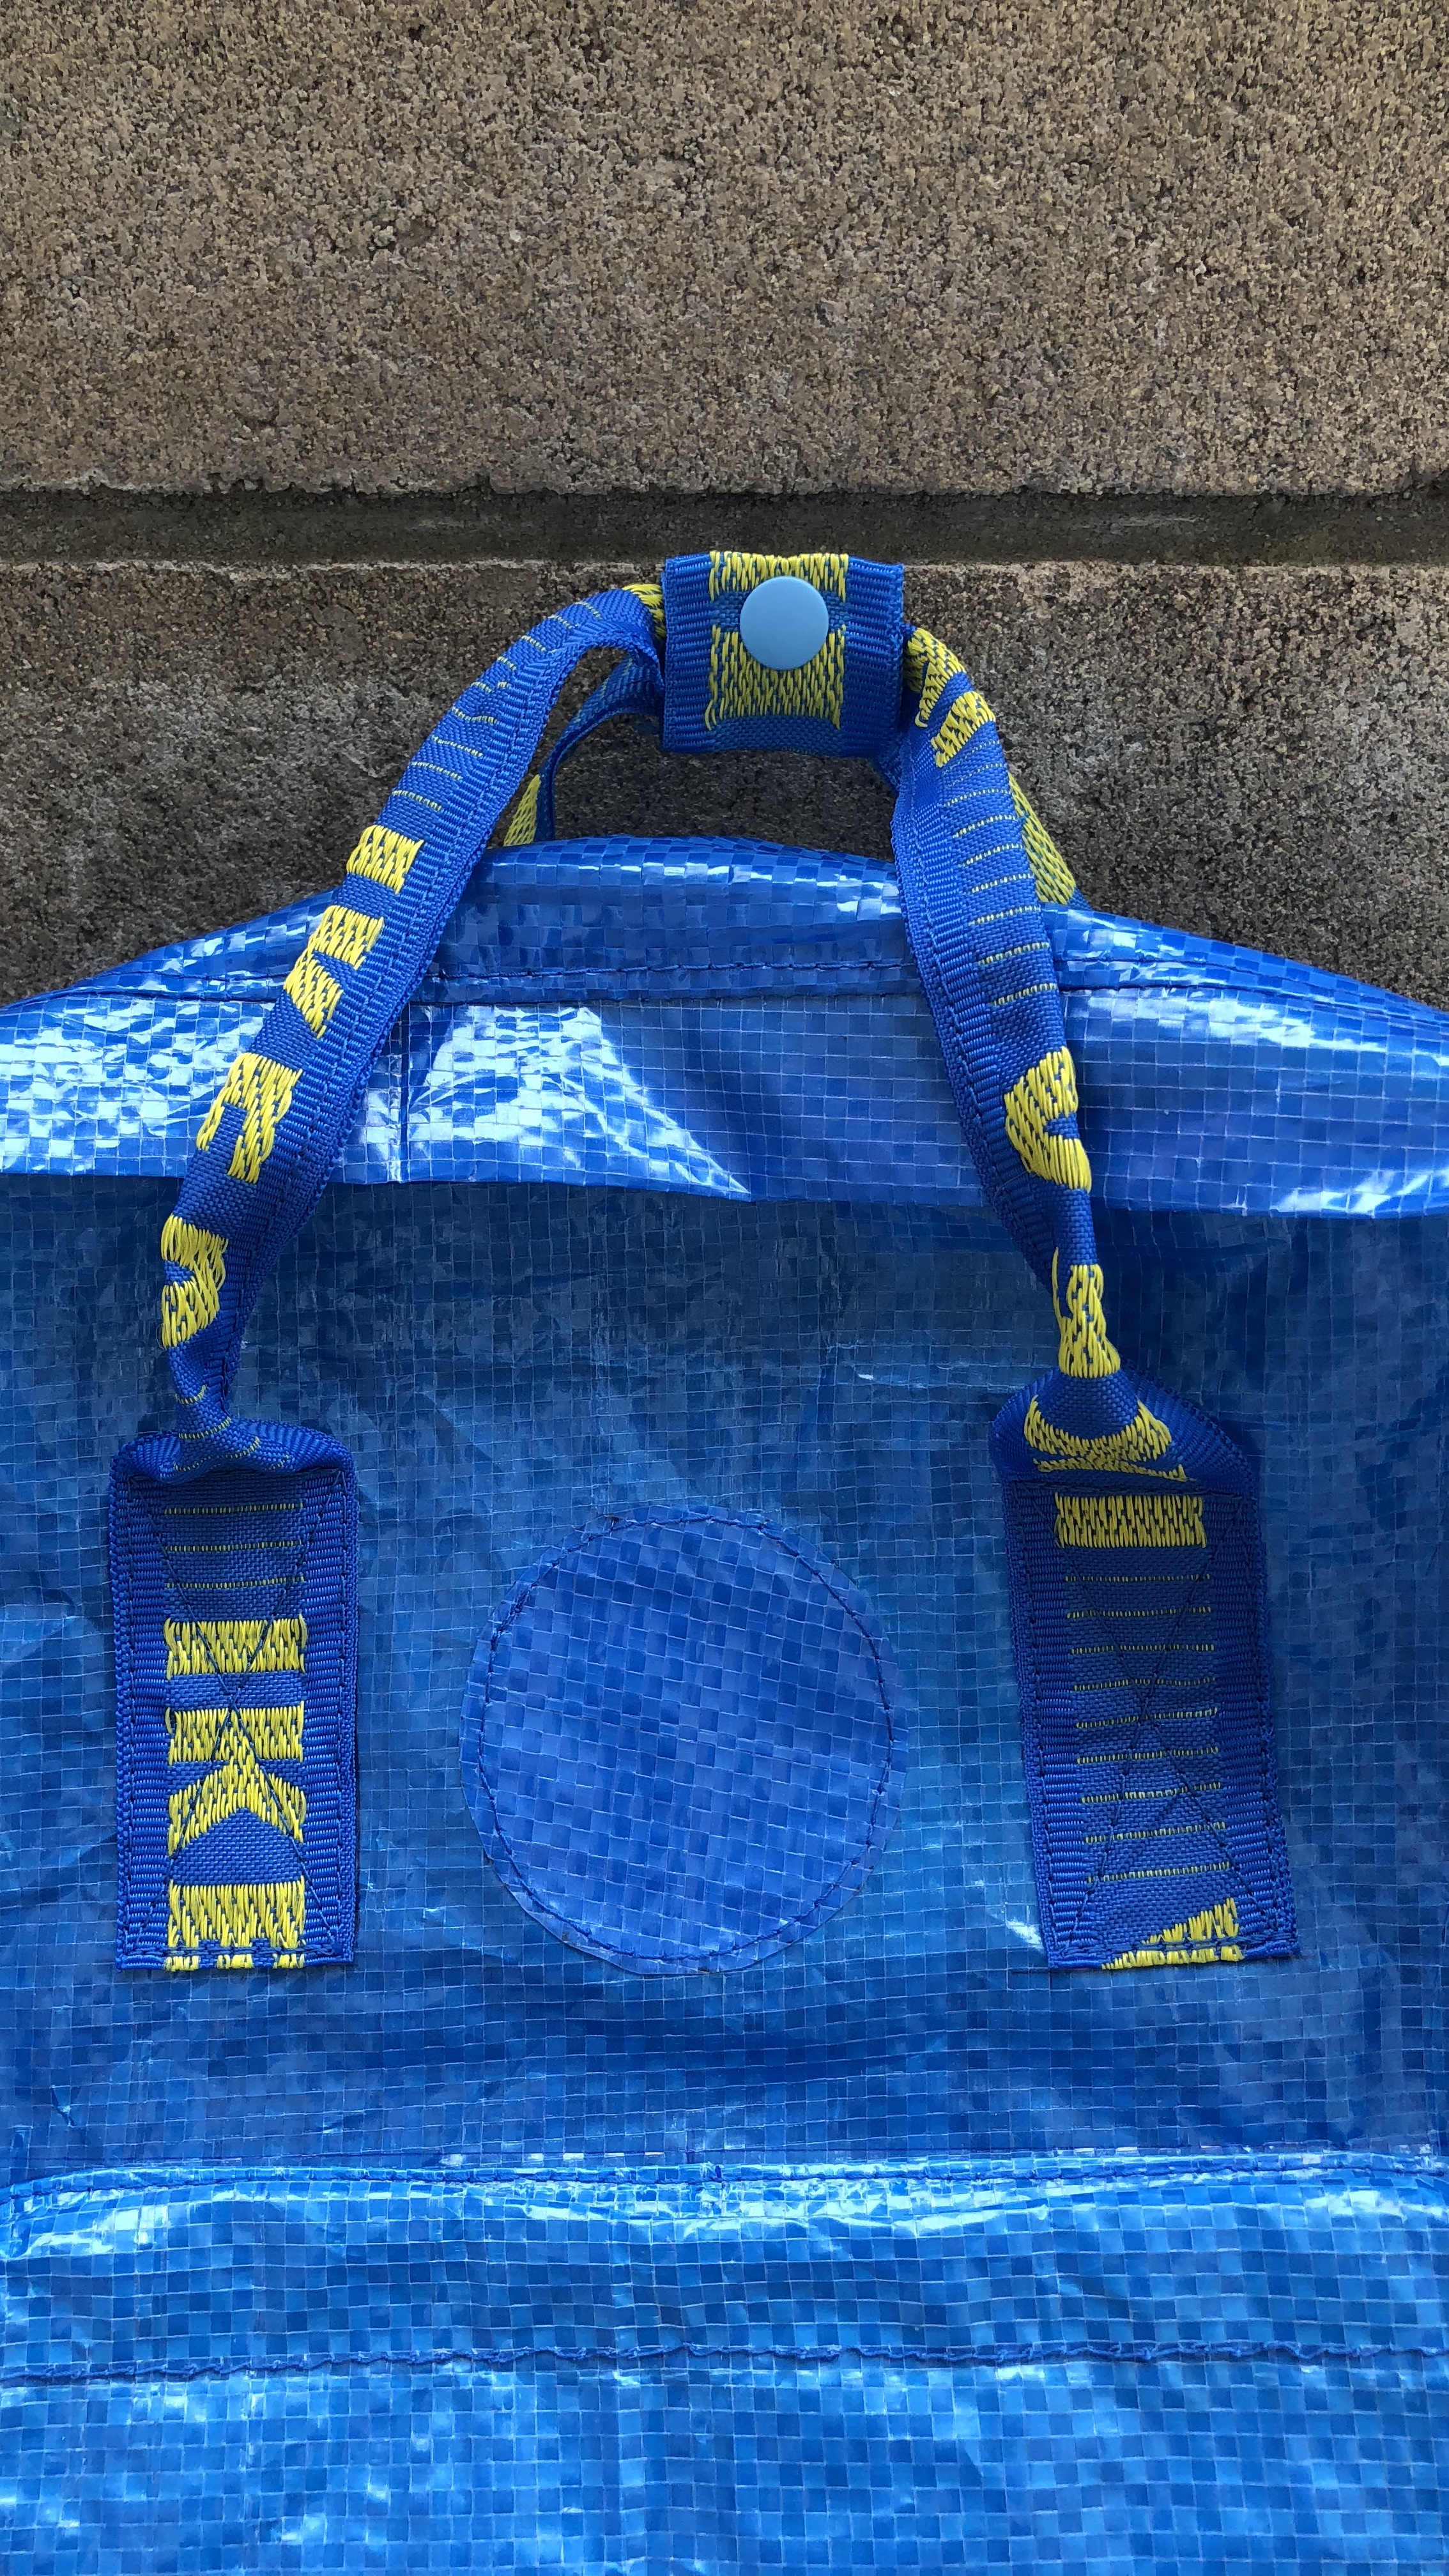
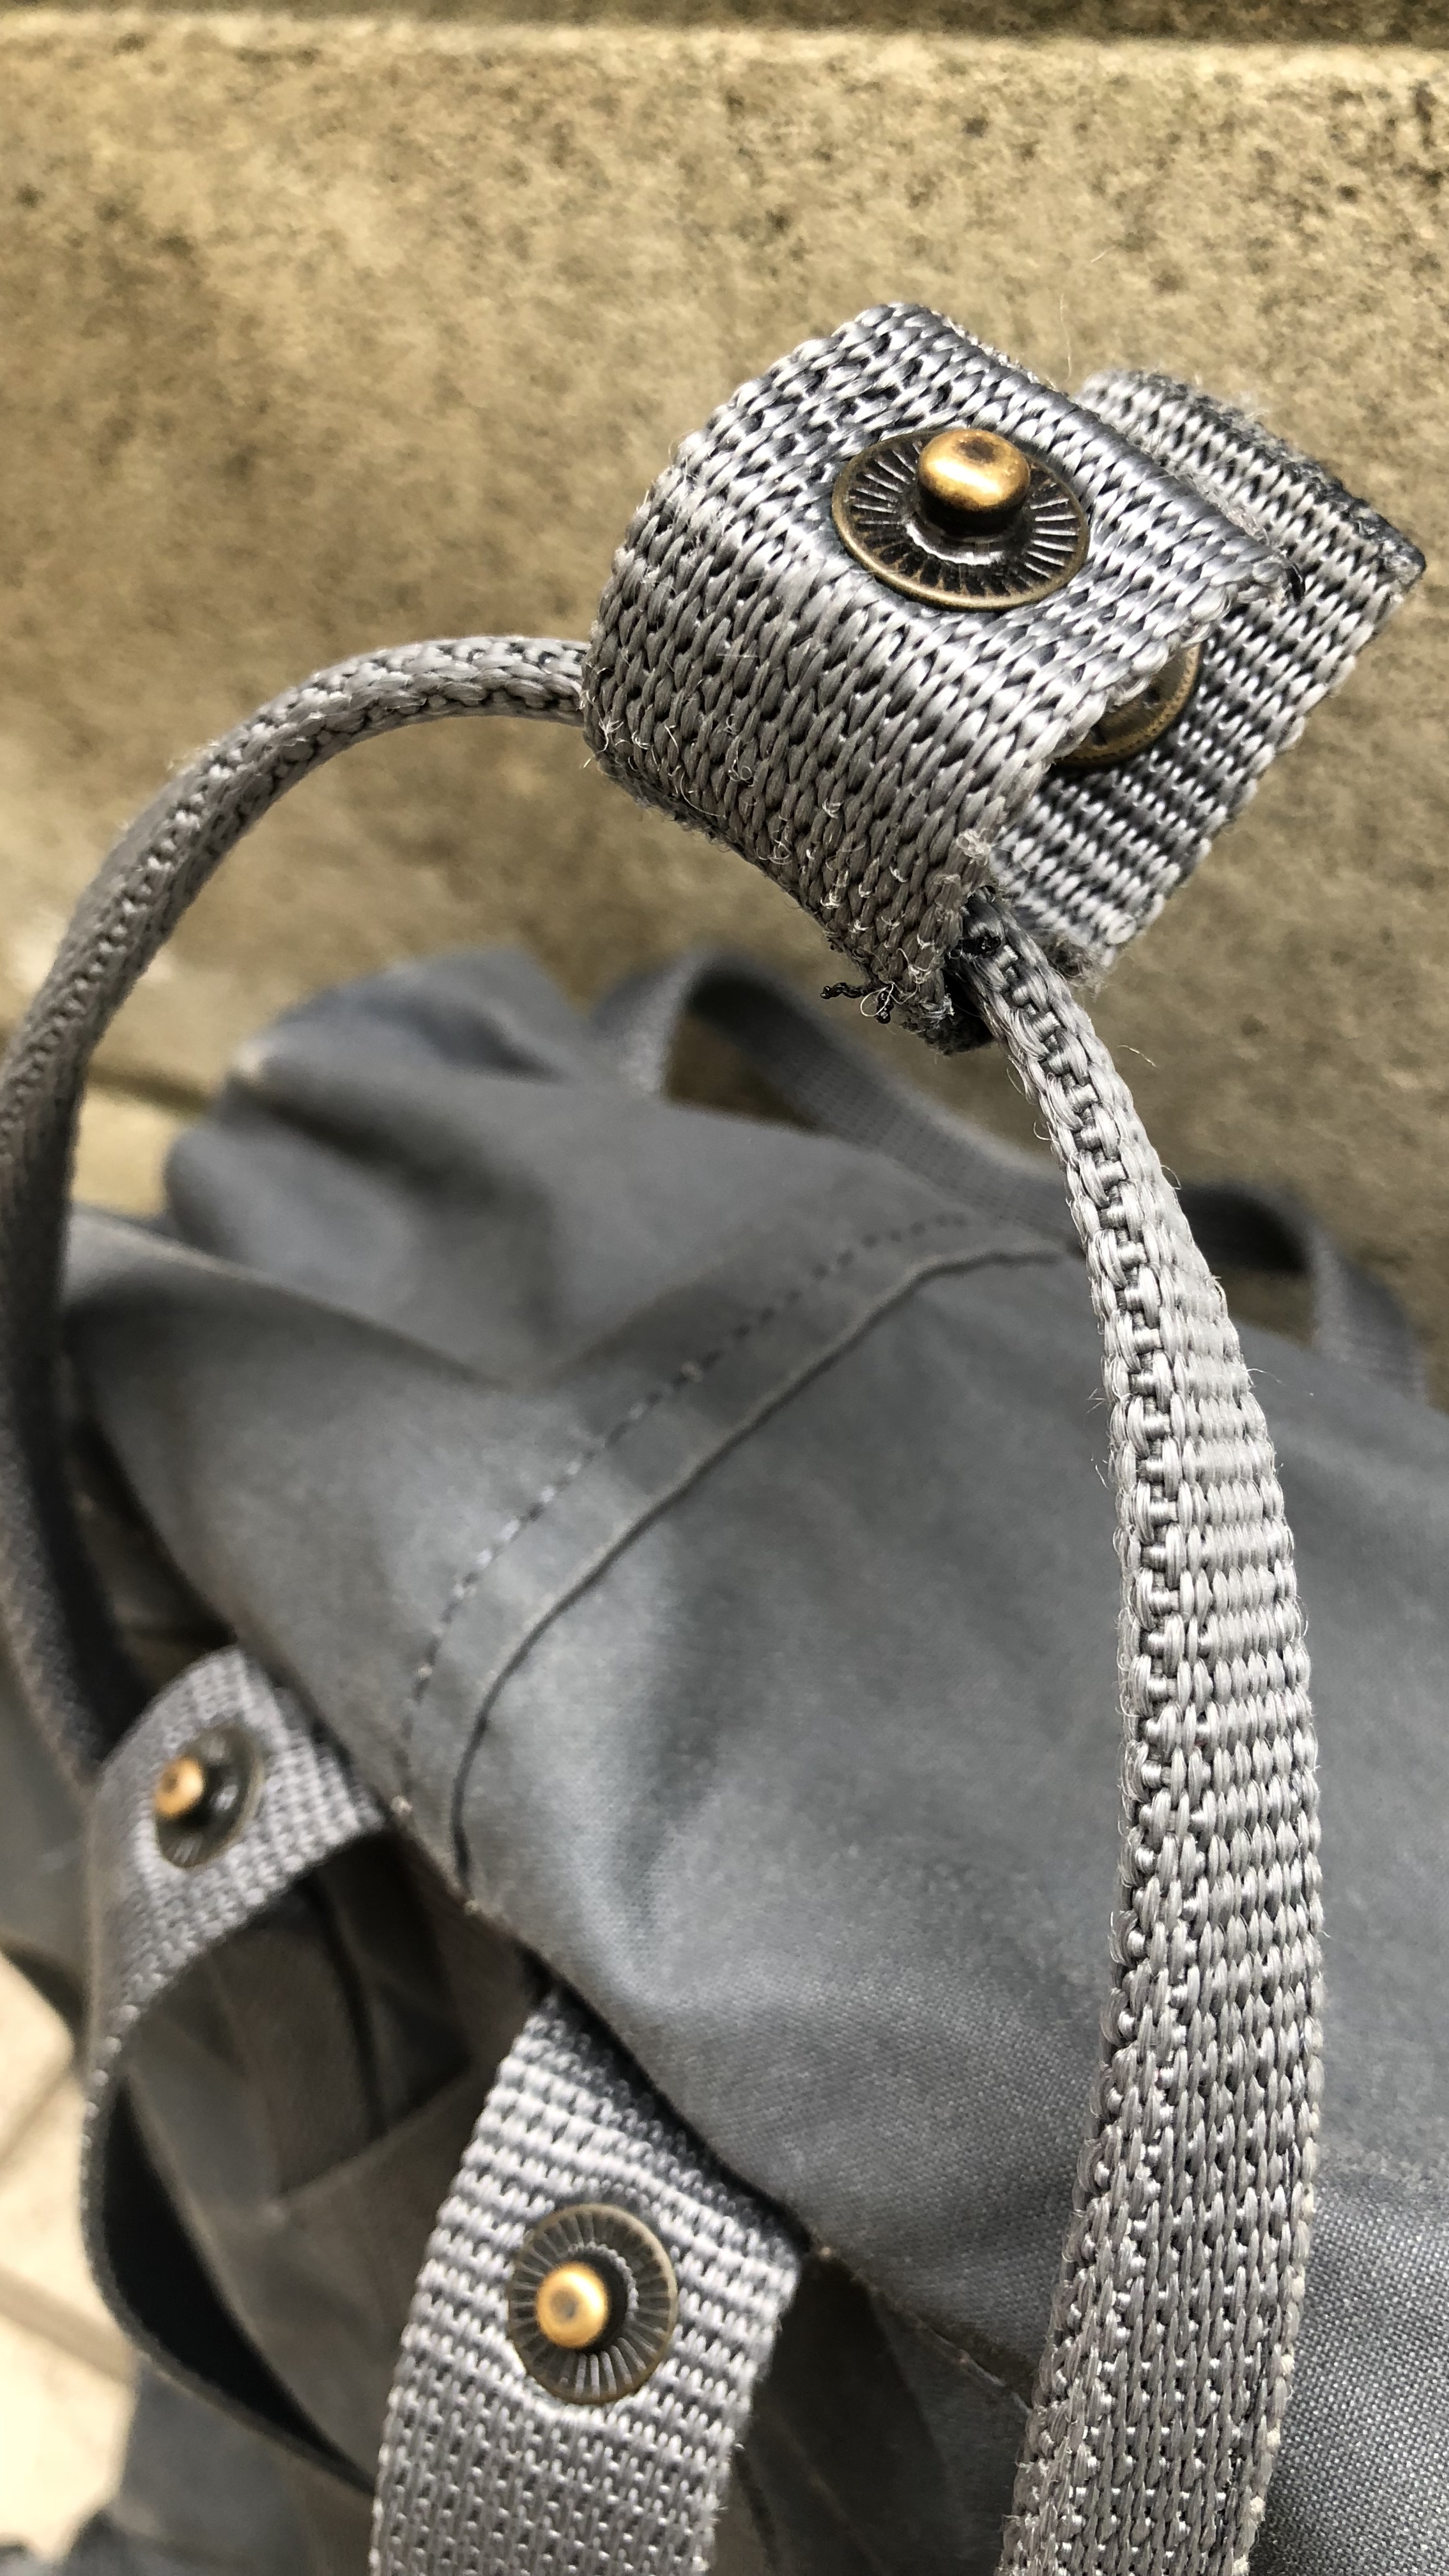
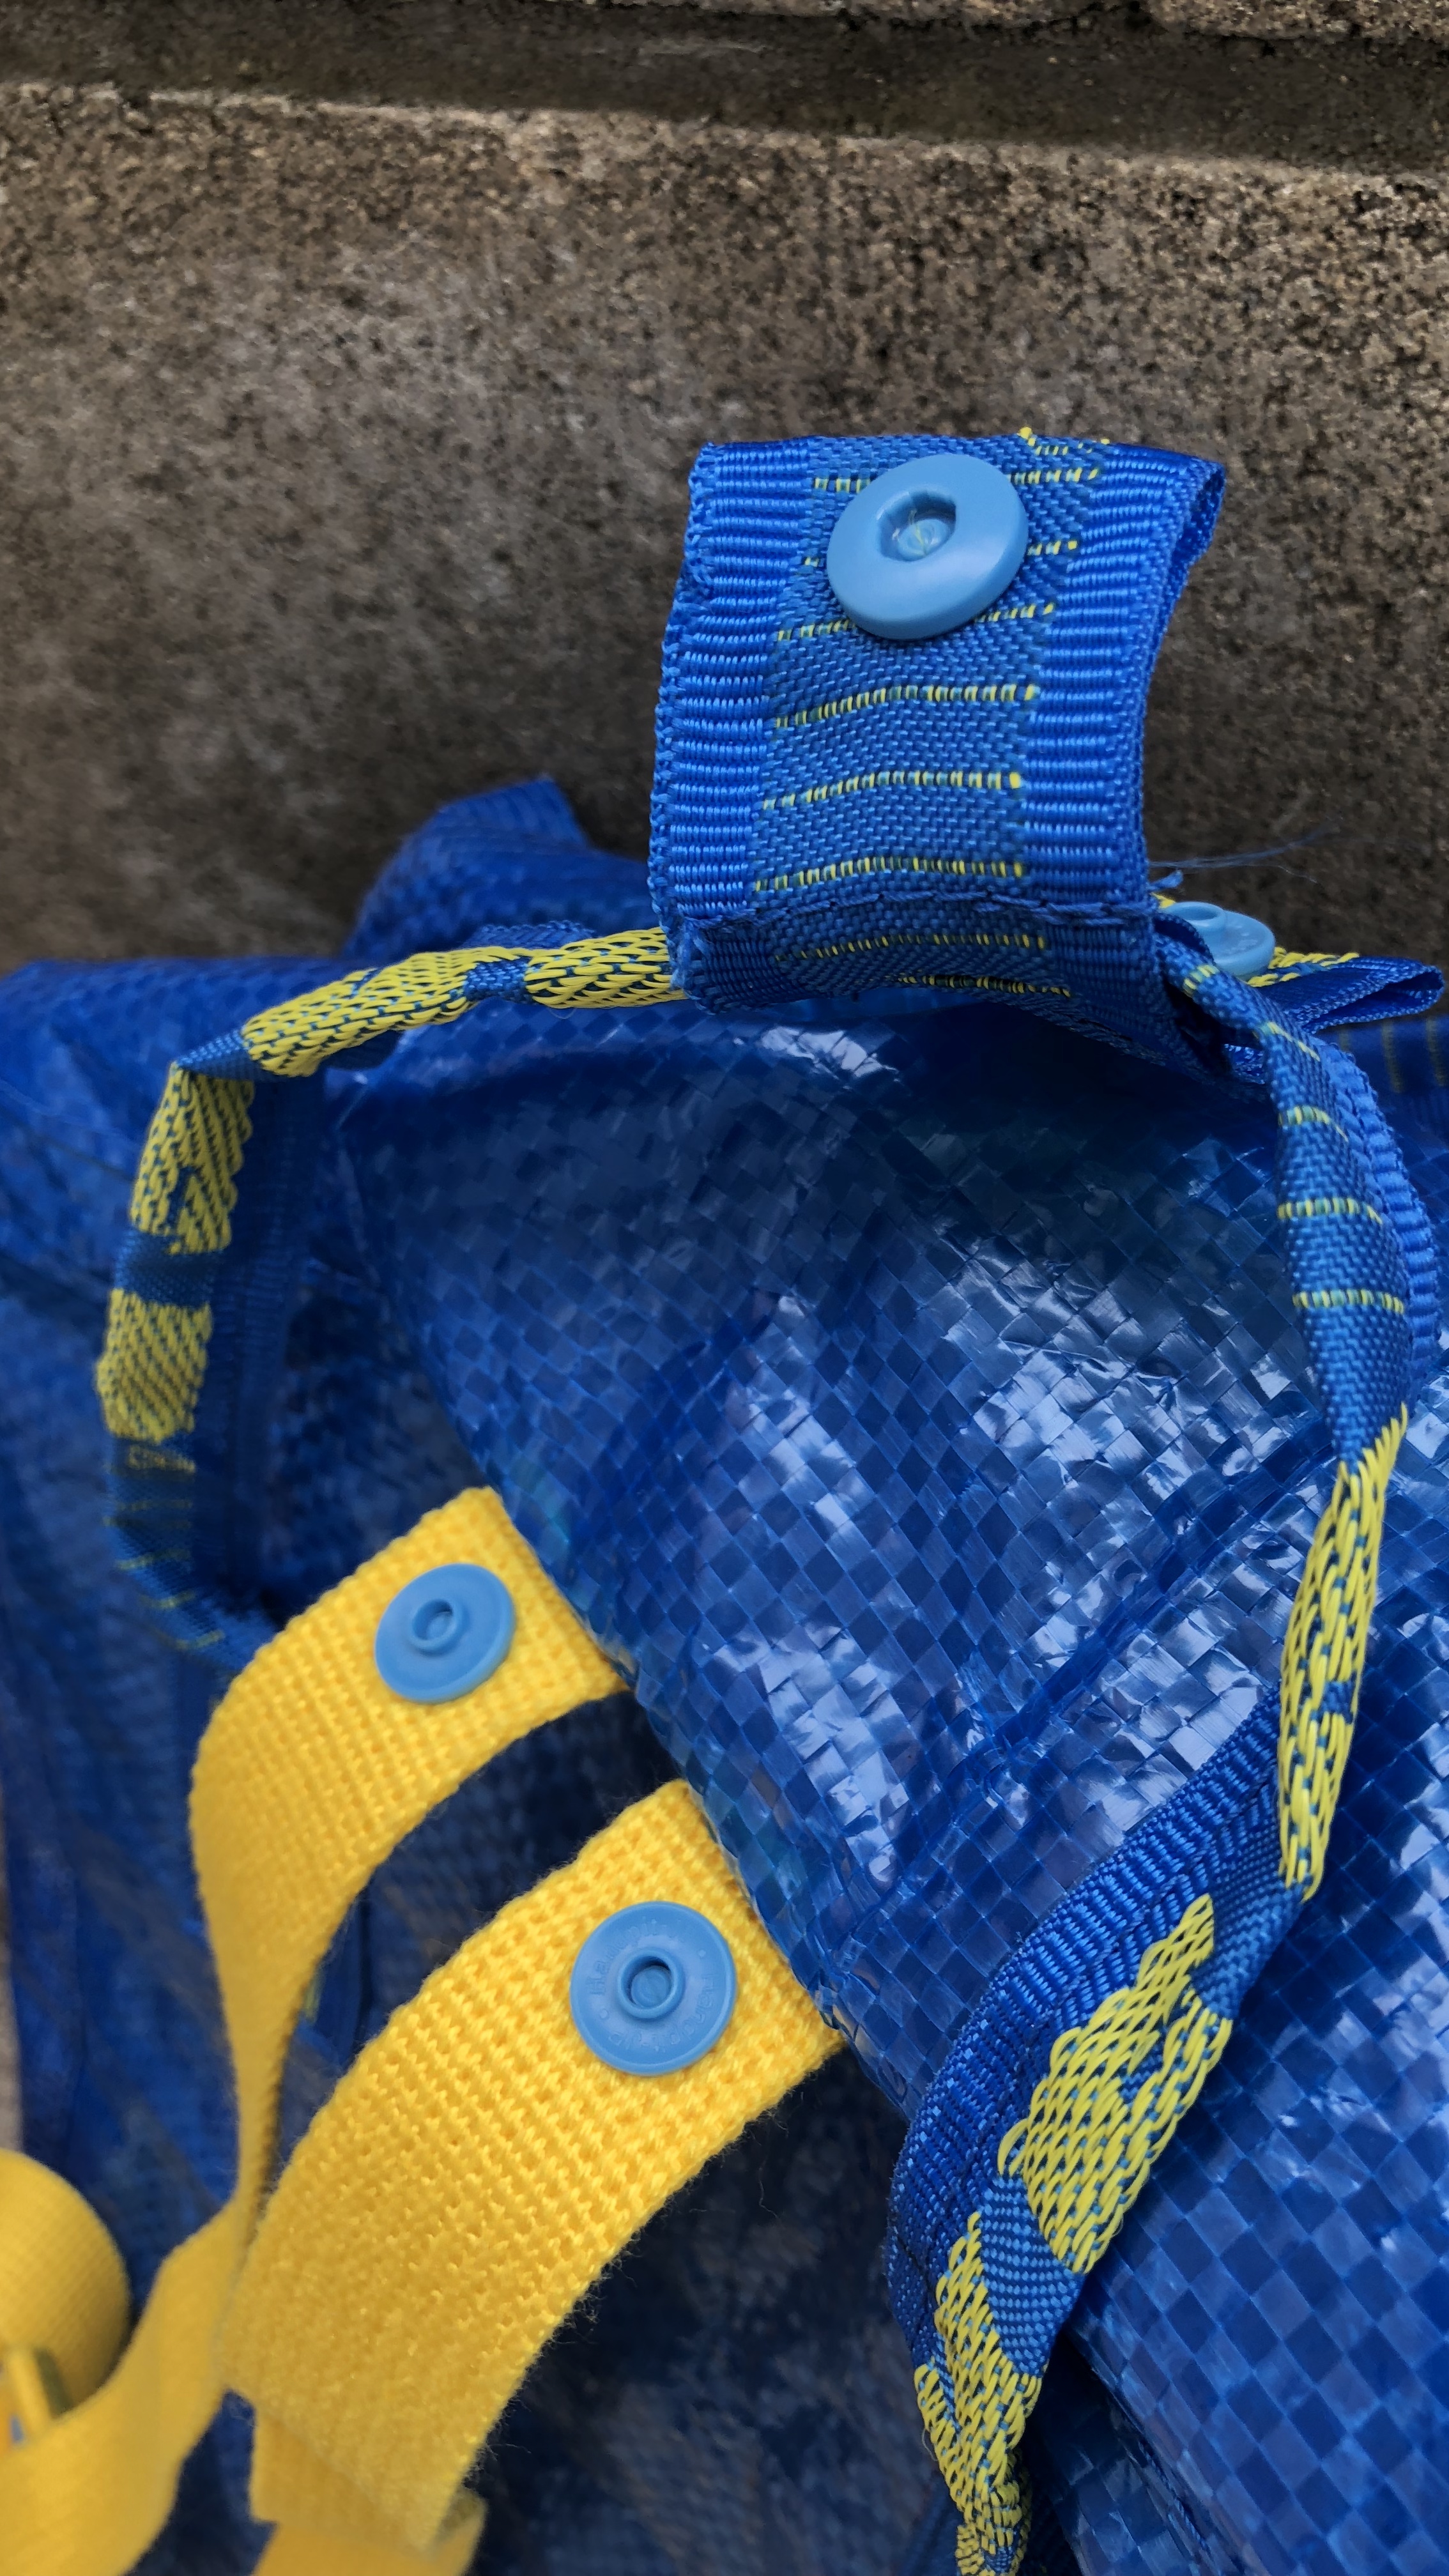
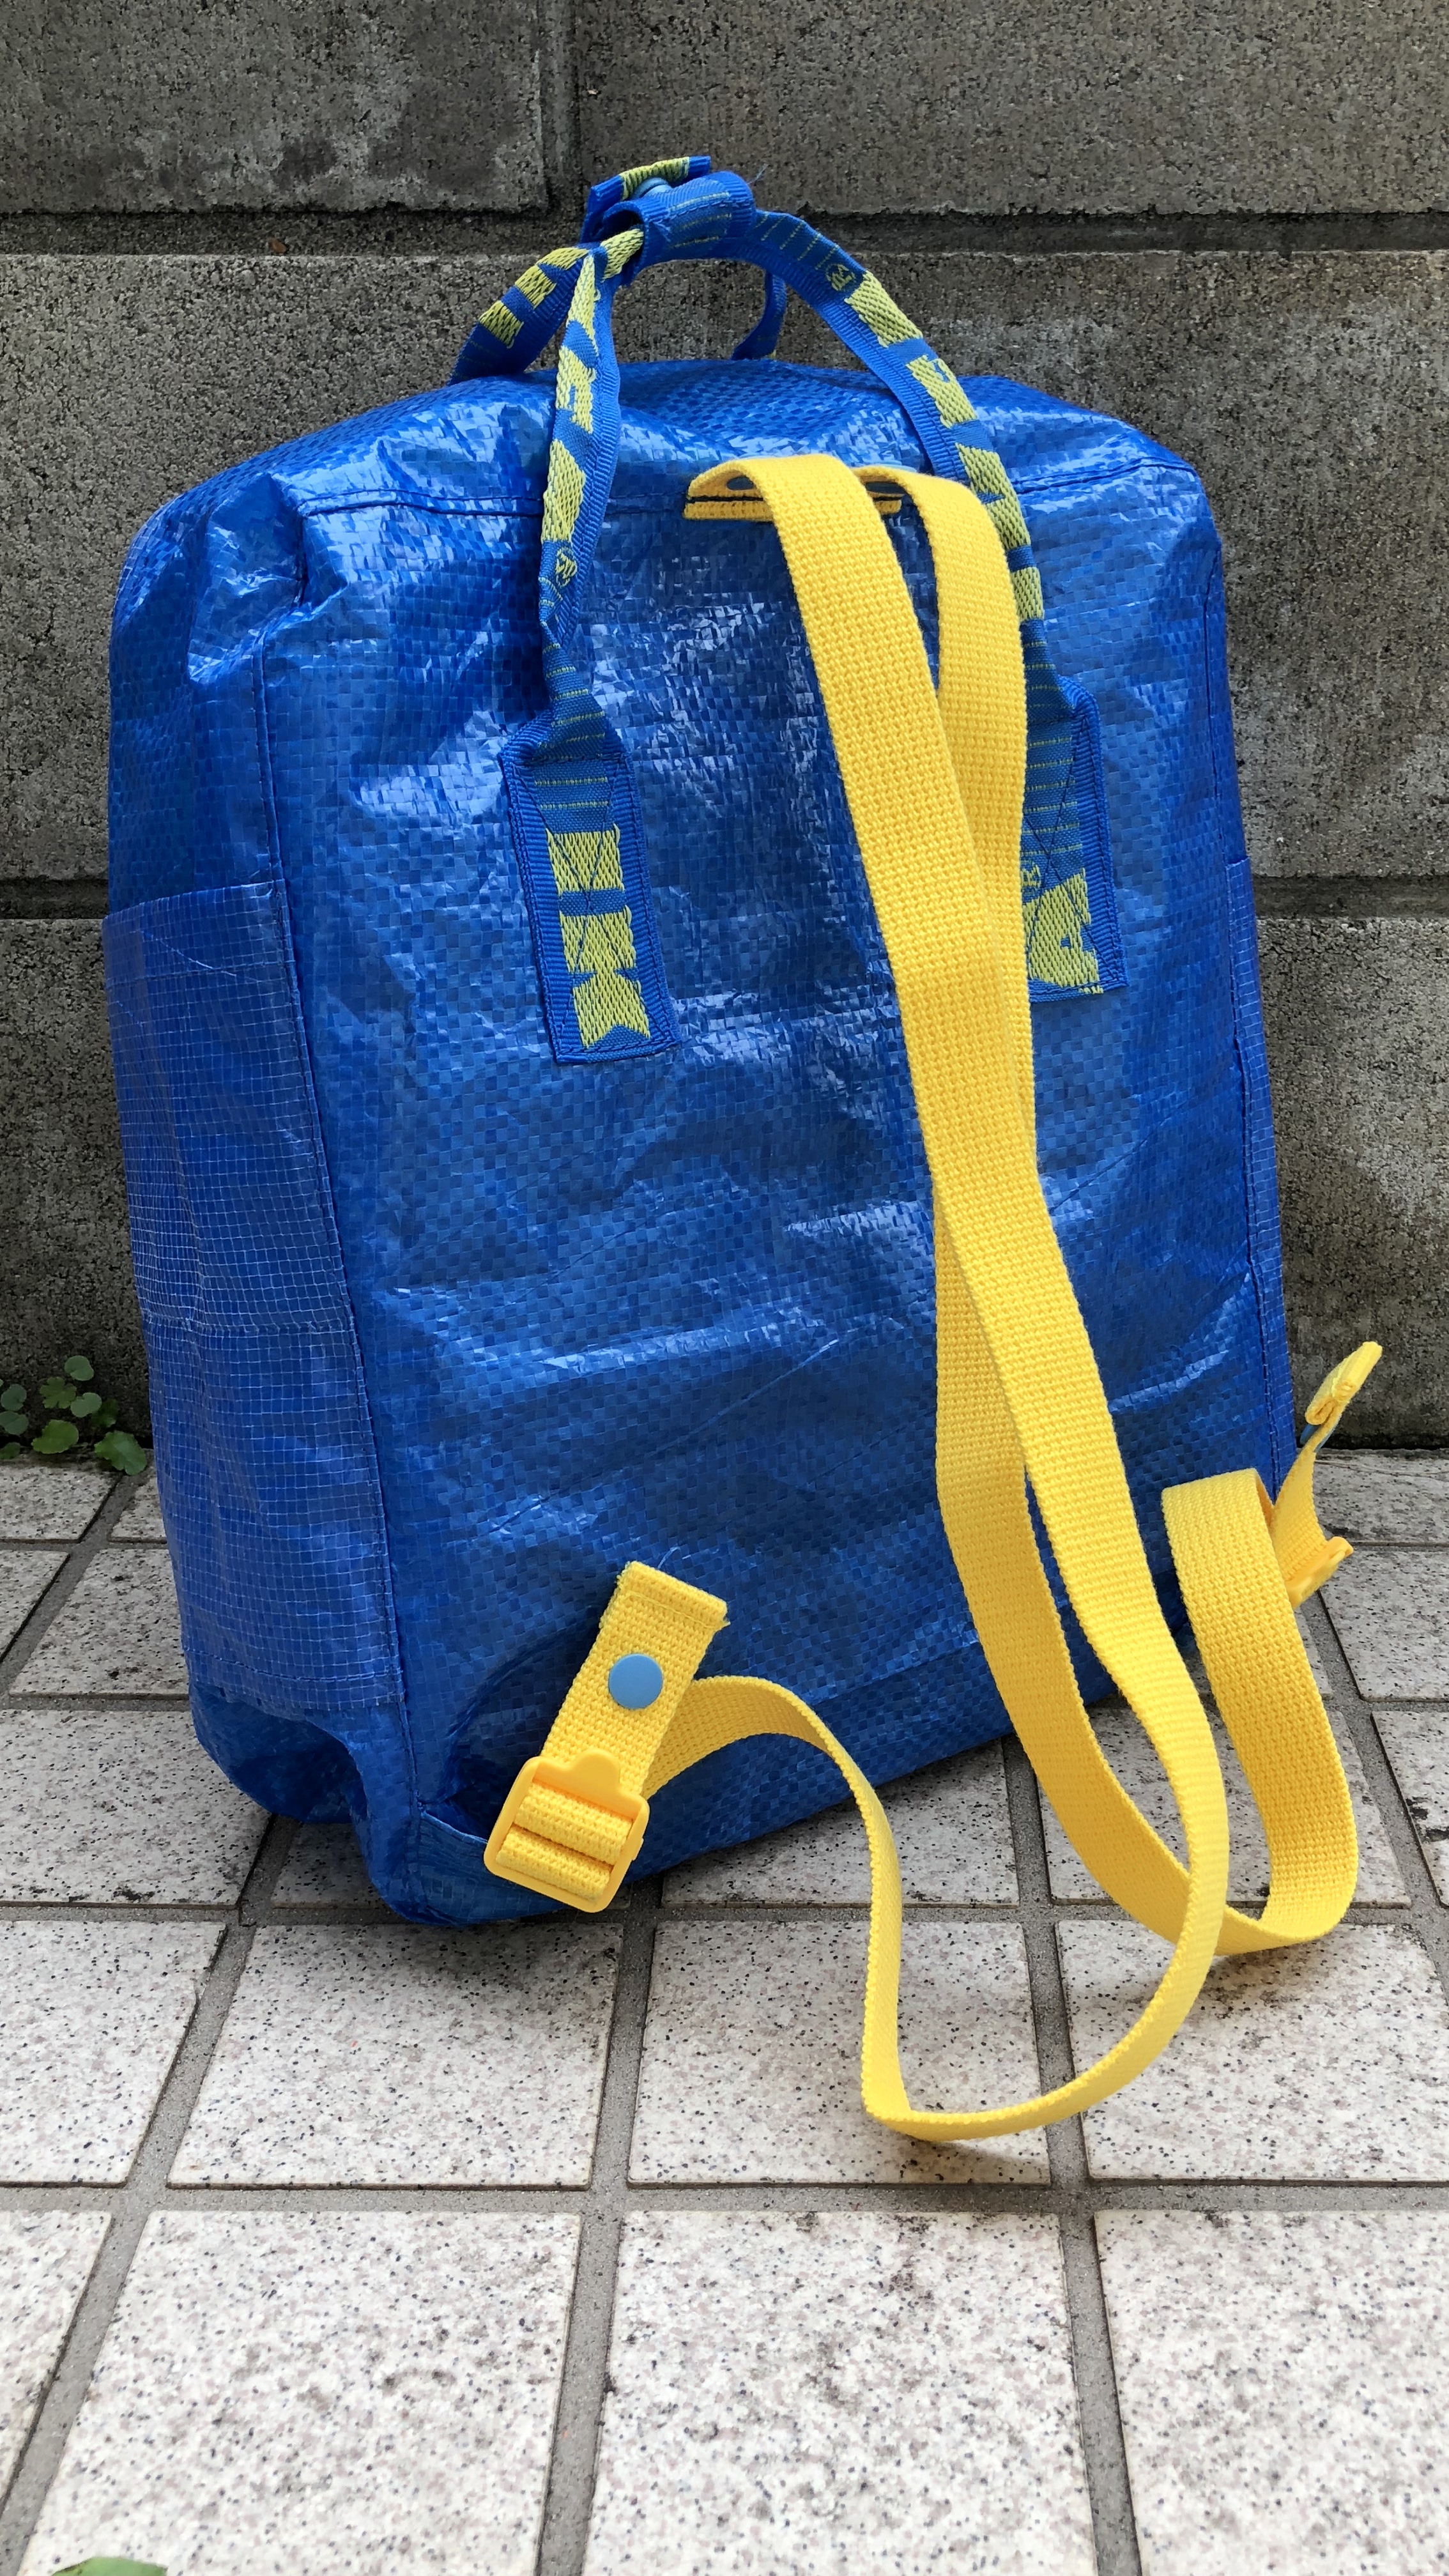
I also learned a lot while making this backpack. Like this back straps that I attached differently than the original. I did it because the material for the handle straps and the back straps are different. But then I understood why the Kanken straps are stitched that way and the reason is not just aesthetics.
By making an X shape on the back, the weight of the backpack is also carried by the back piece. While in my backpack, the weight of the backpack is only carried by a couple of small stitches at the top ends of the back straps.
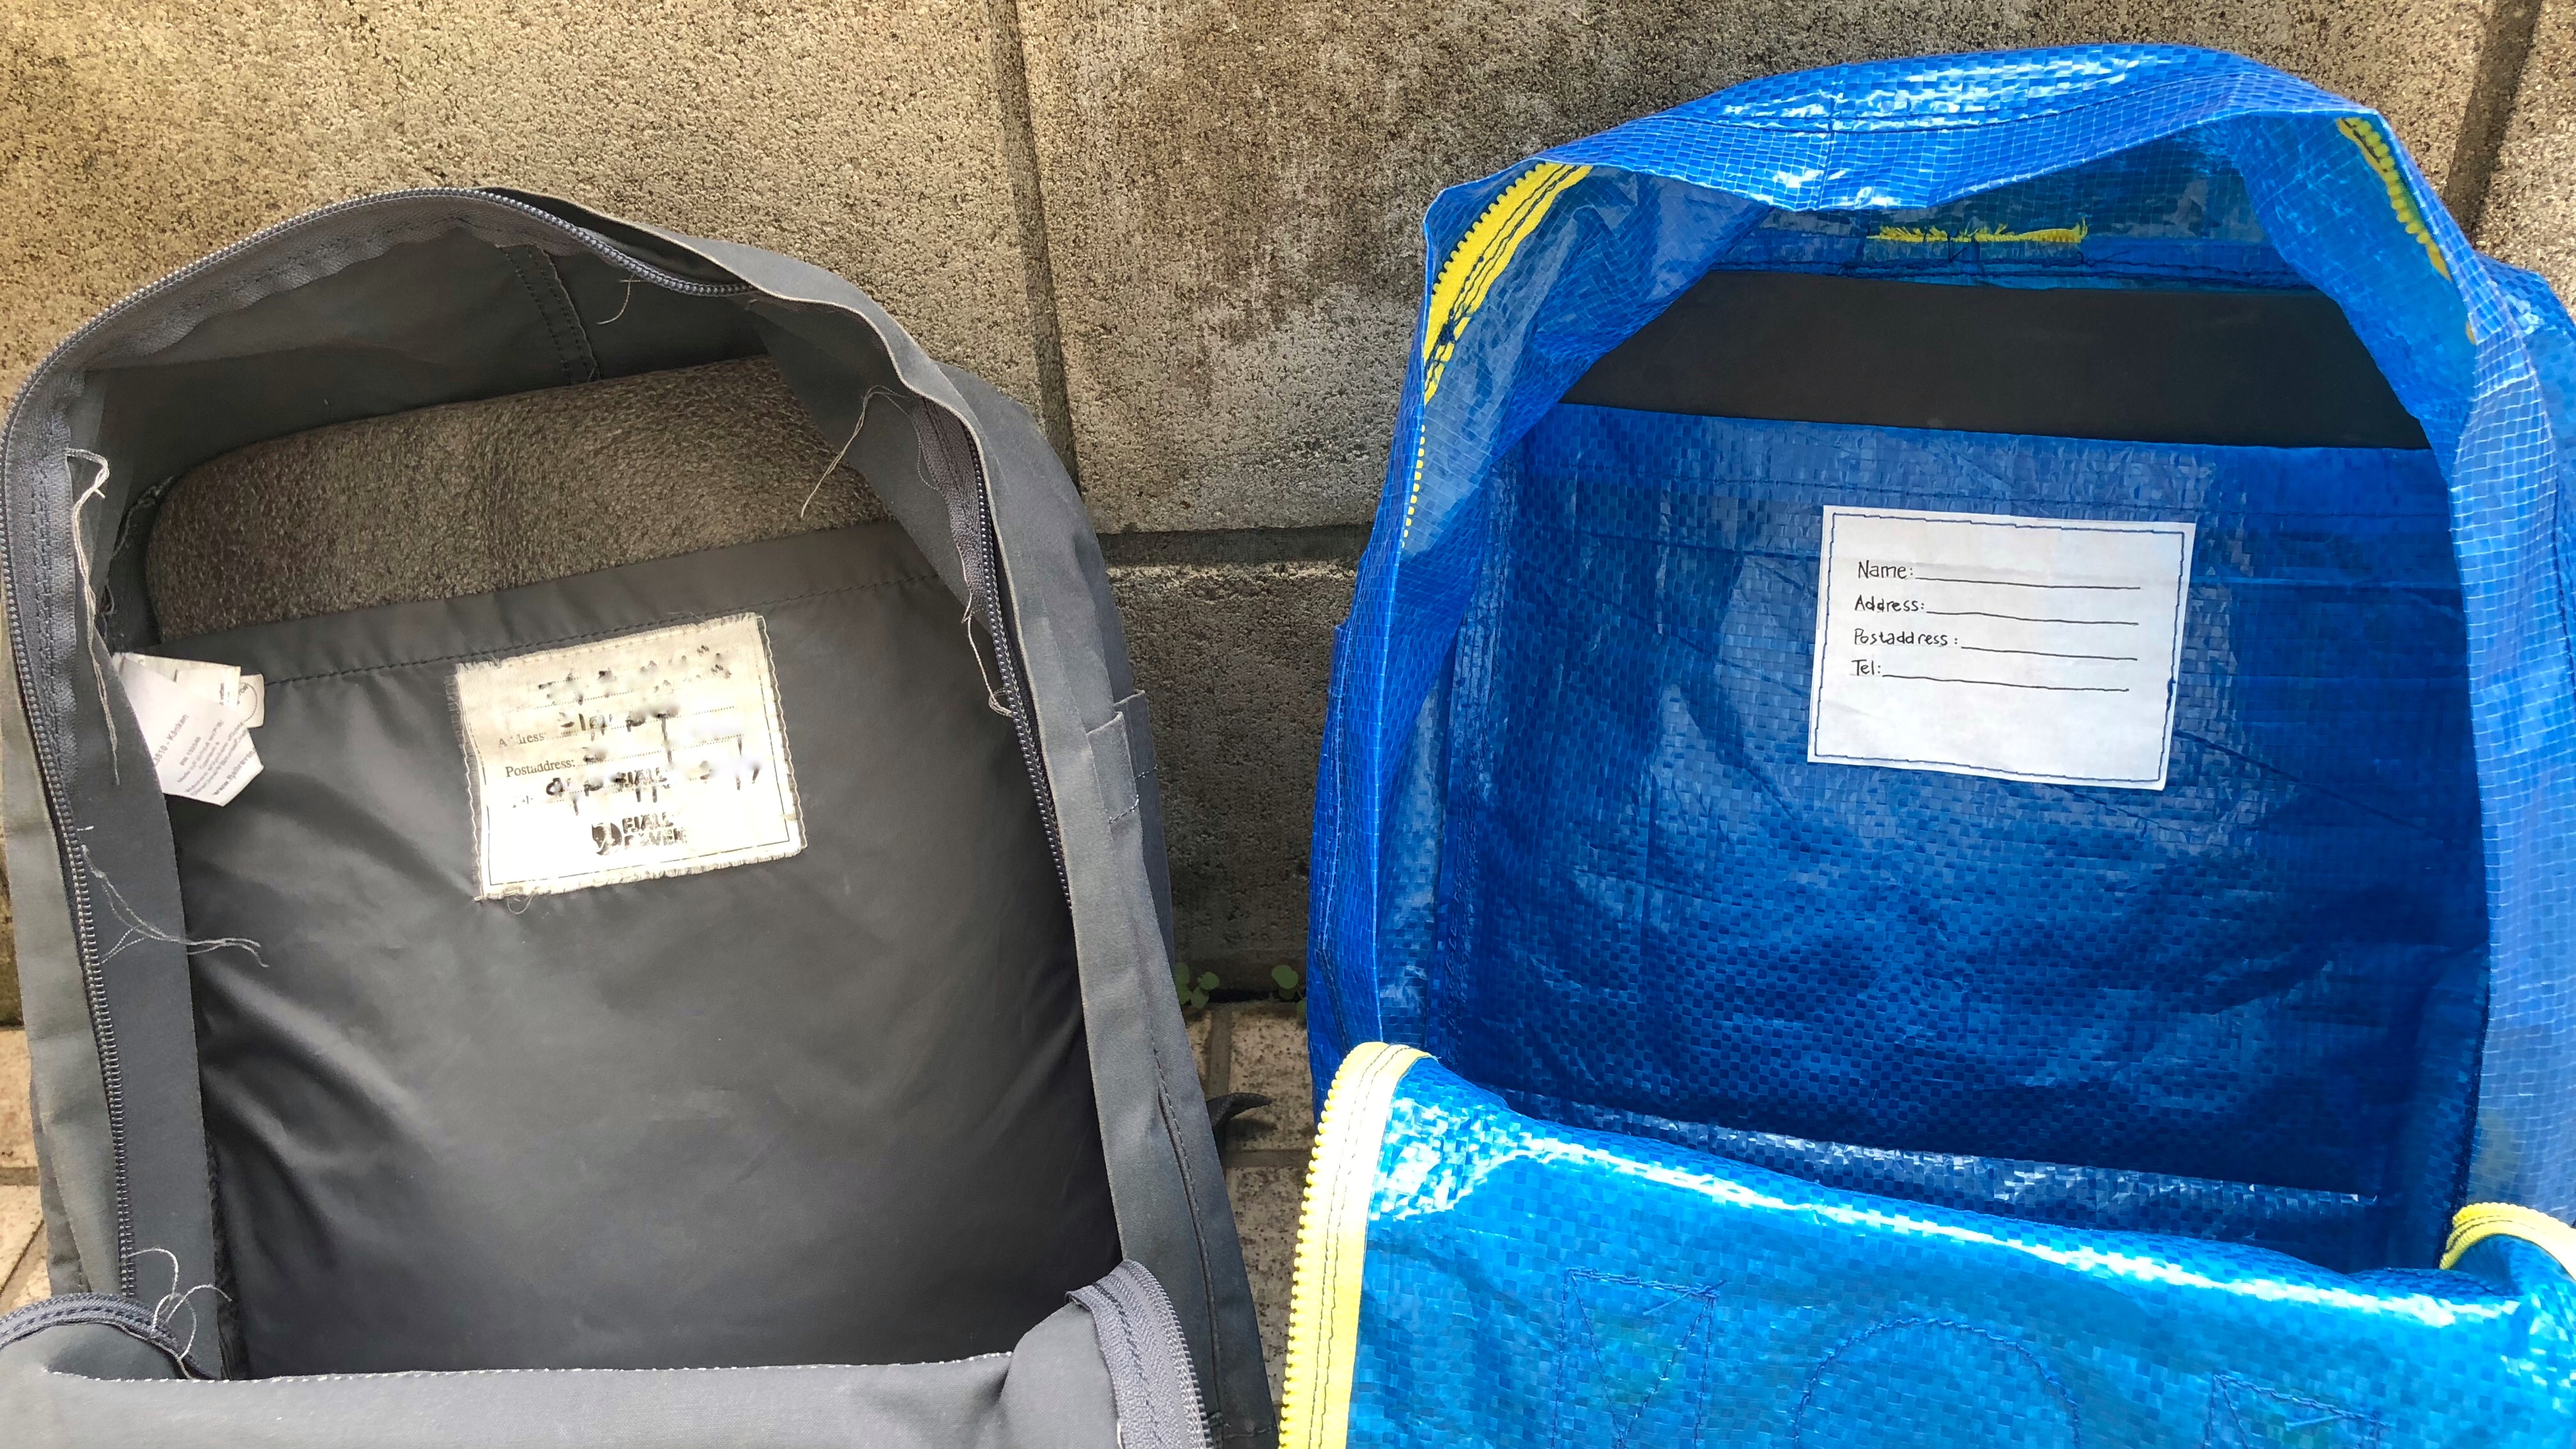
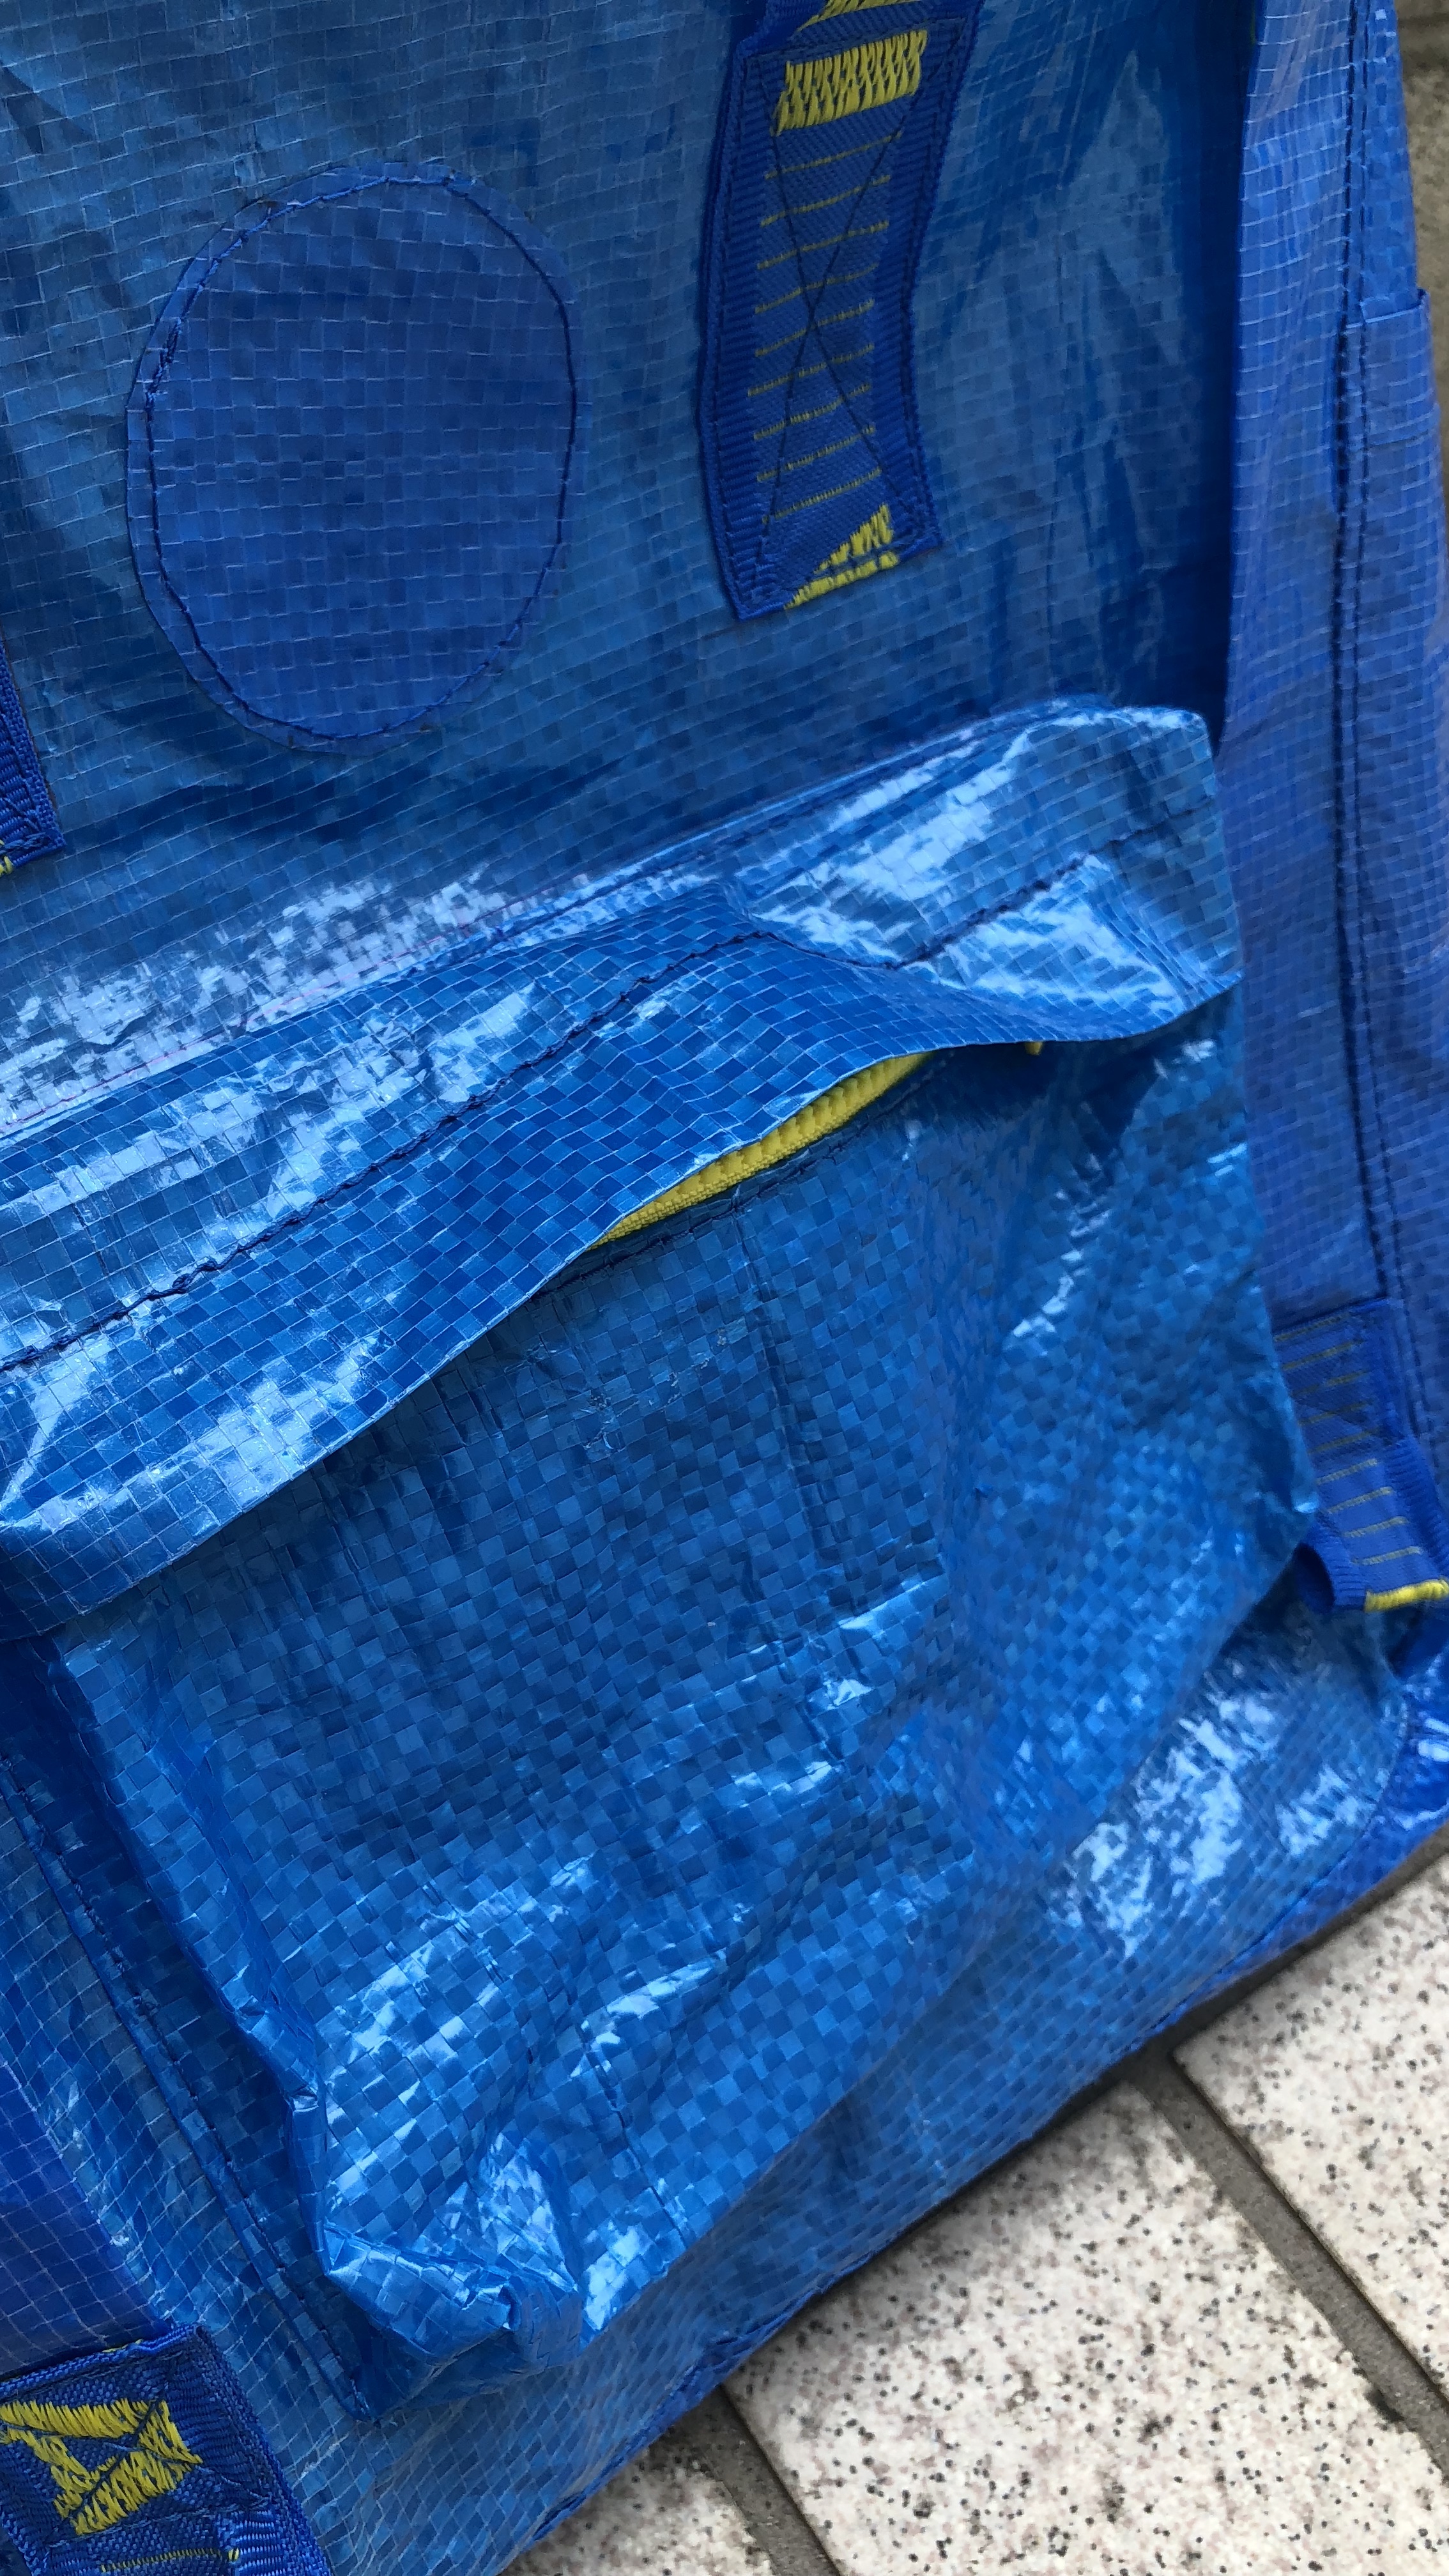
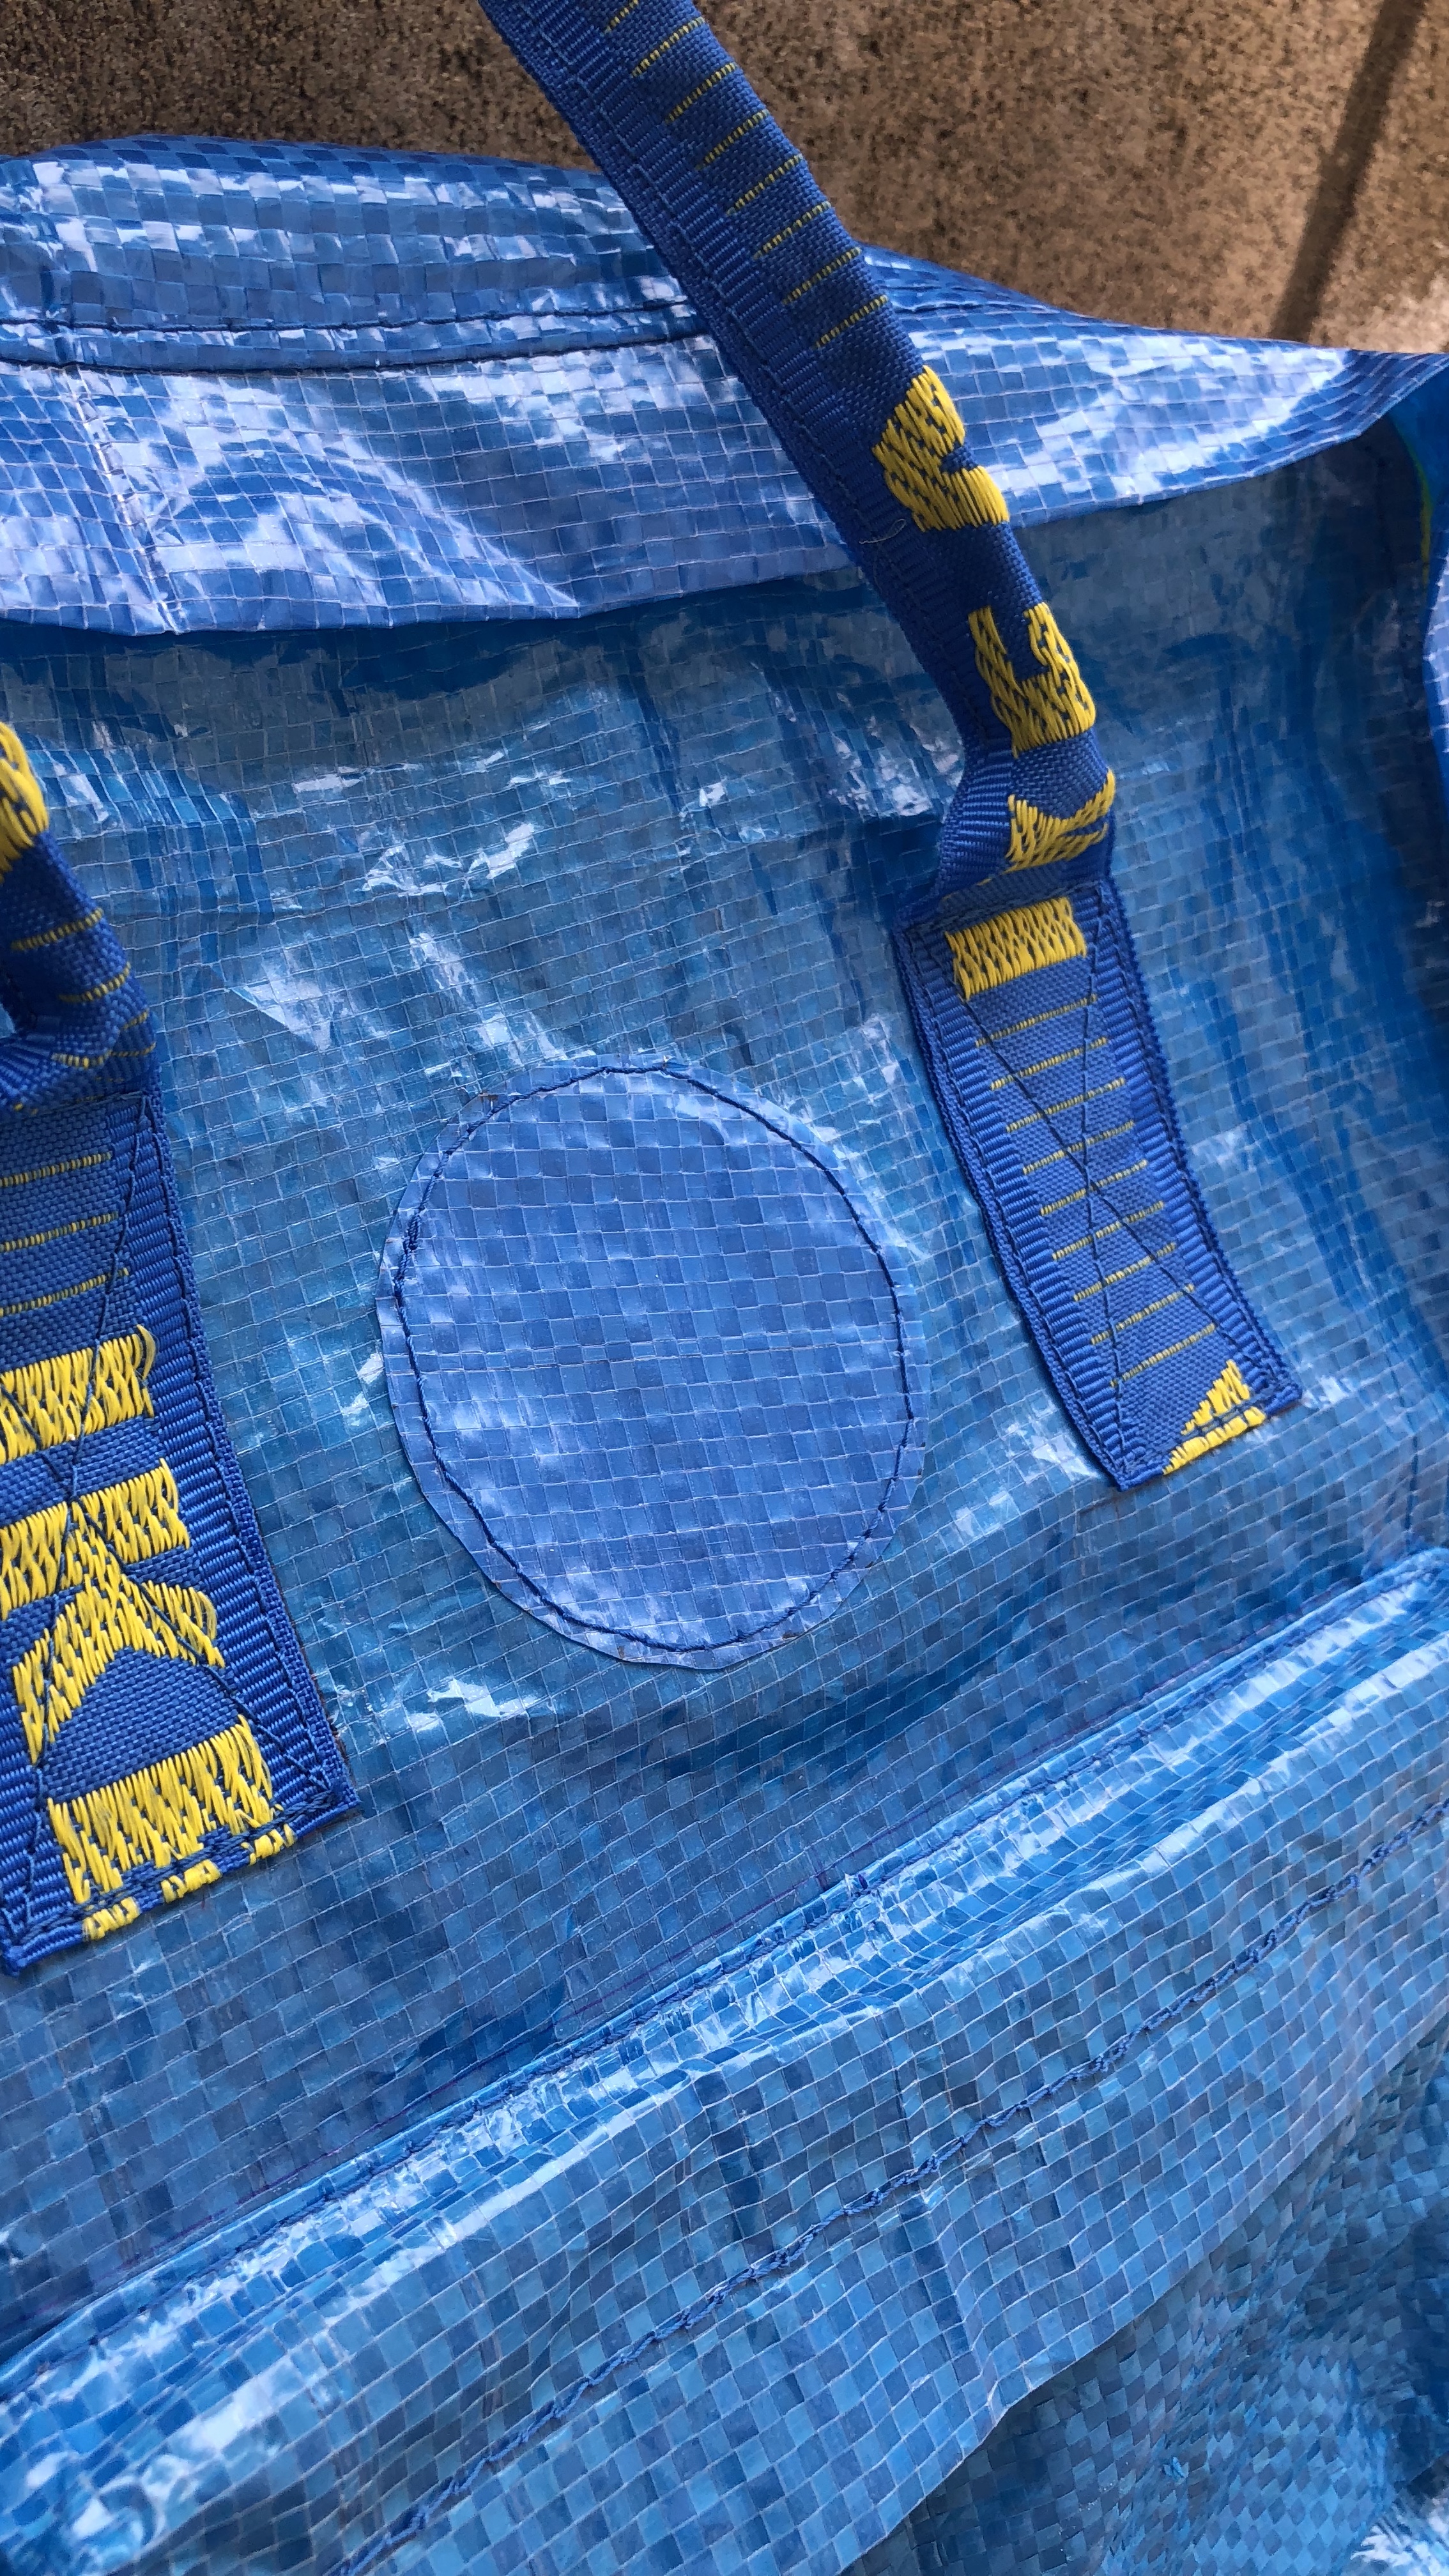
I also duplicated the name and address patch on the inside. For fun, I wrote them and drew the lines by hand. I also cut a circle and topstitch it on the front, like an almost invisible logo patch.

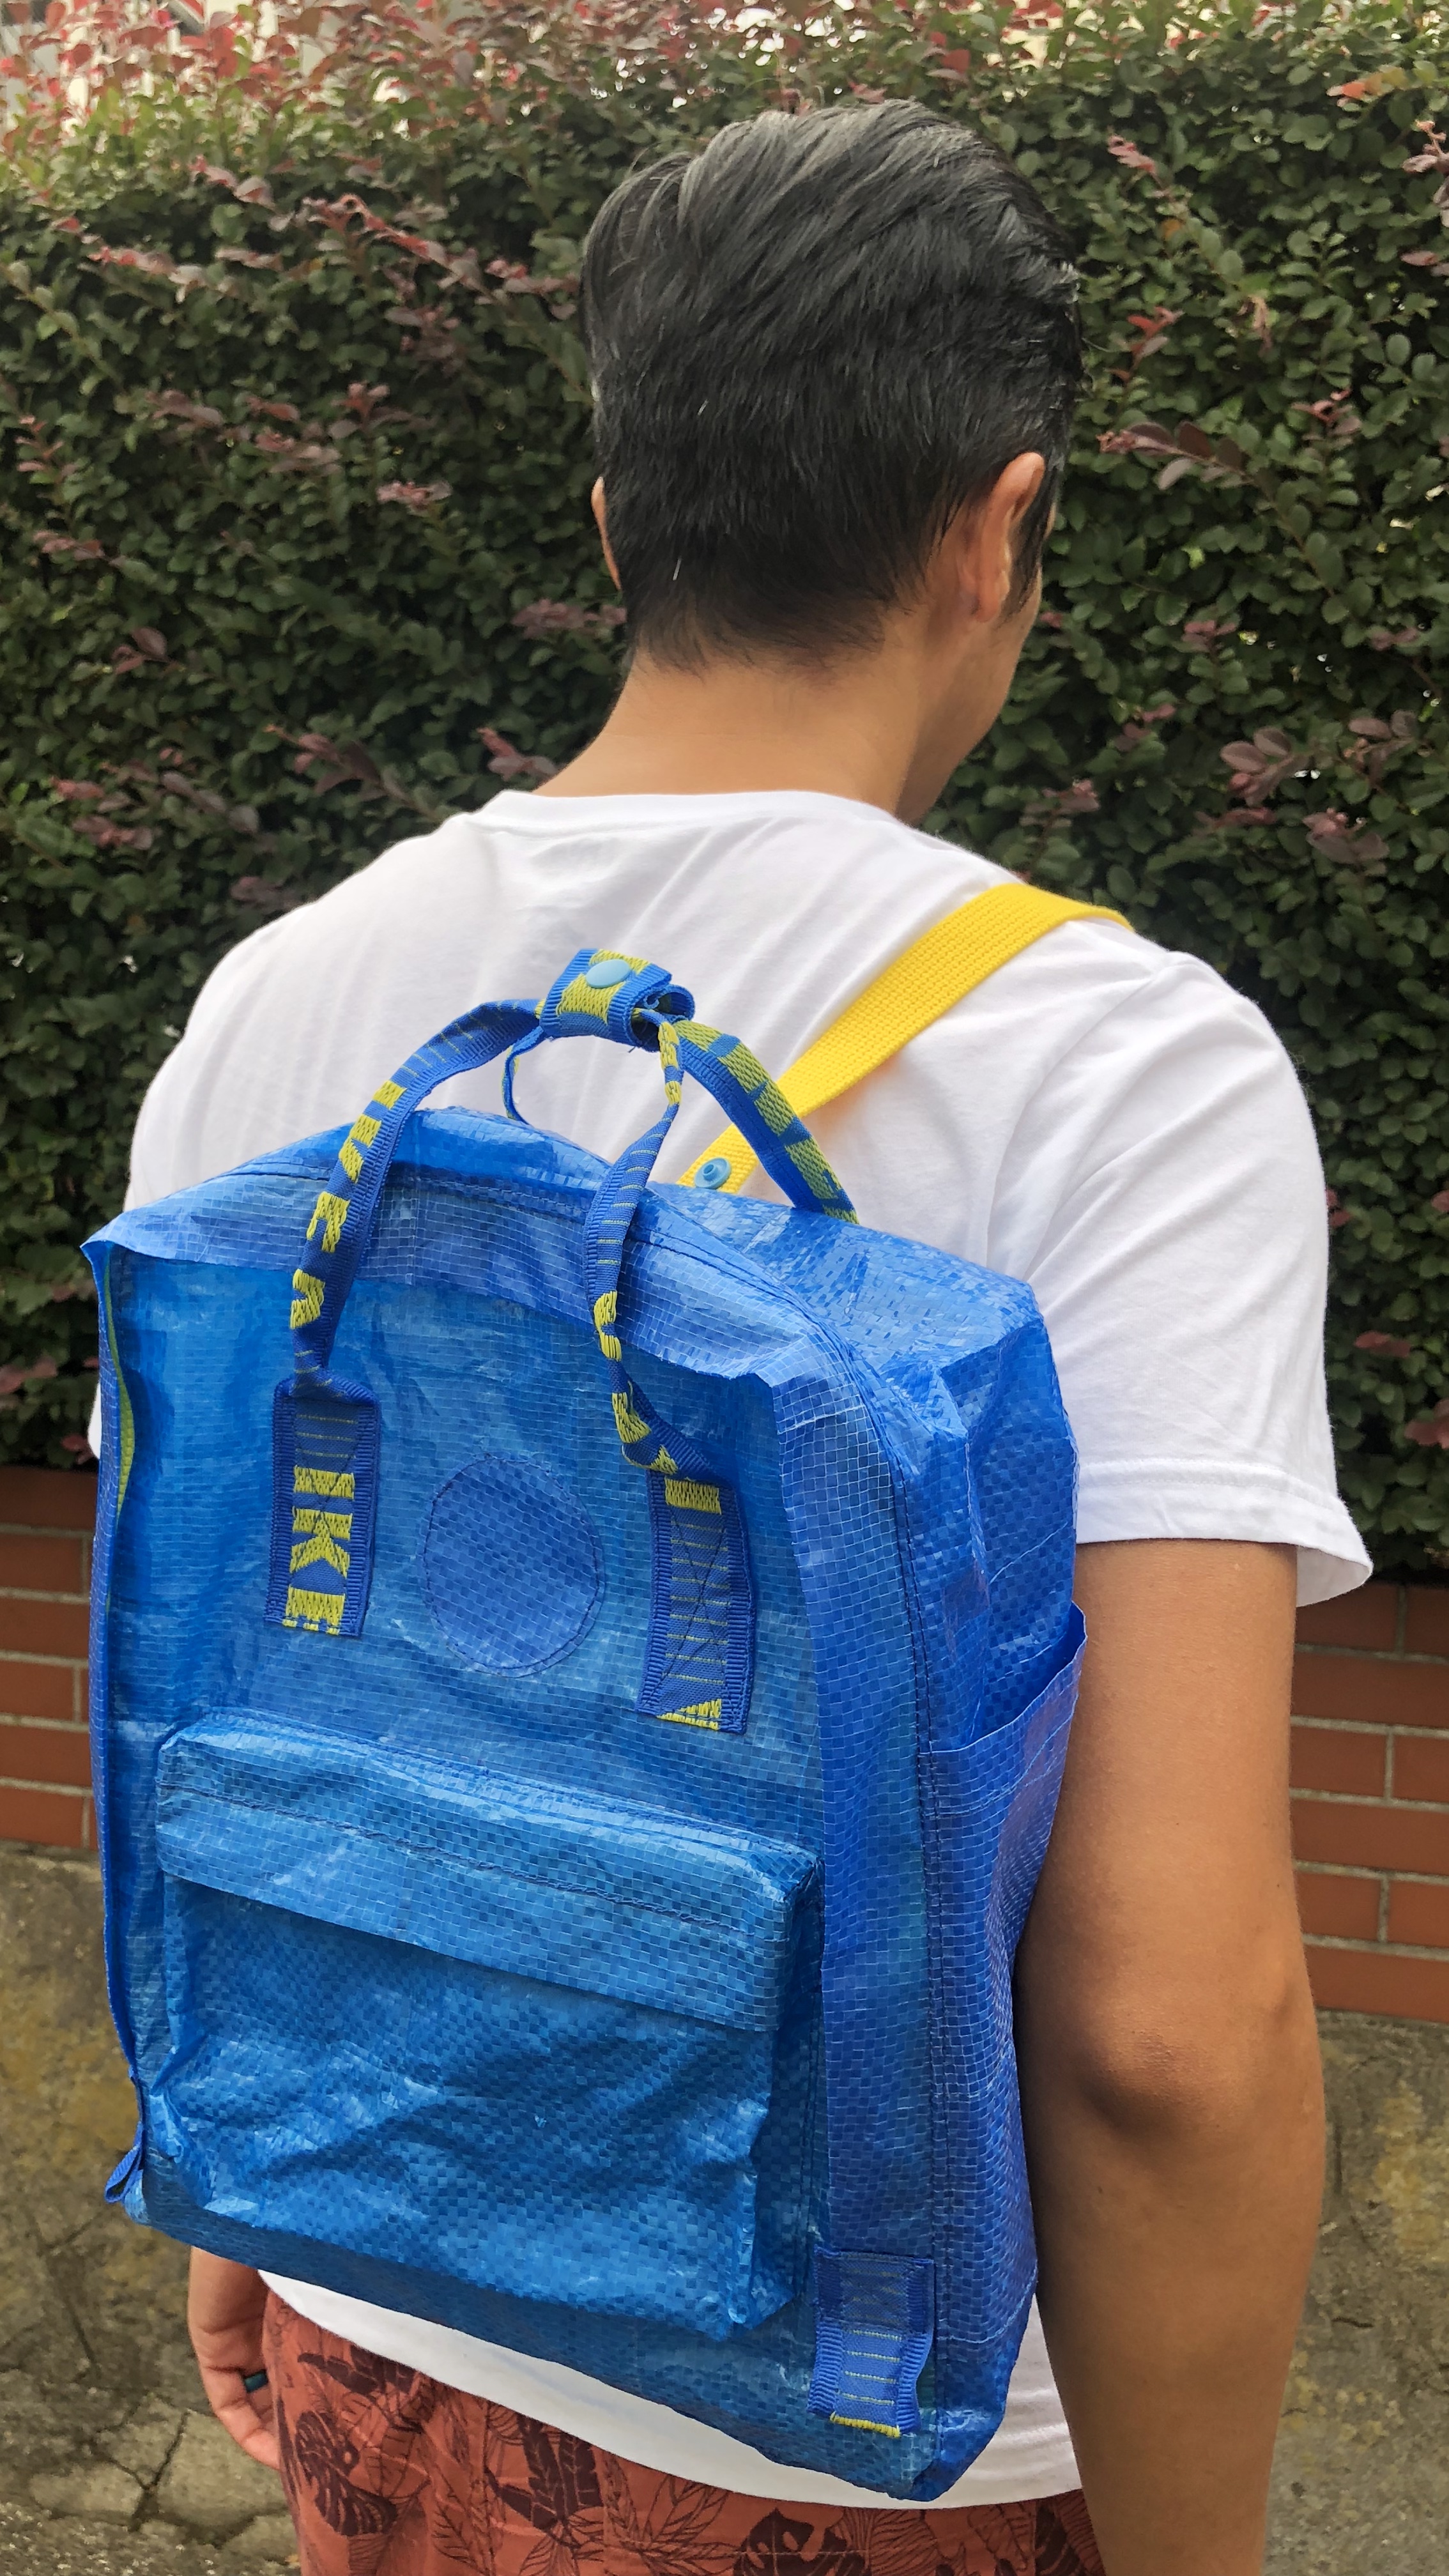
My husband and son tried the backpack on. I think it suits my son better, so I gave him the bag ❤️