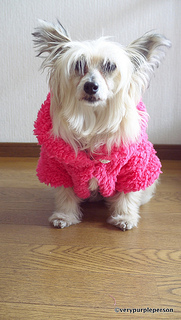
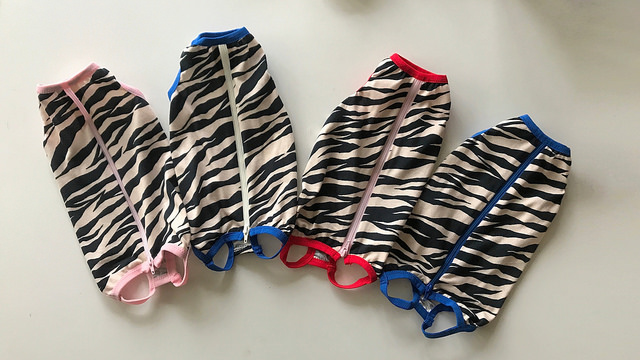
There are several request for the kitten’s post surgery clothes from the last post. Since I had to make more for the shelter, I documented the process for this tutorial.
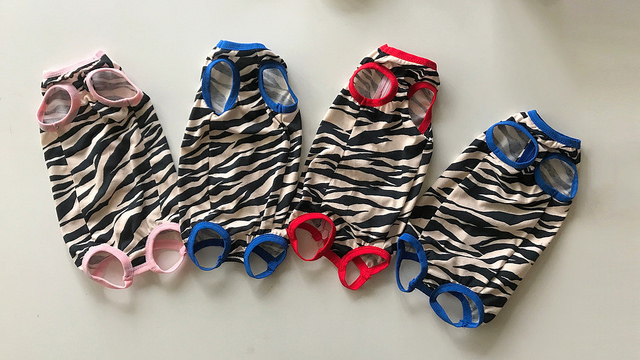
These clothes are meant for female kittens or puppies to wear after they have a surgery, usually spay surgery. For male kittens or puppies, the clothes usually have a ‘pee hole’ in the front part, but I didn’t have the chance to make one. The size is pretty small, the kittens that I made these clothes for weigh about 1.5-2 kg.
Disclaimer: For personal use only. Please do not pass off the pattern and tutorial as your own. Thank you!
APPROXIMATE DIMENSIONS:
- length from neckline to tailhole: 24 cm
- back width: 25 cm
MATERIALS:
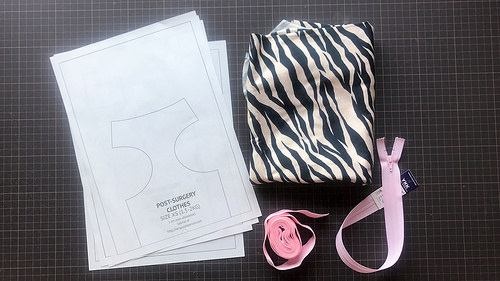
- Kitten’s post surgery clothes pattern (size XS – 1.5-2 kg). DOWNLOAD HERE (1 cm seam allowances are included)
- 0.4 m jersey fabric (you can make 2 from this amount)
- 1.2 m foldover elastic (FOE)
- 30 cm zipper
NOTES:
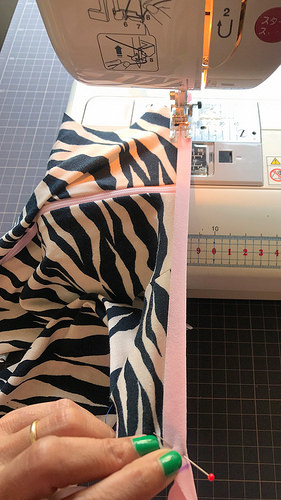
- Use straight stitch for attaching zipper.
- Usually we use zigzag stitch or overlocker for the shoulder and side seams of knit clothing. But this clothing is quite small so straight stitch can also be used.
- Use zigzag stitch for attaching FOE (my usual setting is width set on 3 and length set on 2).
- I like to use one step to stitch the FOE. Some people use two steps, in which the FOE in unfolded state is stitched to the wrong side of the fabric, then the FOE is folded to the right side and stitched for the second time.
- I suggest to make a muslin version first because sometimes the length can be a bit too short or too long depending on the breed.
Instructions:
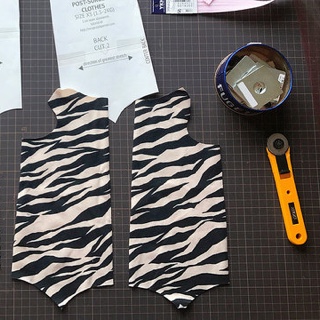
Cutting fabric:
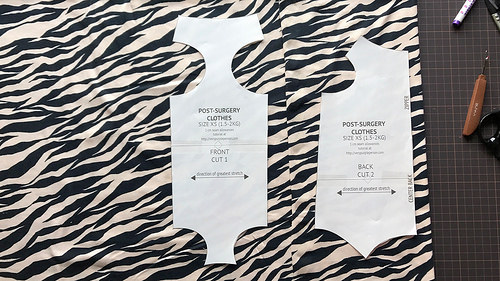
- Place pattern pieces on fabric, pay attention to the direction of greatest stretch.
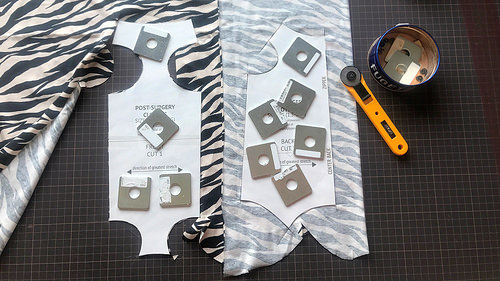
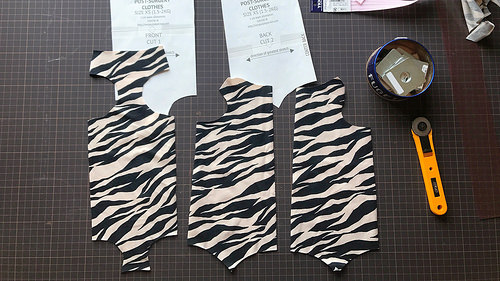
- Cut 1 front piece and 2 back pieces.
SEWING:
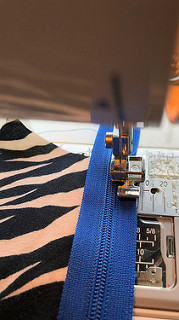
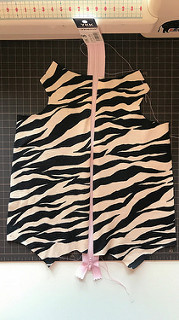
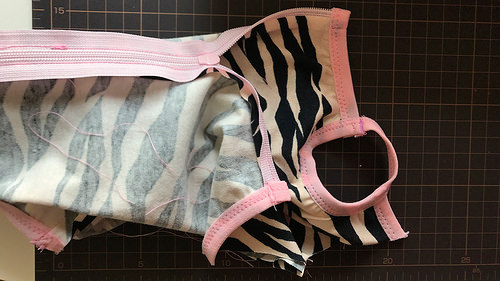
- Sew back pieces to each side of the zipper. Note that the head of the zipper is at the tailhole. You can use zipper foot to stitch.
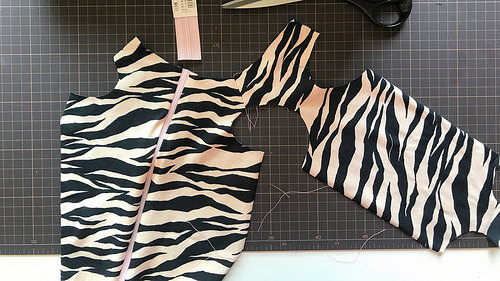
- Cut the end of zipper at the neckline, then stitch front piece to back piece at one of the shoulders with 1 cm seam allowance.
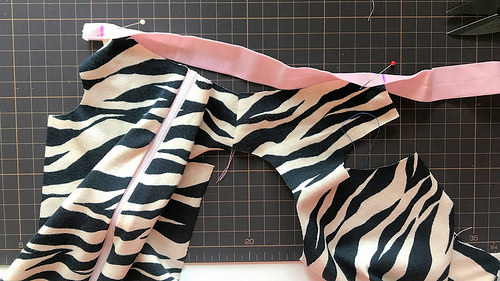
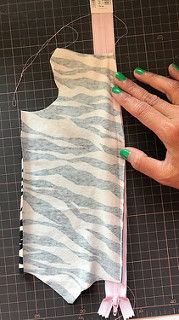
- Measure 19 cm on the FOE and mark with erasable marker. Pin each mark at the end of the shoulders.
- The FOE is shorter than the whole length of the neckline, and should be stretched while being stitched to the neckline. Remember to only stretch the FOE and not the fabric.
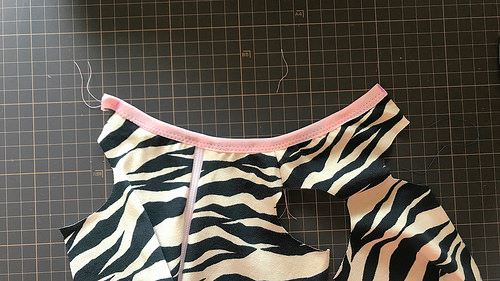
- The neckline is now finished with FOE.
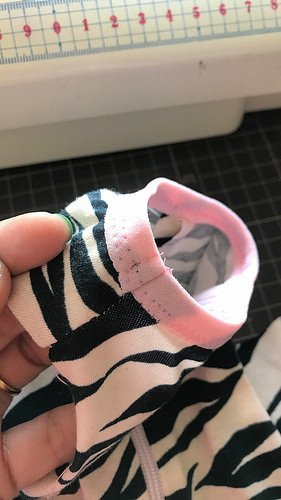
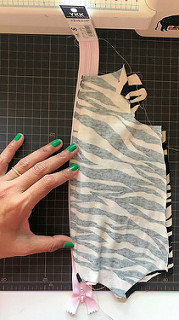
- Sew the other shoulder with 1 cm seam allowance. Direct the seam allowance to one side and topstitch to keep it down. I like to direct all seam allowances to the front side.
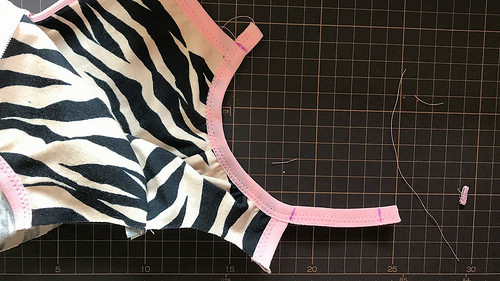
- Attach FOE to the armhole. Each armhole needs 18 cm of FOE. Use the same method as attaching FOE to the neckline above.
- Finish the tailhole end of the front piece with FOE. Stretch slightly while stitching the FOE.
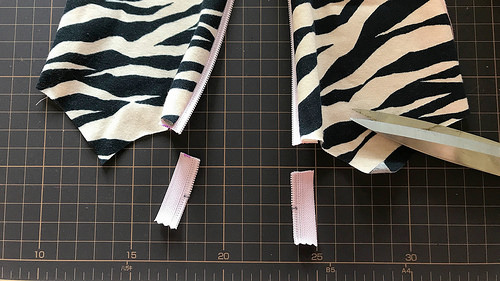
- Open the zipper, then cut each ends of the zipper. Remember to open the zipper first before cutting, otherwise you will have difficulty attaching the zipper head back!
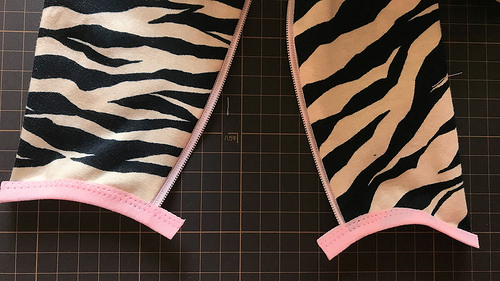
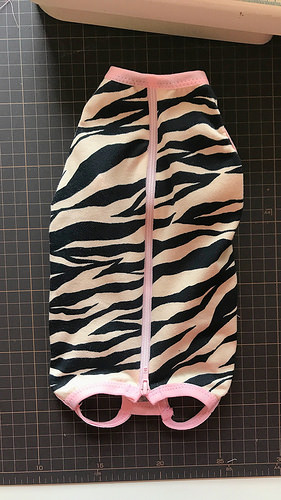
- Finish the tailhole of the back pieces with FOE. Stretch slightly while stitching. Leave some length at the center back.
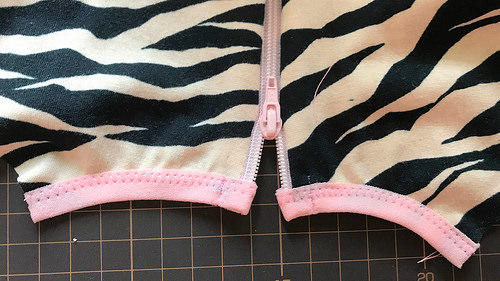
- Fold the end of the FOE and topstitch. Trim the rest of the FOE at the wrong side.

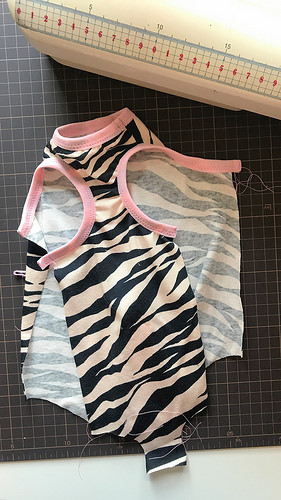
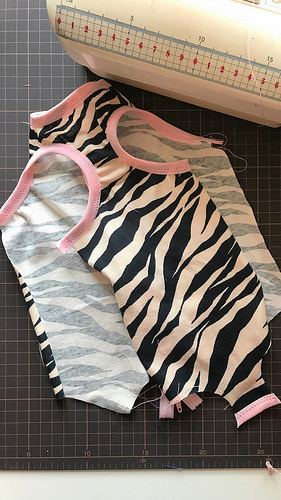
- Sew side seams with 1 cm seam allowance. Topstitch the end of FOE at the armholes.
- Mark 16 cm on the FOE, then mark 5 cm from the end. Attach the first 11 cm on the leg hole, leaving the 5 cm hanging. Remember to keep stretching the FOE while stitching the last 5 cm.
- Stitch the end of FOE together, creating a loop. Topstitch the end of FOE. Do the same to the other leg hole.
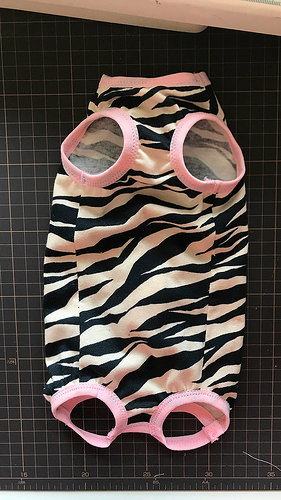
- You are finished!
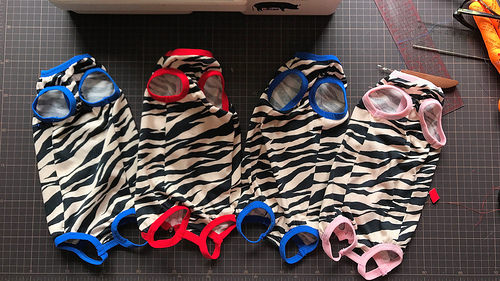
- Now make more because there’s always more kitties at the shelter!
I hope that the tutorial can be useful for you. Please adopt, don’t shop!