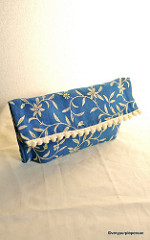
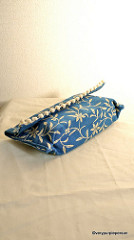
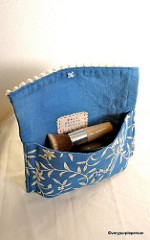
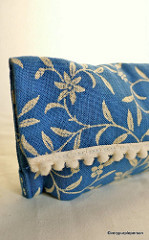
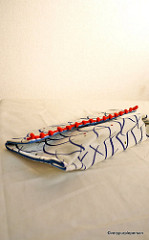
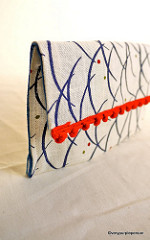
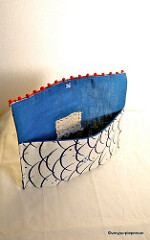
This is a makeup pouch that I use everyday. The outer fabric is blue Japanese cotton with pretty white floral pattern on it, and the lining is blue cotton.
But I didn’t sew the lining myself because this pouch was actually a rectangle placemat with lining already attached. I found a set of pretty placemats in a thrift store, still new and unused. Since I don’t have a dining table to put these placemats on, I turned them into soft pouches.
All I did was sewing the pompom trimming on one short side, fold the placemat, and then topstitching both sides to close it. There is a little tuck on the bottom edge so the pouch retain a nice shape when filled, but stay flat when empty. I use plastic snap-on buttons on the flap, I think they give a comfortable handmade feeling, if there’s such a term for it.
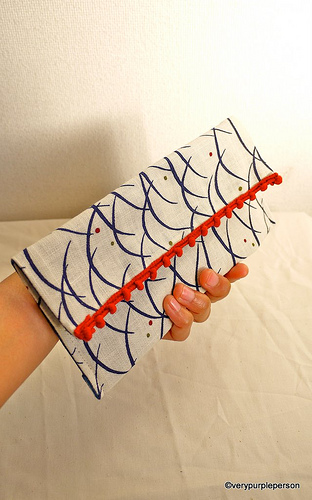
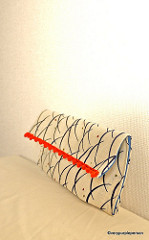
Actually I think this pouch is so simple it doesn’t need a written tutorial for making it. But since I love taking the step-by-step pictures, I compiled them into a PDF file that can be downloaded here. This is more of an idea than a tutorial, no exact measurements needed. For the tutorial, I used a white and blue placemat and red pompom trimming. I love pompom trimmings, they’re so cute! ^.^
Here’s some more ideas for the pouch:
- Use scrap of ribbons or lace instead of pompom trimmings.
- Using a bigger placemat, sew some frills and lace trimmings on the flap to make an underwear pouch.
- Instead of sewing the long sides closed, sew the short sides closed to make a long slim pouch. Use it for… errr, knitting needles?
- Make buttonhole on the flap and sew a vintage button instead of using snap-on buttons.
- Make a strap and insert it when sewing the sides to make a wristlet.
Click to download:
[wpdm_file id=3]
Have you made something from my tutorials? Join my flickr group to share!